Miscellaneous changelog May 21st 2023
- Fixed limit and offset params for the bundle installs API endpoint.
- Added a prompt in the User Dashboard’s account deletion mechanism to confirm that once deleted, no refunds can be processed.
Welcome to the changelog section of Freemius, here you'll find our weekly technical update notes. You can subscribe to all posts via Newsletter or follow us on Twitter to stay updated.
Following requests from our partners, we’ve updated the list of supported localhost and staging sites that come right out of the box from Freemius. We now also include the following providers:
You can read more about license utilization on staging/dev sites here.
We made some small but useful improvements to the new feature we rolled out last week: supporting localization in our checkout.
language will now serve as an alias to the locale parameter.https://checkout.freemius.com/...?language=fr as well as https://checkout.freemius.com/...?language=fr_FR.AWS announced a while back that TLS 1.2 will become the minimum requirement for all their API endpoints. We use AWS S3 to store assets like your product icons, store icons, screenshots etc. To ensure the smooth continuation of service, we audited our implementations and tested with a strict TLS 1.2 connection to the S3 API endpoints.
We have been serving asset URLs in protocol-relative formats, for example:
//s3-us-west-2.amazonaws.com/...
While this will continue to work in our own apps because we host our apps in a strict https environment, this can break image rendering if such links are used on a http page. To make the impact minimal, we will now be serving (both existing and new) all asset links with https URL format:
https://s3-us-west-2.amazonaws.com/...
So in case, you’ve been adding the protocol to the URL for your own use case, please remove them and expect a full https URLs from our API.
As part of our Marketing Automation, we send an email when a license is about to expire. To make it convenient for the user, we include special authorized links to quickly update or add a payment method if it was not there already. This comes in handy for partners who migrate customers from other platforms.
As an enhancement to the system, we’ve added a check to not include pricing for licenses that do not have any values set. This came as a request from one of our partners who recently migrated to Freemius.
Over the past few weeks, we’ve gradually been rolling out a new system to identify and block card testing attempts. We already had a system like this in place, but after a few recent attacks, we recognized it needed a complete overhaul to work more intelligently.
Our CTO, Dror Yaakov, has been leading the development of this system. To test its effectiveness, we ran it in “observation” mode over the past few weeks. After gathering enough data and proving its effectiveness, we’re finally letting it out at full capacity. Our hope is that it will better serve our partners to detect attacks and prevent financial losses.
While developing this system, we combined our collective years of experience to come up with the best possible strategies. We learned many things in the process.
An attacker is usually smart enough to rotate a large set of emails and IP addresses, among other things. Tracking just one or a few of them is usually not enough. We’ve found that the more redundant the system, the better it is at detecting such parameters.
While Google reCAPTCHA is no doubt an excellent tool to prevent automated submissions, we’ve found it can be bypassed, although this doesn’t come easy or cheap. Relying on reCAPTCHA alone as the ultimate security measure is almost never enough. It’s better to have a two-factor authentication system where real human intervention is always required.
A very sophisticated attack can fool even a very strong system. In such cases, having another redundant system to monitor traffic and spikes helps a lot with identifying such attacks.
The above are only a few of the strategies our new system implements. We hope it gives your users a better checkout experience. If you face any issues, please don’t hesitate to contact us at [email protected].
We’re super stoked to announce the immediate availability of localization in the Freemius Checkout App.
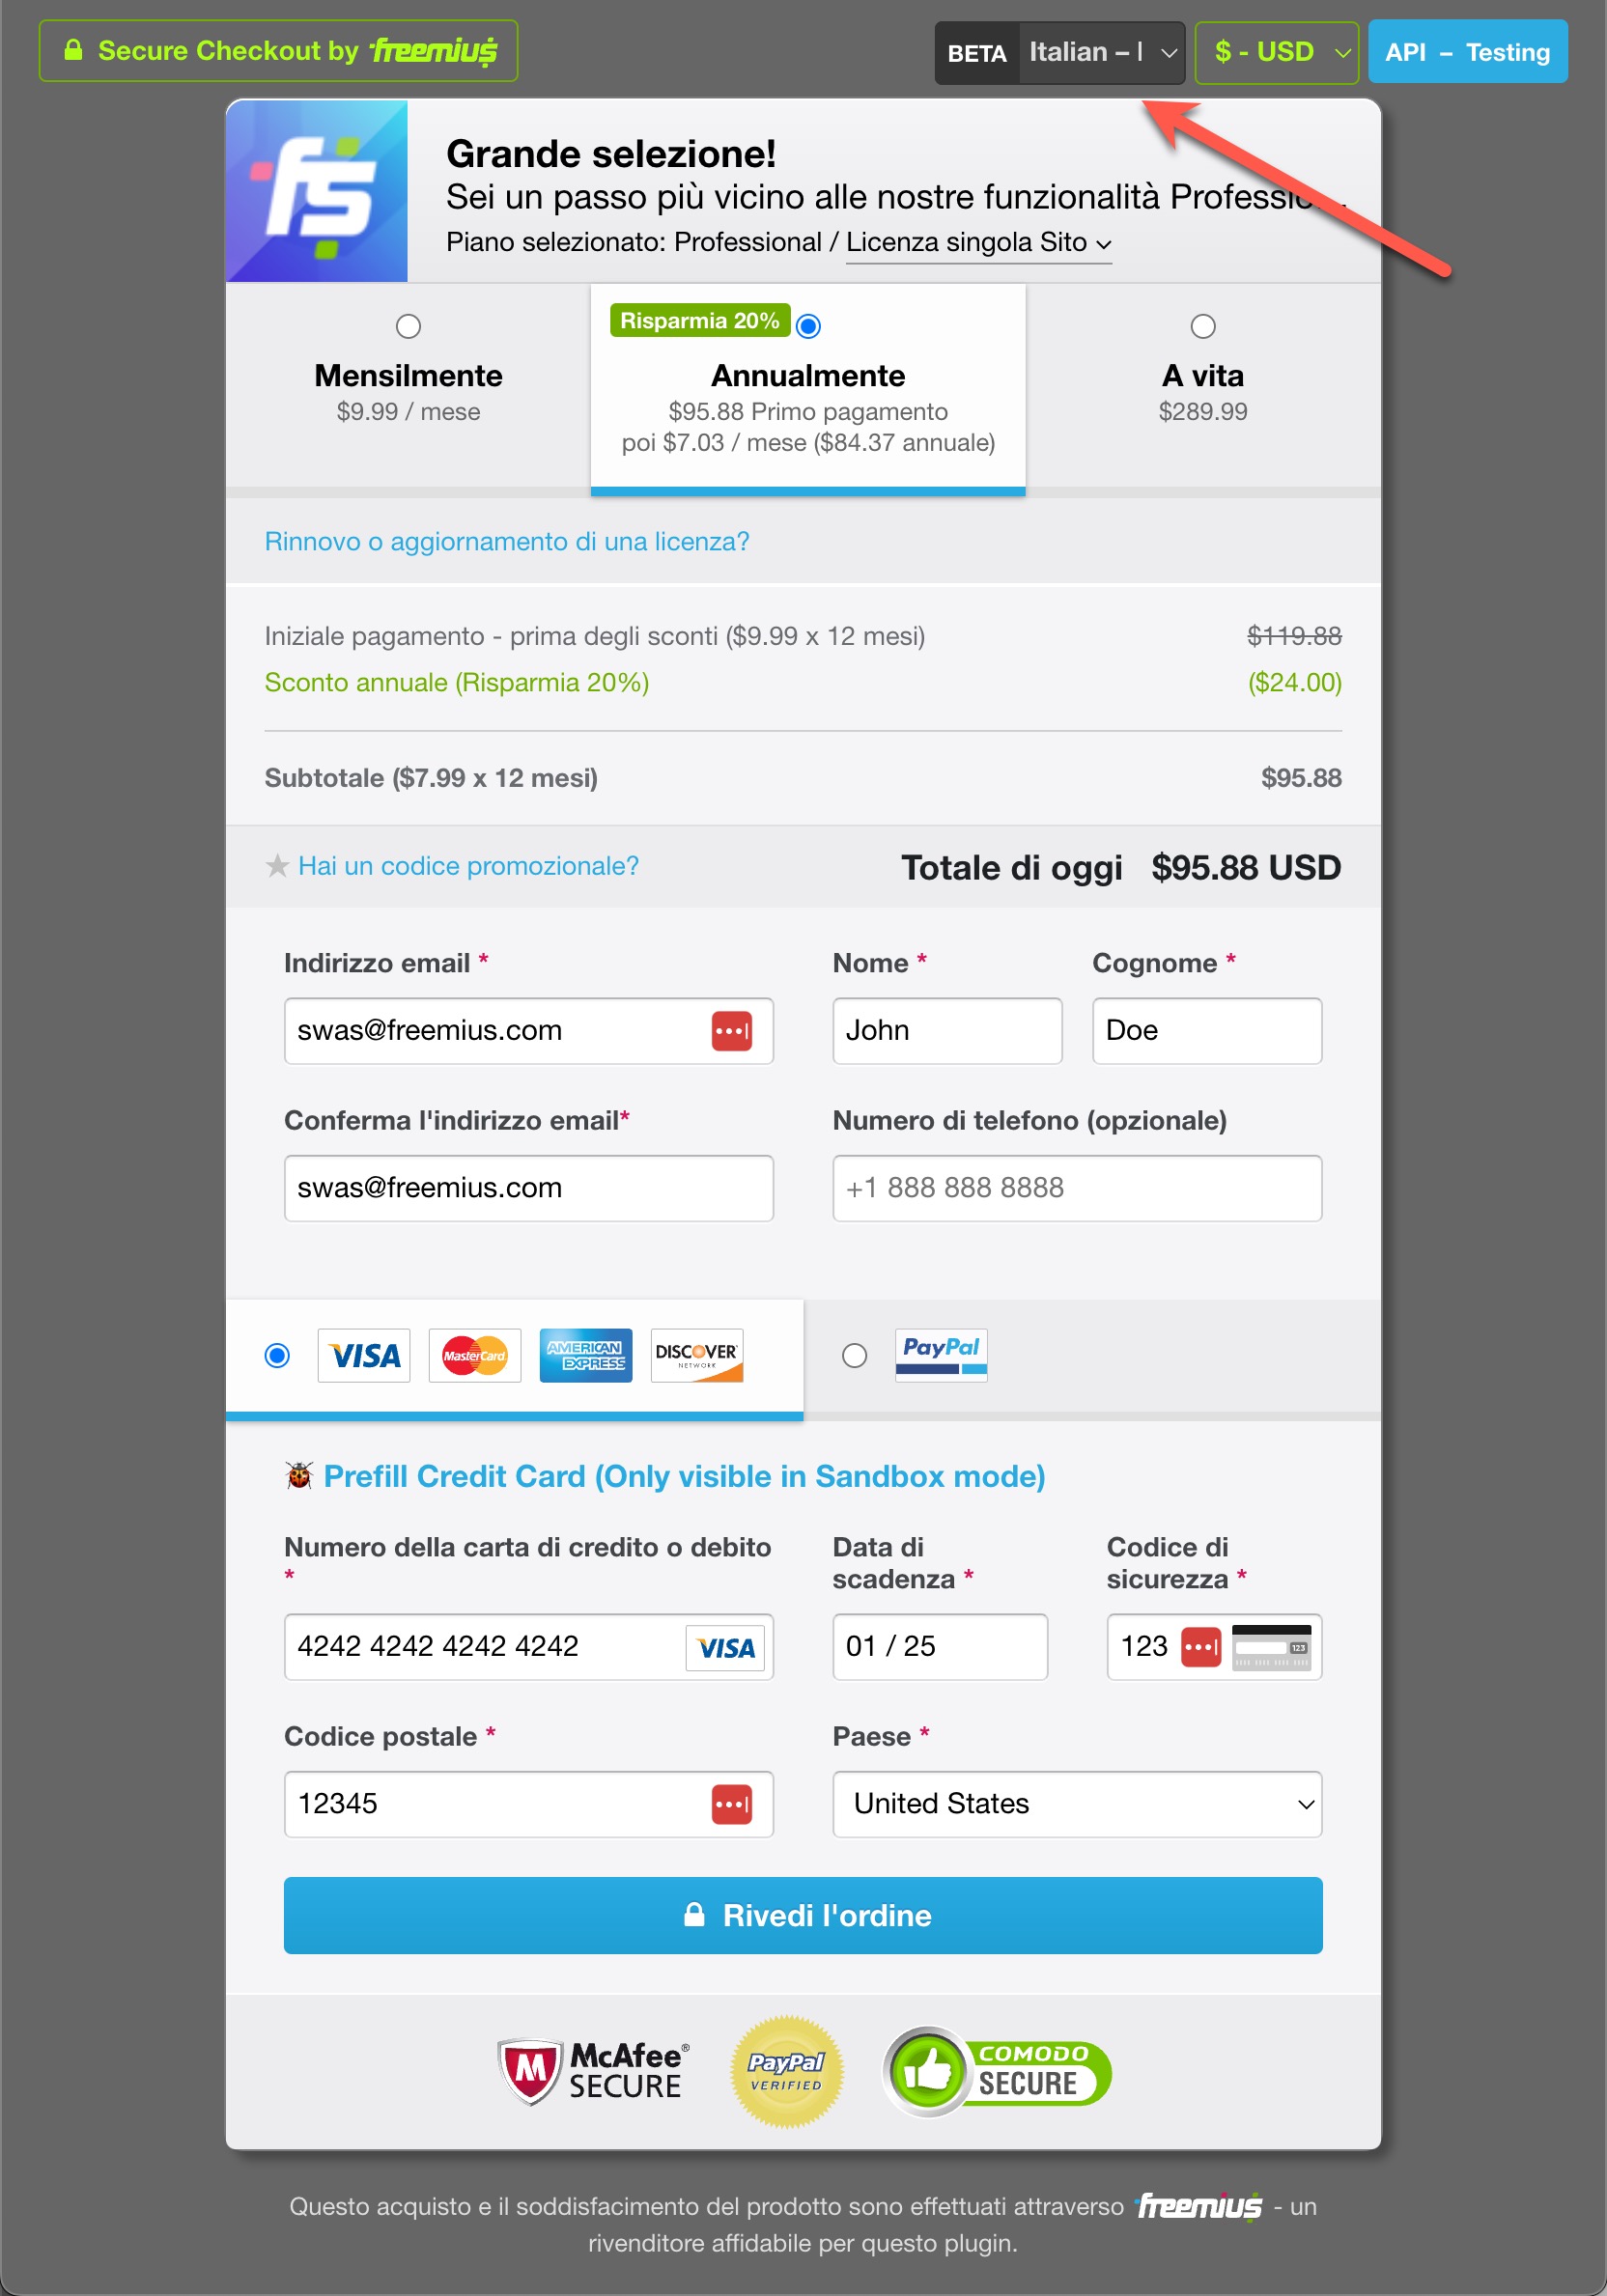
Besides English, the Freemius Checkout App can now be used in any supported localization. Our system is capable of handling any language, even selecting the exact locale of a language (for example, French spoken in Spain vs French spoken in Mexico).
Since this is a brand-new feature, the language selector UI is opt-in only for now. Please read on to find out more.
You can now pass a special URL Query Parameter locale to instruct the app to display a specific language when loading or linking the Freemius Checkout. For example, if the URL of the checkout is something like this:
https://checkout.freemius.com/mode/dialog/plugin/:plugin_id/plan/:plan_id/
You can now add the query parameter, which would result in this:
https://checkout.freemius.com/mode/dialog/plugin/:plugin_id/plan/:plan_id/?locale=es_ES
For the Freemius JavaScript SDK, you can simply pass a new parameter, either when configuring the handler or when opening the pop-up:
<script>
    var handler = FS.Checkout.configure({
        plugin_id:  "xxxx",
        plan_id:    "yyyy",
        public_key: "pk_xxxxxxxx",
        image:      "https://your-plugin-site.com/logo-100x100.png";,
        // Set the locale of the checkout pop-up
        locale:     "es_ES";
    });

    $("#purchase").on("click", function (e) {
        handler.open({
            name     : "My Awesome Plugin",
            licenses : $("#licenses").val(),
            // You can also override it here.
            locale   : "es_ES";
        });
        e.preventDefault();
    });
</script>
localeFor the time being, the locale supports the fully formatted language and country code. For example:
es_ES – Spanish / Spain.en_US – English / US.We have the following locales available for the time being.
en_US)de_DE)fr_FR)es_ES)it_IT)nl_NL)bn_IN)All of the translations are AI-generated and are currently marked as beta (more on this later). If you wish to improve it or add more languages, please send us an email at [email protected] and we can provide you with the source POT and PO files. Depending on requests, we might add more languages/locales in the future.
We also support a feature to automatically select the best language for your user, based on browser information and geolocation. To start using this feature, you can enter one of the following values in the new locale URL parameter.
auto: Will automatically select the best available language for the user. However, this won’t select languages that are marked as AI-translated or beta for the time being. If we identify a locale that we don’t support right now, we’ll keep showing the English language.auto-beta: Same as above, but will also select a language marked as beta. When a language marked as beta is selected, the UI will also show it (as in the screenshot above).Example:
https://checkout.freemius.com/mode/dialog/plugin/:plugin_id/plan/:plan_id/?locale=auto-beta
Since this is a new feature, it is currently opt-in only. You have to specifically pass the locale parameter either in the URL or through the JS API.
auto, yet the language (XX) is not visible in the Checkout AppIt’s possible that we haven’t translated the language applicable to the geolocation. If a user requires a different language, we’ll revert to English and still show the language selector UI. Please check the list above to see what languages are available.
user.billing.tax_id.updated. This event is logged when either the developer or the user changes the tax ID associated with the user’s billing. If you need to sync your own system with the changes in the tax ID of a user, you can hook into this event from the Developer Dashboard.Following user complaints, we’ve added a password visibility button in the User Dashboard’s ‘login’ form and the ‘change password’ form.
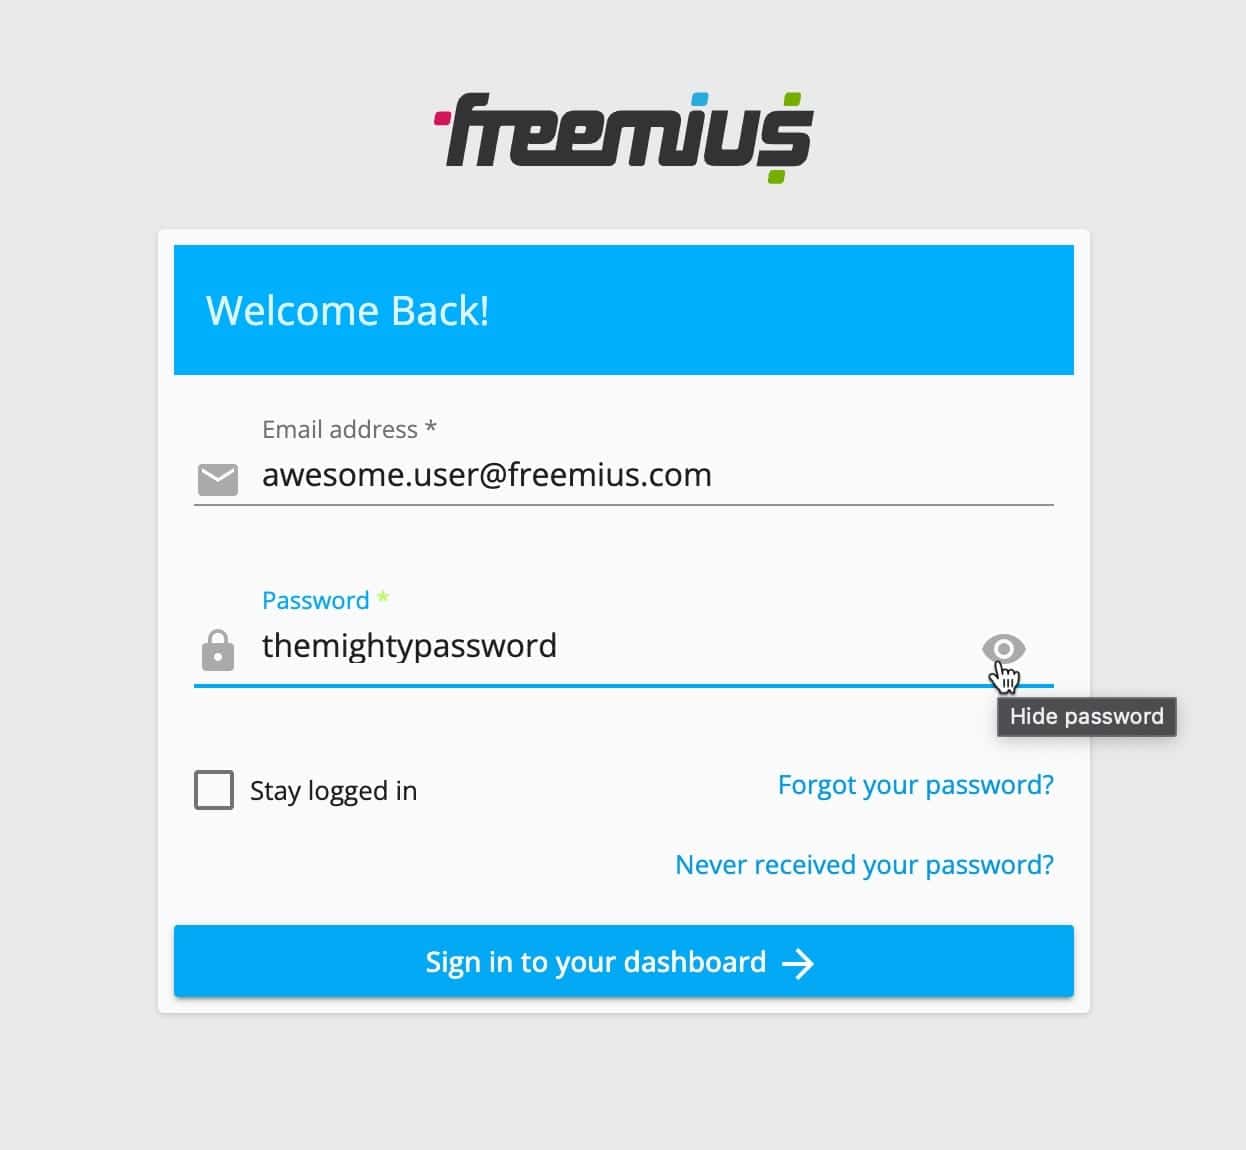
This helps our users determine if the password is correct when trying to log in.
As part of our internal housekeeping effort to pay the tech debt we accumulated over the years, we’ve been hard at work to upgrade all dependencies in the Developer Dashboard app. We’re glad to announce it’s been accomplished. The app is now a little faster and contains less JavaScript (talk about dropping support of IE 8 from old dependencies 😅).
During the process, we also realized we weren’t properly utilizing the file upload mechanism in various places. We made significant improvements in that area too.
…from places where you can upload image files, for example:
They now support drag-and-drop for better UX. Also, when selecting a file from the Upload button, it will filter out unsupported files.
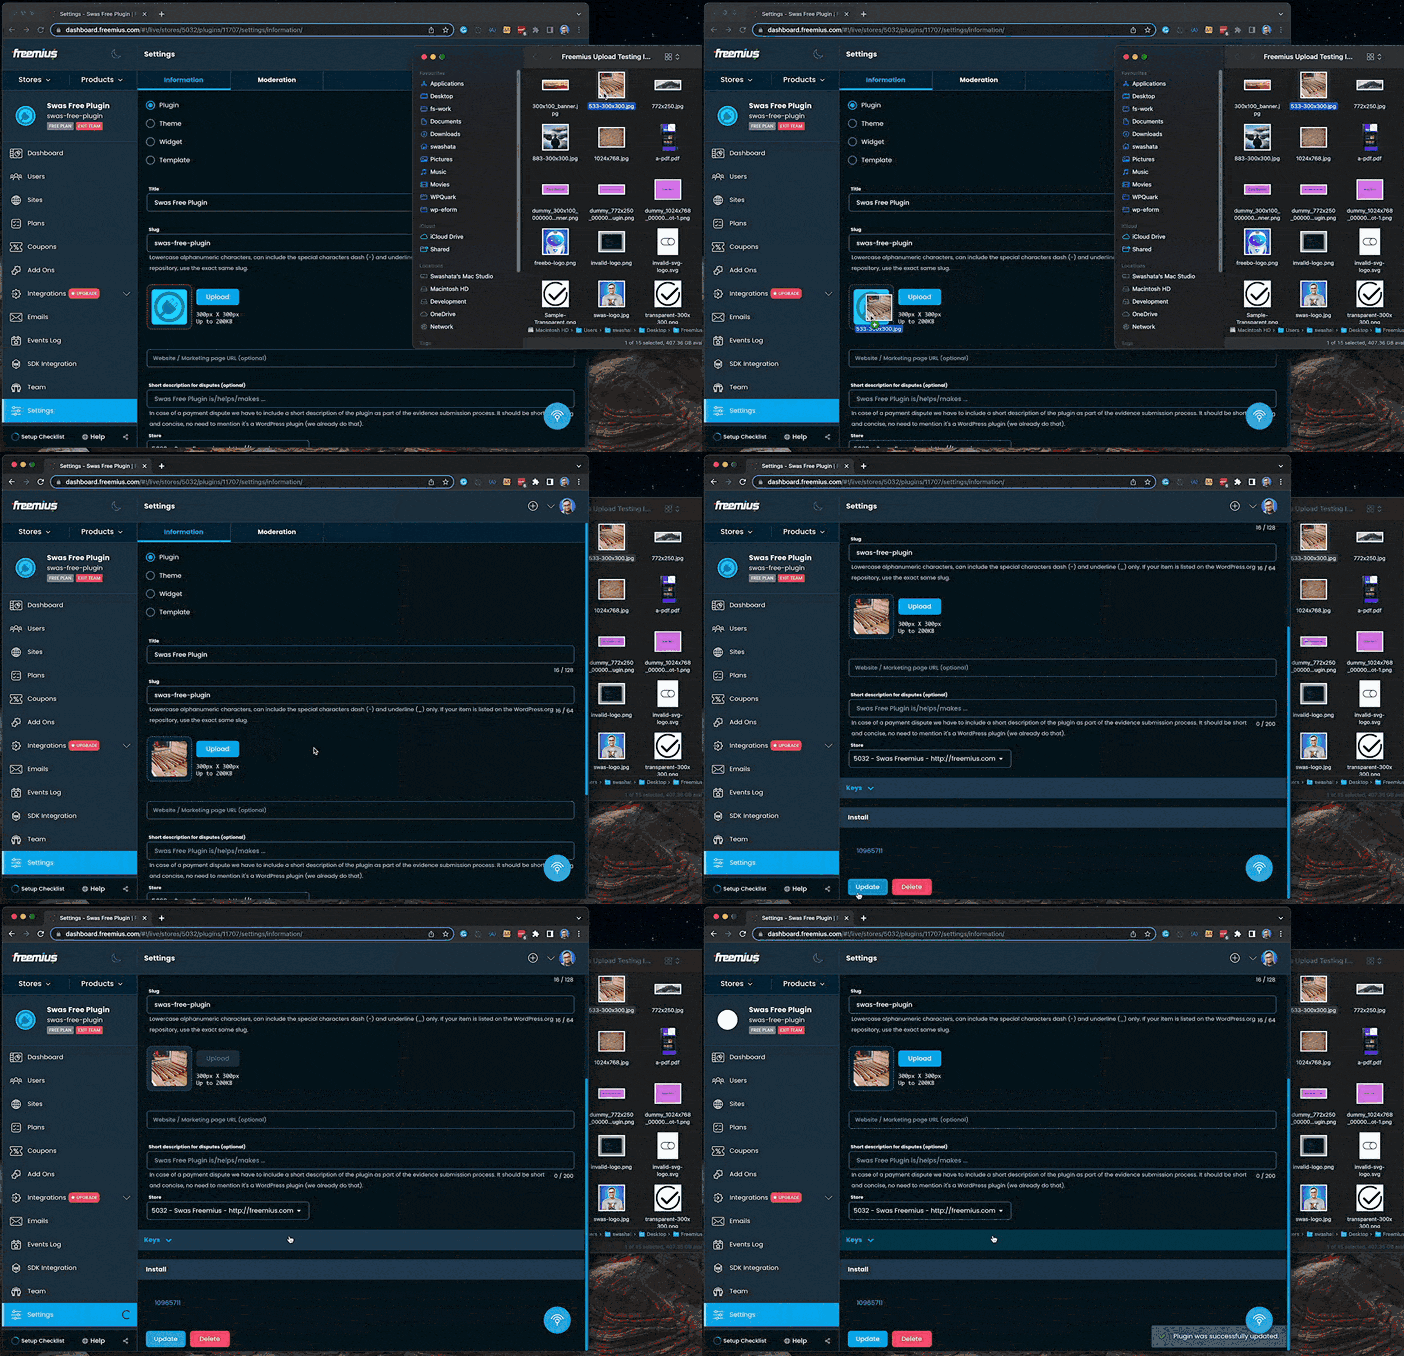
If you go to Settings on add-on pages, you’ll see we’ve improved the UI for uploading:

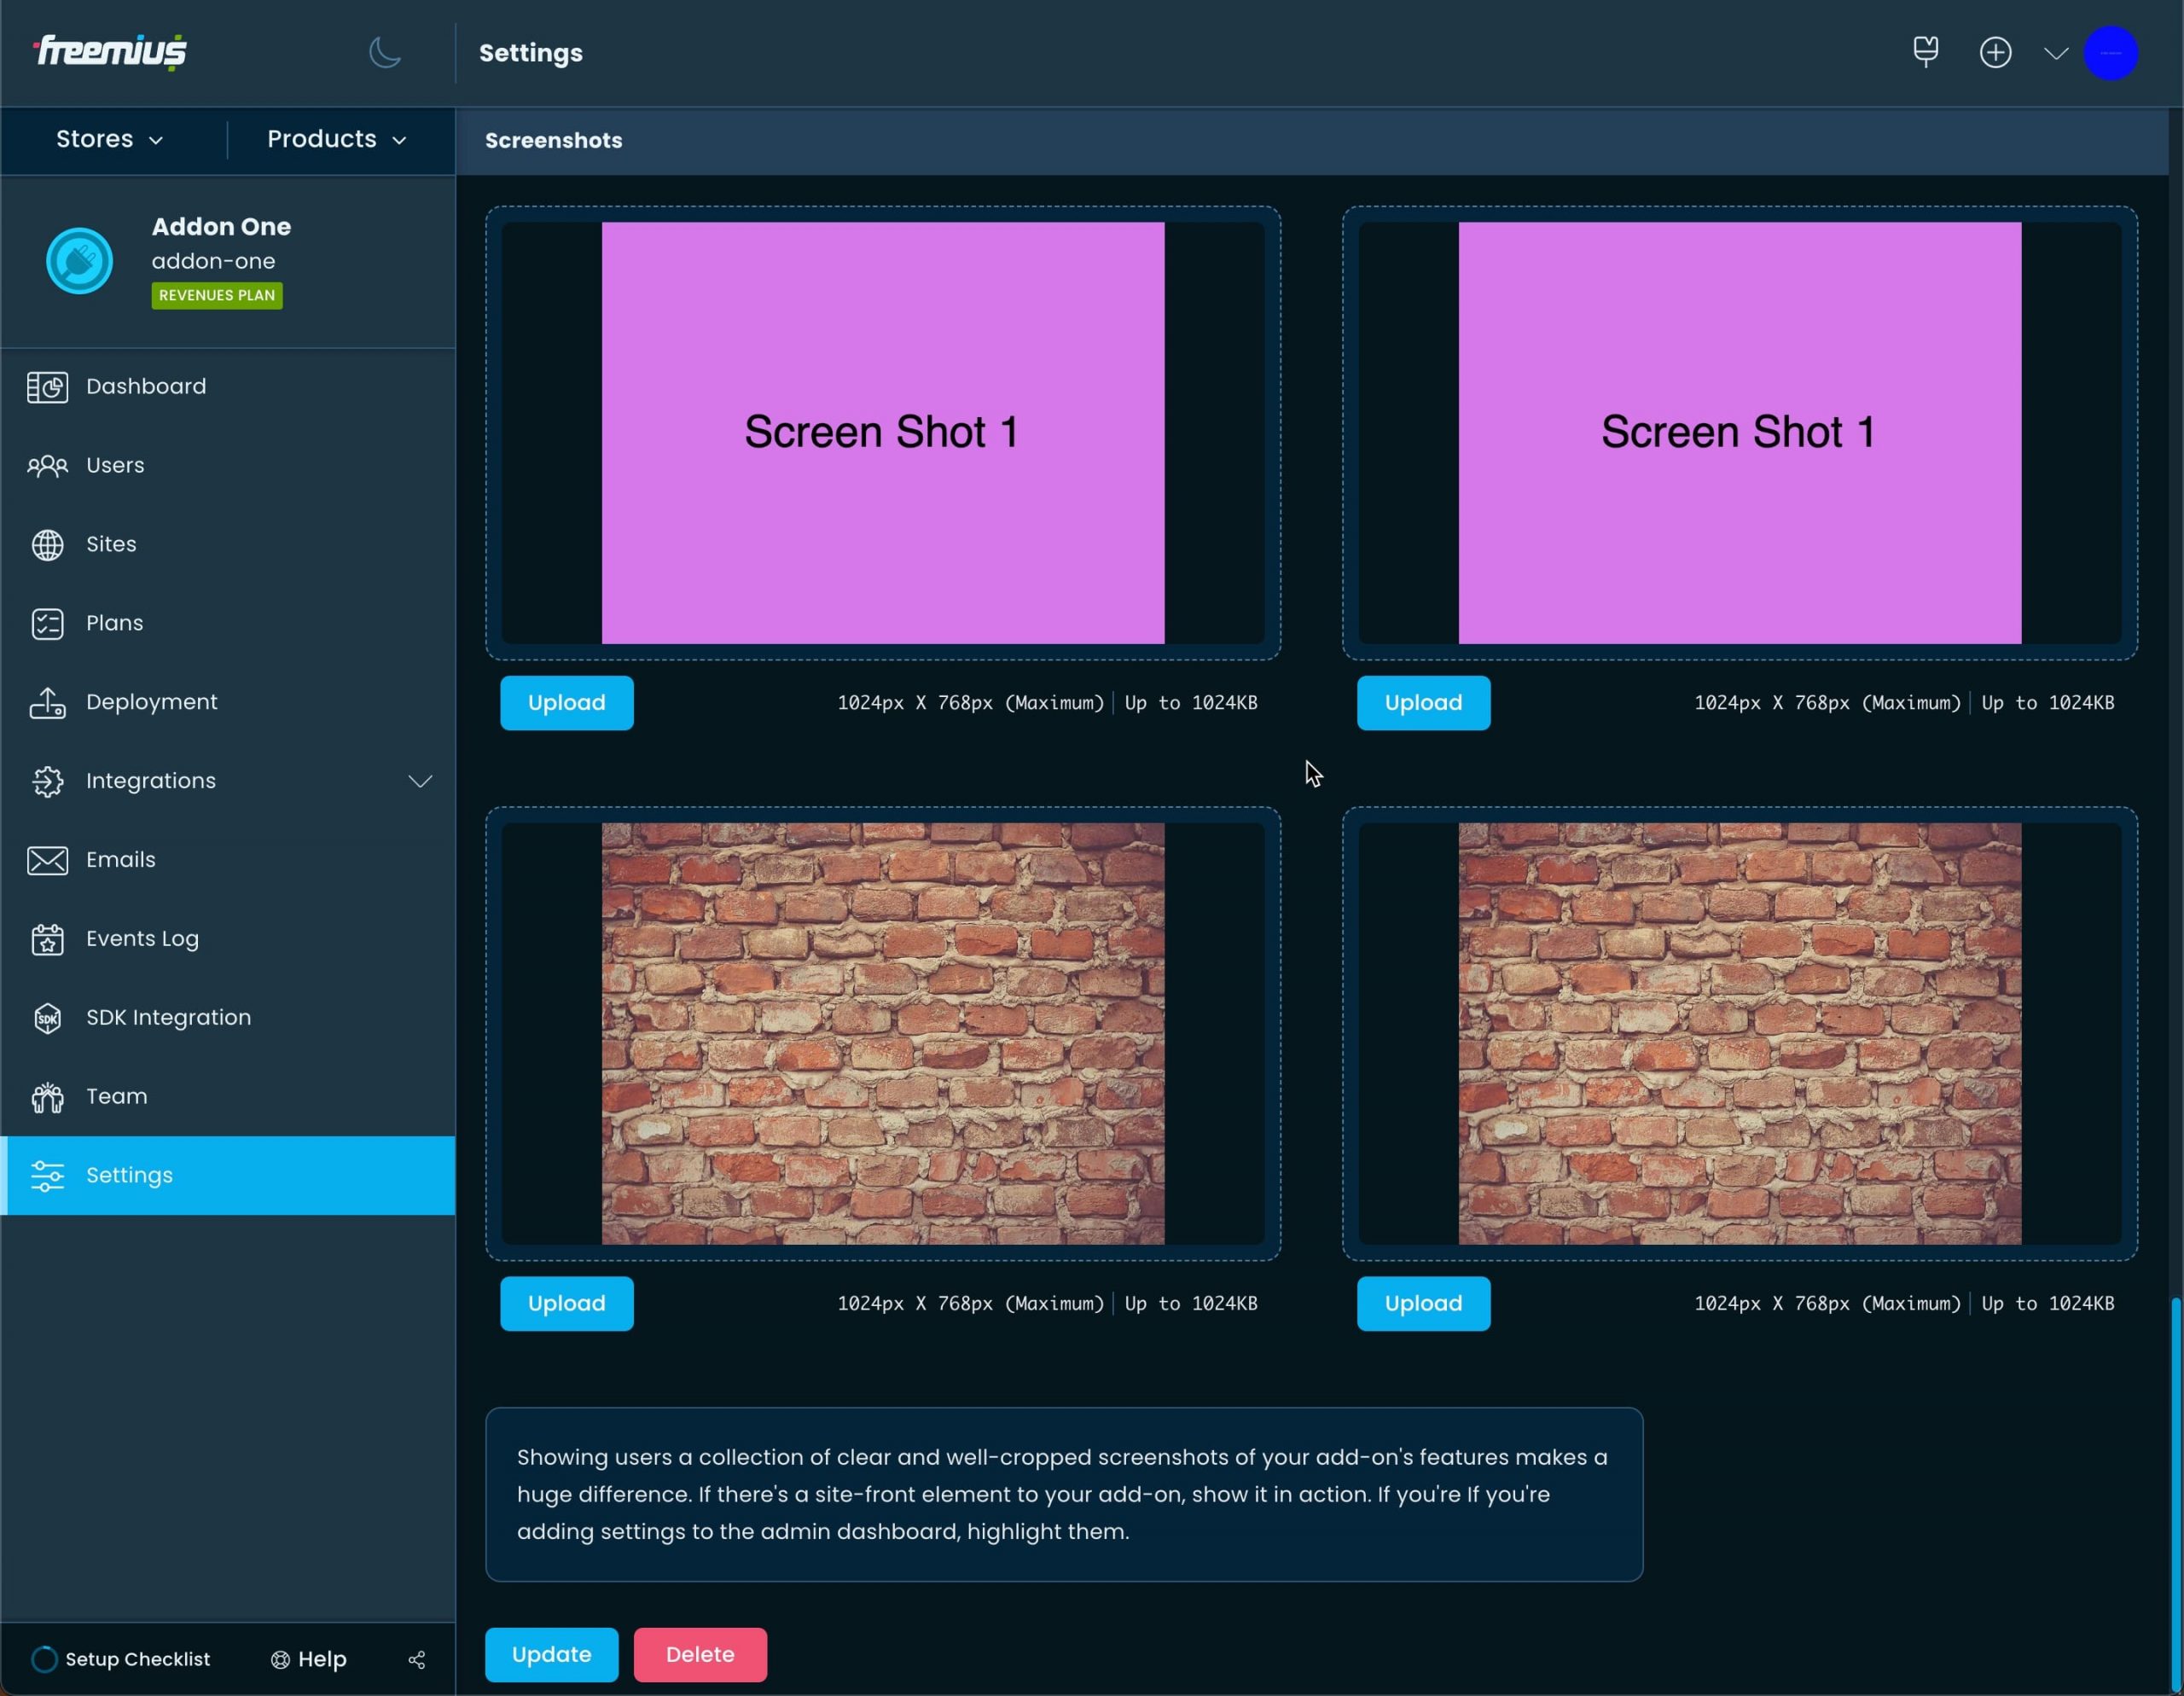
They still support drag-and-drop and feature a nifty file selector.
The new Multi-store Dashboard would sometimes give prompts related to permissions when developers or support staff were logging in.
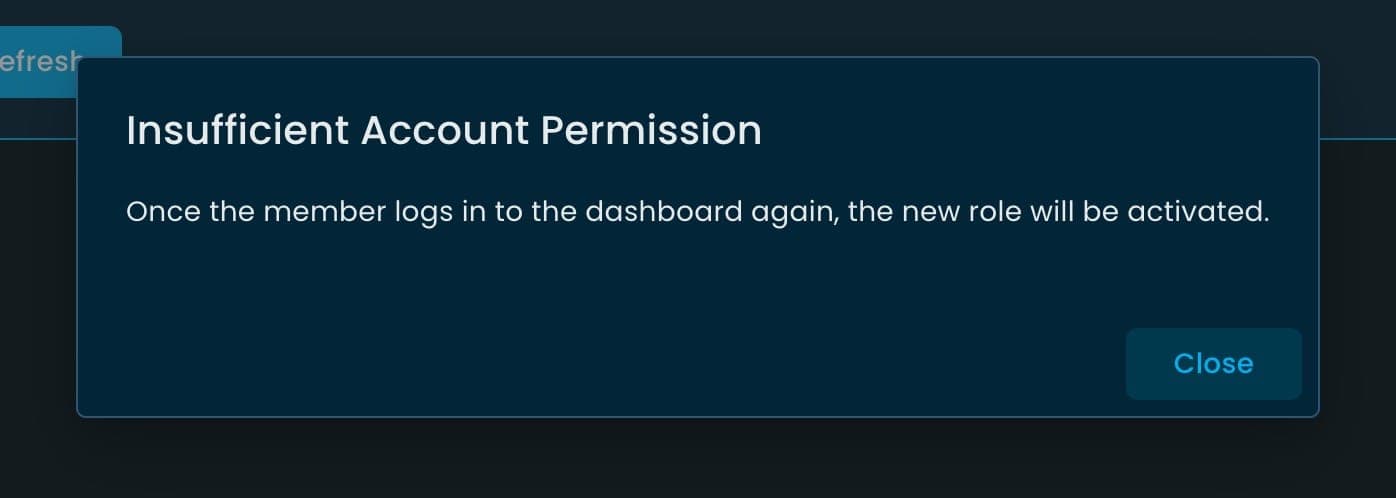
We’ve fixed this regression, improved which pages are rendered for team members, and enhanced navigation to relevant pages when switching between products.
Our MailChimp integration was not working properly for the Multi-store Developer Dashboard. If your MailChimp list had groups, they weren’t being shown in the UI.
Thank you to our partners who made us aware of this issue. We’ve pushed a fix to mitigate it.
For historical reasons, we didn’t reveal the download link and license key in our checkout form. The assumption was that anyone with access to the email address would have access to the license key and the download link. By not revealing them during checkout, we automatically verified the email. This also reduces fraud.
While this works for WordPress plugins and themes, it can add an unnecessary step for static products like widgets and templates. Customers usually want to download them right away and they don’t need the license key to activate them.
Following requests from our partners, we’ve started showing download links for all static products right after the checkout.
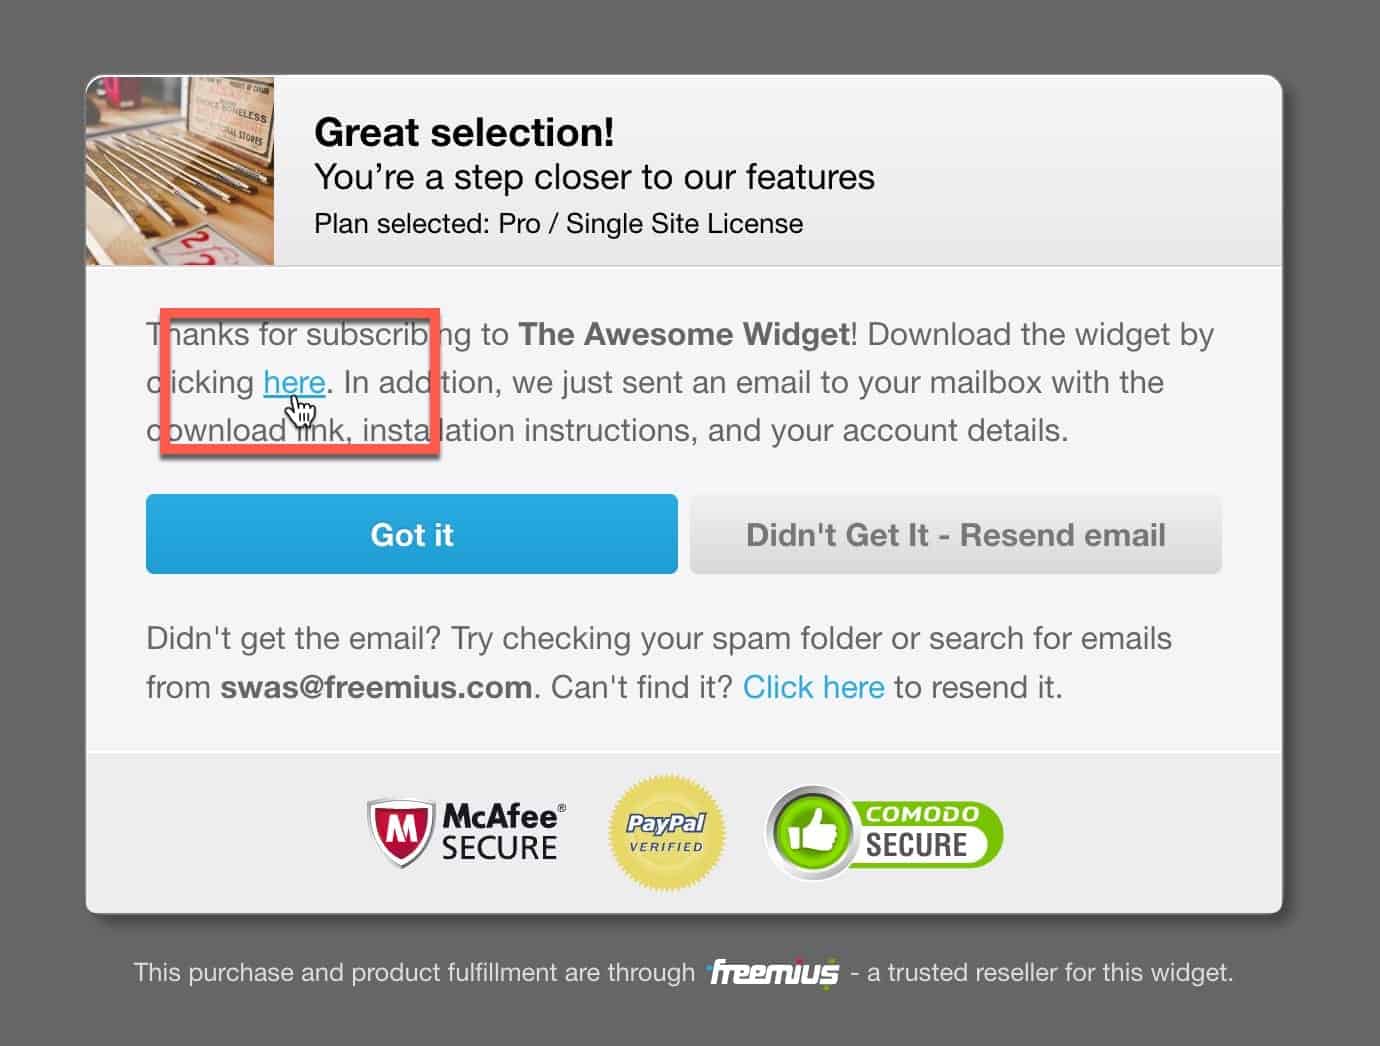
We still don’t reveal the license key. If we see more requests related to this feature, we will add support in our Developer Dashboard, where our partners can choose if they want to reveal the download link and – possibly – the license key right after the checkout.
This week, we’re releasing some minor updates to the new security layer we’ve been working on. This system is there to protect us and our partners from ever-increasing card testing attacks.
The new system is still running under observation mode. It’s already providing us with plenty of valuable information and we’re growing confident about its robustness. We hope to bring it out of observation mode soon and put it into production.
This week, we’re releasing some updates to the Freemius backend and API. They are:
Please stay tuned – we’re preparing for some big changes in the Checkout App (no teasers at the moment 😄)
This week, we’re rolling out a new security layer that our CTO Dror Yaakov has been working on. It will prevent card testing attacks more accurately while letting legitimate purchases pass through.
We’re doing this in a phased manner to avoid surprises and to thoroughly test the system. Only a small percentage of requests will run through the new layer. Once we have enough data, we will let the system handle more requests, eventually replacing the existing one.