Embed the Freemius Customer Portal into your website
You can provide your customers with easy access to their accounts by either adding a direct link to the Customer Portal on your website or embedding it directly into your site.
Adding a Link on Your Store
If you have a website, we recommend adding a direct link to the portal to make it easier for your customers to access their account. The Customer Portal URL takes the structure below:
https://customers.freemius.com/store/<storeID>
Where <storeID> is your unique store identifier. Here are the steps to find your Store ID in the Store's settings.
Embedding the Customer Portal in Your Store
Alternatively, you can embed the portal directly on your site. The customer portal has been designed to work for this exact use case, keeping users on your store and making the portal feel native to your site.
Find Store ID & Public Key
You will need your store ID and public key to embed the portal.
- Log into your Freemius Developer dashboard.
- Navigate to your store by clicking Stores in the top-left panel under the Freemius logo.
- Select your store by name.
- Scroll down the menu and select the Settings page.
- Under the API & Keys sub-page, you will find your store ID and public key.
Embedding Into a WordPress Website
- Install and activate Freemius Customer Portal WordPress Plugin.
- Create a new page on your website. We recommend using one of the following slugs:
users,account,members. Save the page's link to be used in step 4. - In your Freemius Developer account, navigate to your store by clicking Stores in the top-left panel under the Freemius logo.
- Select your store by name.
- Scroll down the menu and select the Settings page.
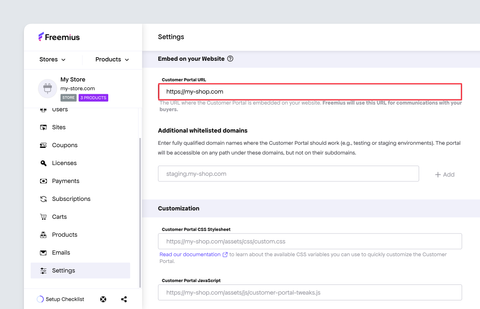
- Under the Customer Portal sub-page, scroll to the Embed on your Website section.
- In the Customer Portal URL setting field, paste the URL address of the page created (in step 2). Make sure the protocol (HTTP or HTTPS) is accurate, otherwise, the portal will not load.
- Add this shortcode to the page you created:
[fs_members store_id="<storeID>" public_key="<storePublicKey>" position="fixed" left="0" right="0" top="<headerHeight>px" bottom="0"] - Replace the following placeholders in the shortcode with your information that we obtained in the previous steps:
<storeID>- with your store ID.<storePublicKey>- with your store's public key.<headerHeight>- with your site's header height.
If your site’s header height is responsive, you can customize the dashboard’s position with media queries by styling the iframe’s <div id="fs_dashboard_container"> container as follows:
#fs_dashboard_container {
   top: {headerDesktopHeight}px;
}

@media screen and(max-width: 600px) {
   #fs_dashboard_container {
      top: {headerMobileHeight}px;
   }
}
Disabling Redirect to WordPress Login Page
Users might be redirected to the default WordPress login page when they log out of the embedded Customer Portal. To disable this behavior, add the following code snippet to the bottom of your active theme's functions.php file:
function my_fs_members_dashboard_config( $config ) {
    $config = str_replace( 'window.location.href', '// window.location.href', $config );
    return $config;
}

add_filter( 'fs_members_dashboard', 'my_fs_members_dashboard_config' );
Support For Multiple Domains
For security purposes, the portal will not load unless it is embedded on the domain specified in the Freemius Developer Dashboard.
However, there are cases where you may want to allow the portal to be embedded on multiple domains, for example, if you have a staging environment or a local development environment.
To set up, follow these steps:
- Log into your Freemius Developer dashboard.
- Navigate to your store by clicking Stores in the top-left panel under the Freemius logo.
- Select your store by name.
- Scroll down the menu and select the Settings page.
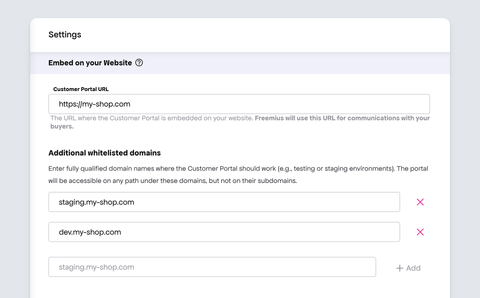
- Under the Customer Portal sub-page, scroll to the Embed on your Website section.
- Add your additional domains in the Additional Whitelisted Domains configuration.
- Click the Add button to save the additional domain.
Customizing the Customer Portal Appearance
For the Customer Portal to match your website and brand look, find up-to-date instructions on customizing the Customer Portal appearance with CSS.