|
|
What if you could fully monetize your SaaS in just half an hour?
That’s exactly what Swashata Ghosh, VP of Engineering at Freemius, set out to prove in this live coding webinar.
Using a lean Next.js stack, powered with the Freemius JavaScript SDK and React Starter Kit, Swas took an AI chat app and turned it into a fully monetized SaaS. The result? End-to-end billing, a paywall, checkout, and credit top-ups, all wired up in real-time.
This recap walks you through the tech choices, major milestones, and core architecture decisions while showing how Freemius handles the operational heavy lifting so you can focus on building fast and shipping faster.
The insights in this recap are just scratching the surface. For the full coding experience:
Step 1: Choose the Right Stack and Don’t Overthink It
Swas opened the session with a truth that too many developers forget:
“Makers often fall into “analysis paralysis”, where they’ll spend days comparing stacks instead of shipping. When it comes to building your SaaS, the best tech is what you’re familiar with. Your familiarity and speed matter more than chasing the latest trend.”
In other words, your tech stack isn’t your product — shipping is. As a solo founder, the fastest way to validate and monetize is to build in what you already know.
That said, if you’re starting from scratch, Swas recommends using JavaScript and Next.js. A powerful combo that offers full-stack capabilities and a thriving ecosystem.
Here’s the stack he used in the demo:
- Framework: Next.js
- Authentication: Better-Auth — fast, full-featured user auth and session management
- Database: PostgreSQL with Prisma ORM
- UI and design: shadcn/ui + Tailwind v4
Together, this modern, modular stack gave Swas the speed to ship fast under pressure without locking himself into a rigid system.
Solopreneurs can’t afford to waste time integrating tools manually. Starter kits like Next.js SaaS Boilerplates already include the building blocks you need — user auth, session management, and database layers — so you start iterating on your actual product instead of the plumbing.
To help you hit the ground running, Swas also recommends:
- Using the official Next.js SaaS Starter Kit to scaffold your app (user auth, sessions, DB included)
- Using Nextra to instantly spin up your marketing site and docs
- Avoiding premature optimization — launch first, perfect later
This stack isn’t just lean — it’s designed to help indie founders go from idea to monetized SaaS in days, not months.
Step 2: Set Up Subscriptions and Credit Top-Ups in Freemius
Before writing any monetization code, Swas configured the entire business model in the Freemius Developer Dashboard. This let him move fast once development started.
By defining plans and pricing inside Freemius first, Swas effectively separated business logic from application logic. “Once your pricing model is clear, setting it up in Freemius is just a few clicks away.”
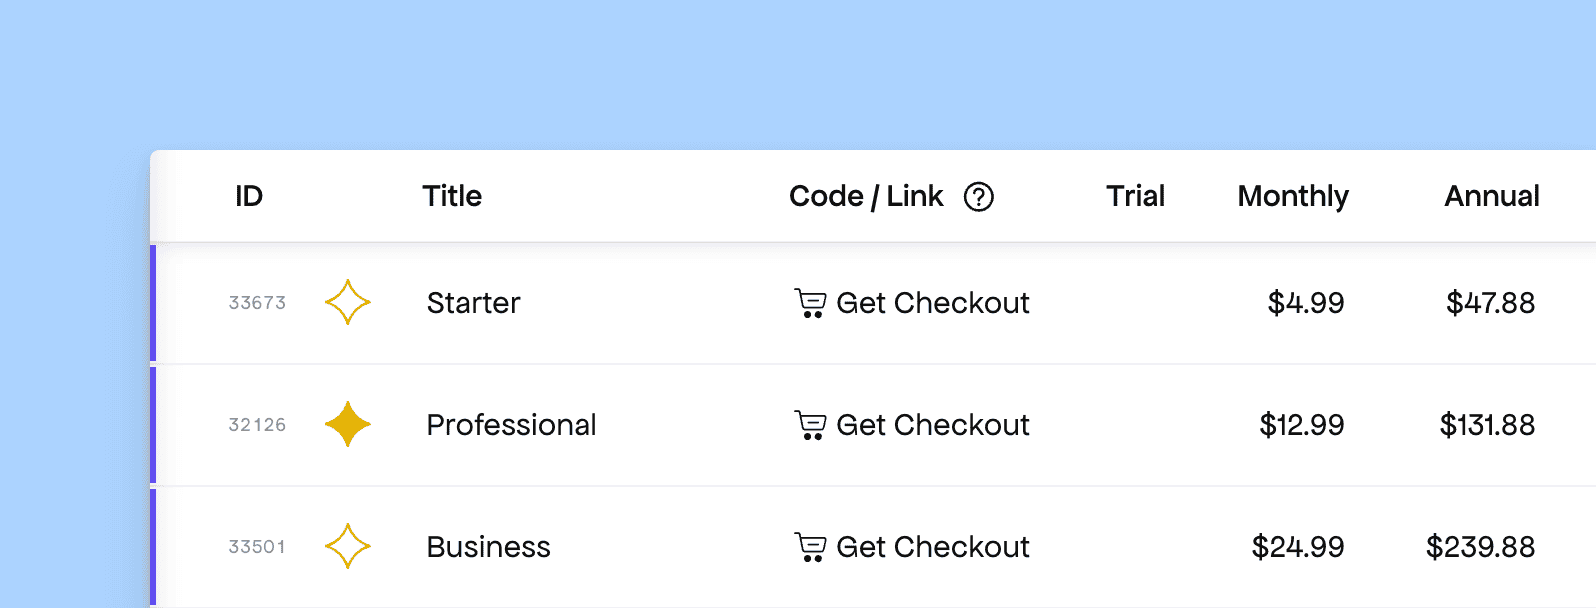
Here’s how he structured his SaaS product’s pricing:
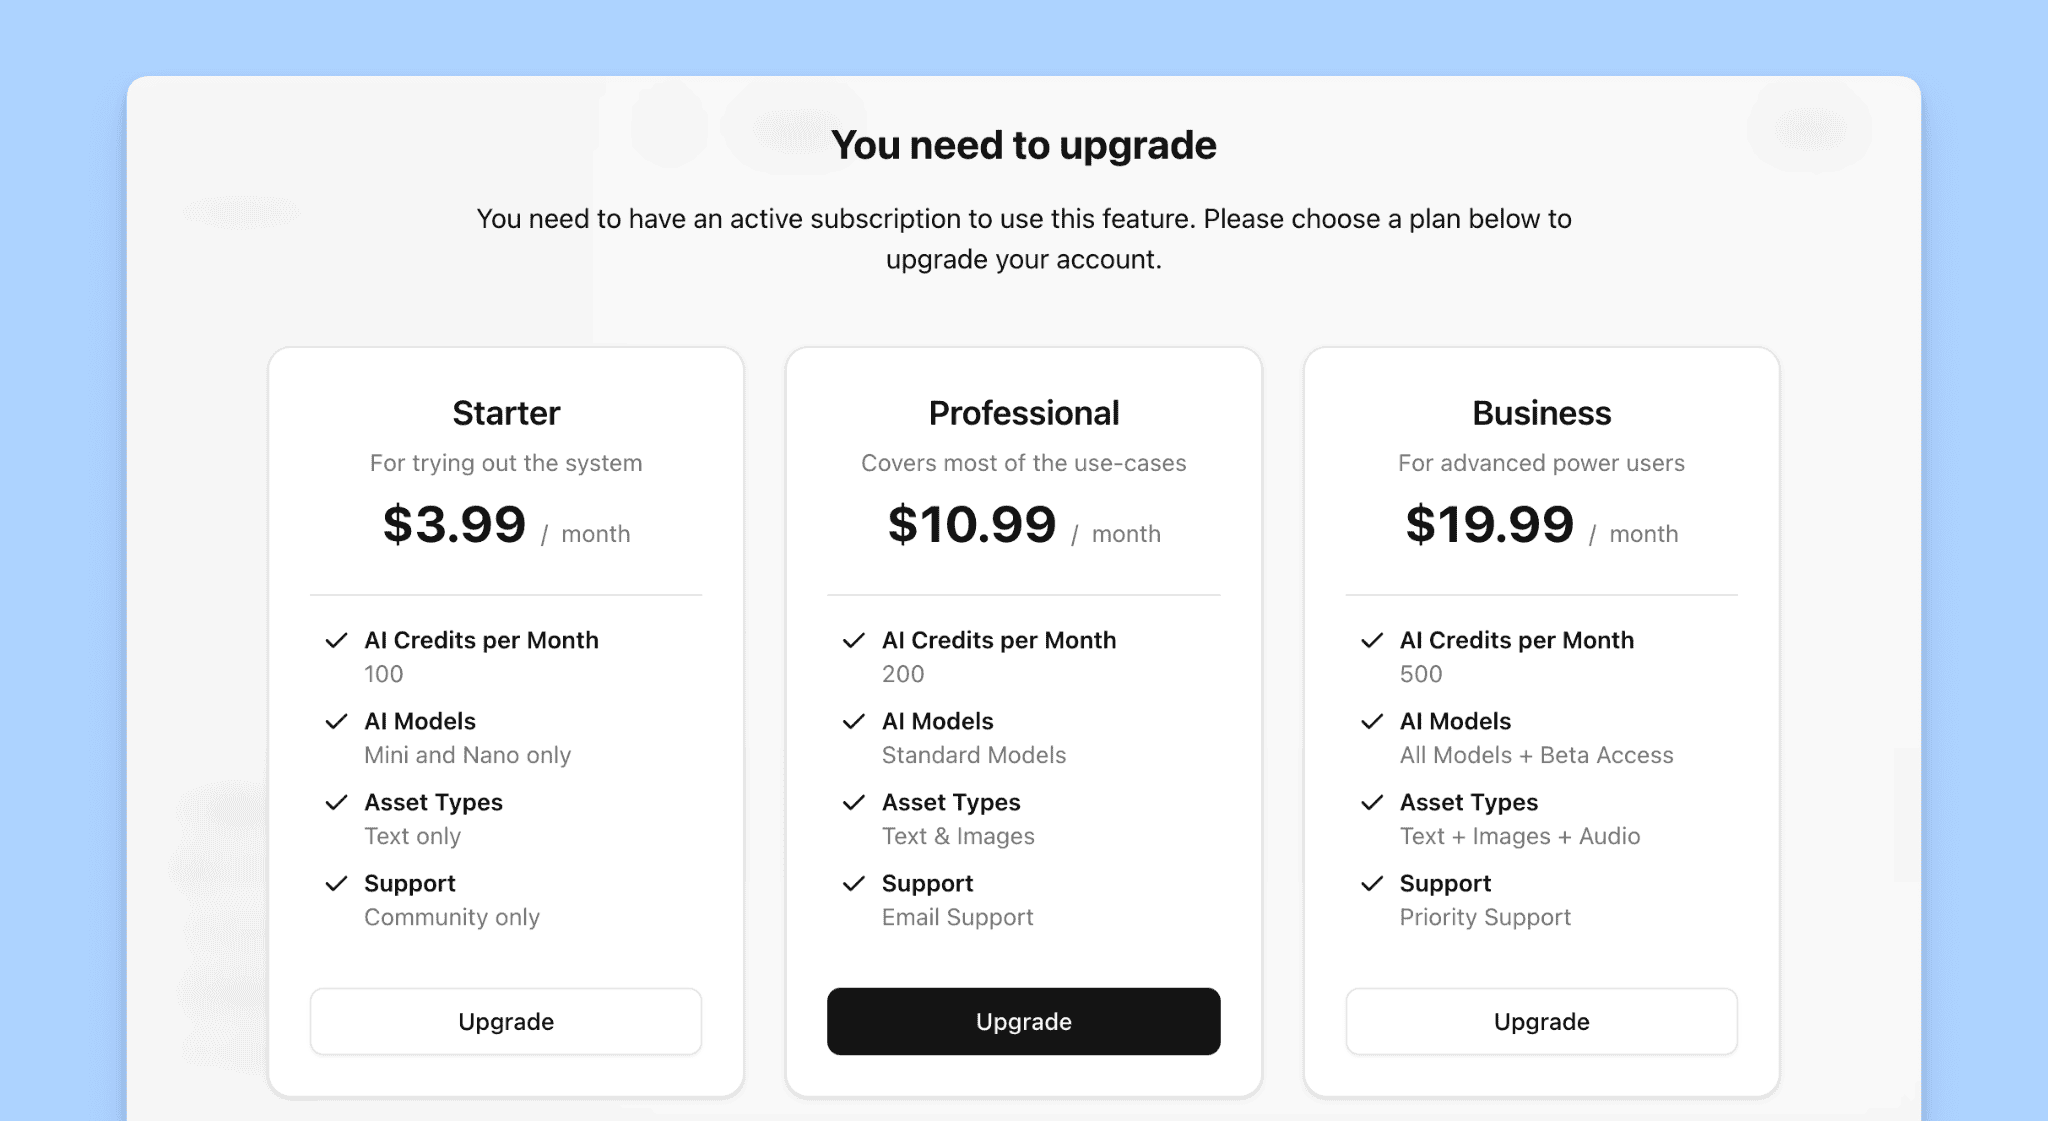
Subscriptions for access and monthly credits
- Three plans: Starter, Professional, Business
- Each plan’s feature list was clearly displayed, so customers knew what they were paying for. This transparency not only reduces confusion but also makes upgrades feel natural when usage scales.
- Each plan included a monthly credit allowance (e.g. 500 credits for Business)
- Flexible billing: Monthly and annual pricing (e.g. $24.99/mo or $239.88/year)
- Custom features: Visible to users during checkout, defined per plan
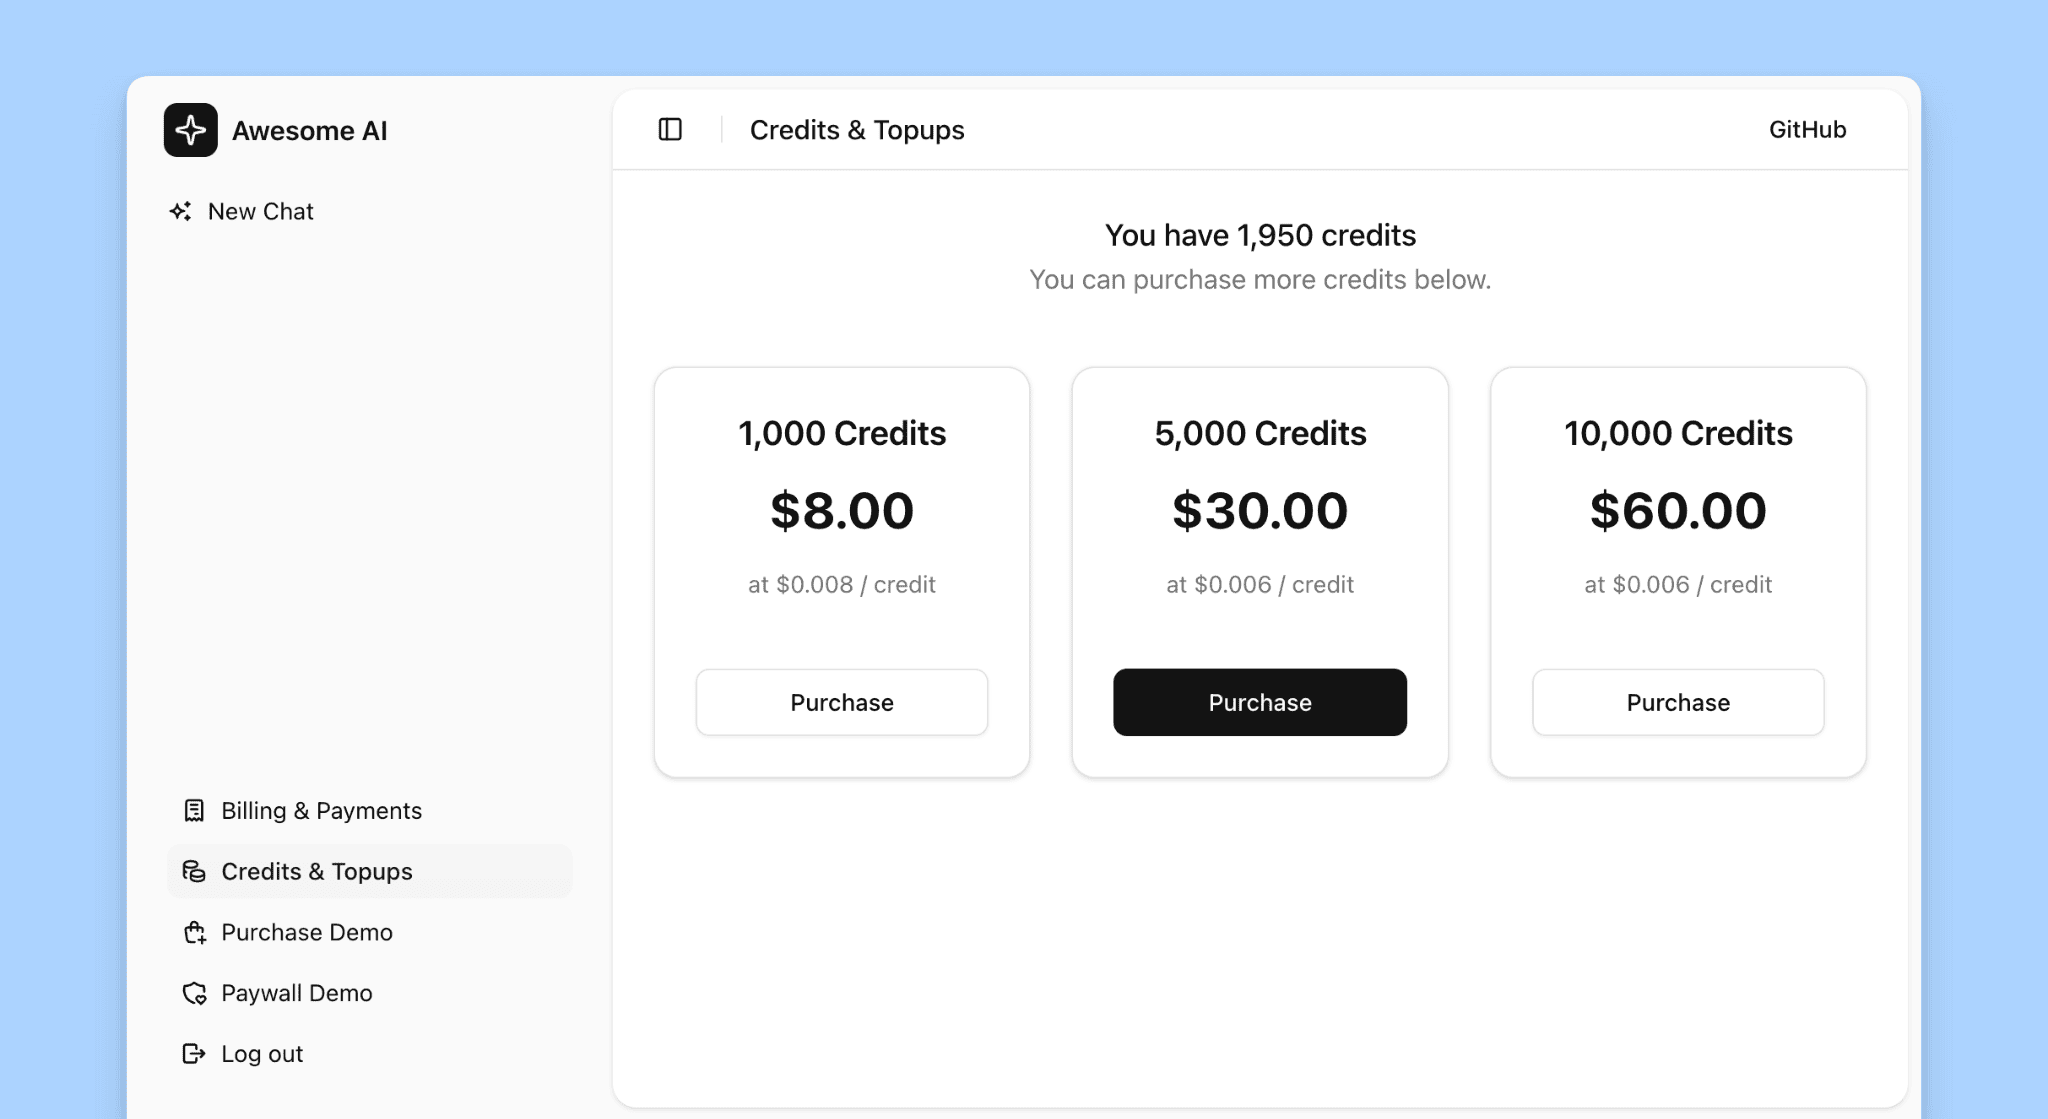
One-off credit top-ups
- Bulk options: 1,000, 5,000, or 10,000 credits
- These top-ups were separate from subscriptions and ideal for customers who hit usage limits
By separating subscriptions (for access and baseline usage) from credit top-ups (for scaling usage), Swas gave his SaaS flexibility and scalability. This model allows you to earn predictable recurring revenue while giving power users room to grow without overcommitting.
Swas also noted that this hybrid model mirrors real usage patterns in AI and API-based products, where customers may need extra compute or tokens occasionally. It’s an easy way to add upsell potential without complicating your base pricing.
Step 3: Freemius SDK and Starter Kit Integration — From Scratch
Once the SaaS stack was ready, Swas moved fast to wire up monetization logic using the Freemius JavaScript SDK, with zero backend billing infrastructure required.
Freemius’ JavaScript SDK handles heavy-duty operations like checkout, entitlement tracking, and purchase processing directly in the backend, freeing developers from writing or maintaining billing APIs.
He used just three key helper functions — processPurchaseInfo, getUserEntitlement, and getFsUser — to link Freemius’ backend with the app’s local database, ensuring every subscription or top-up instantly updates user access.
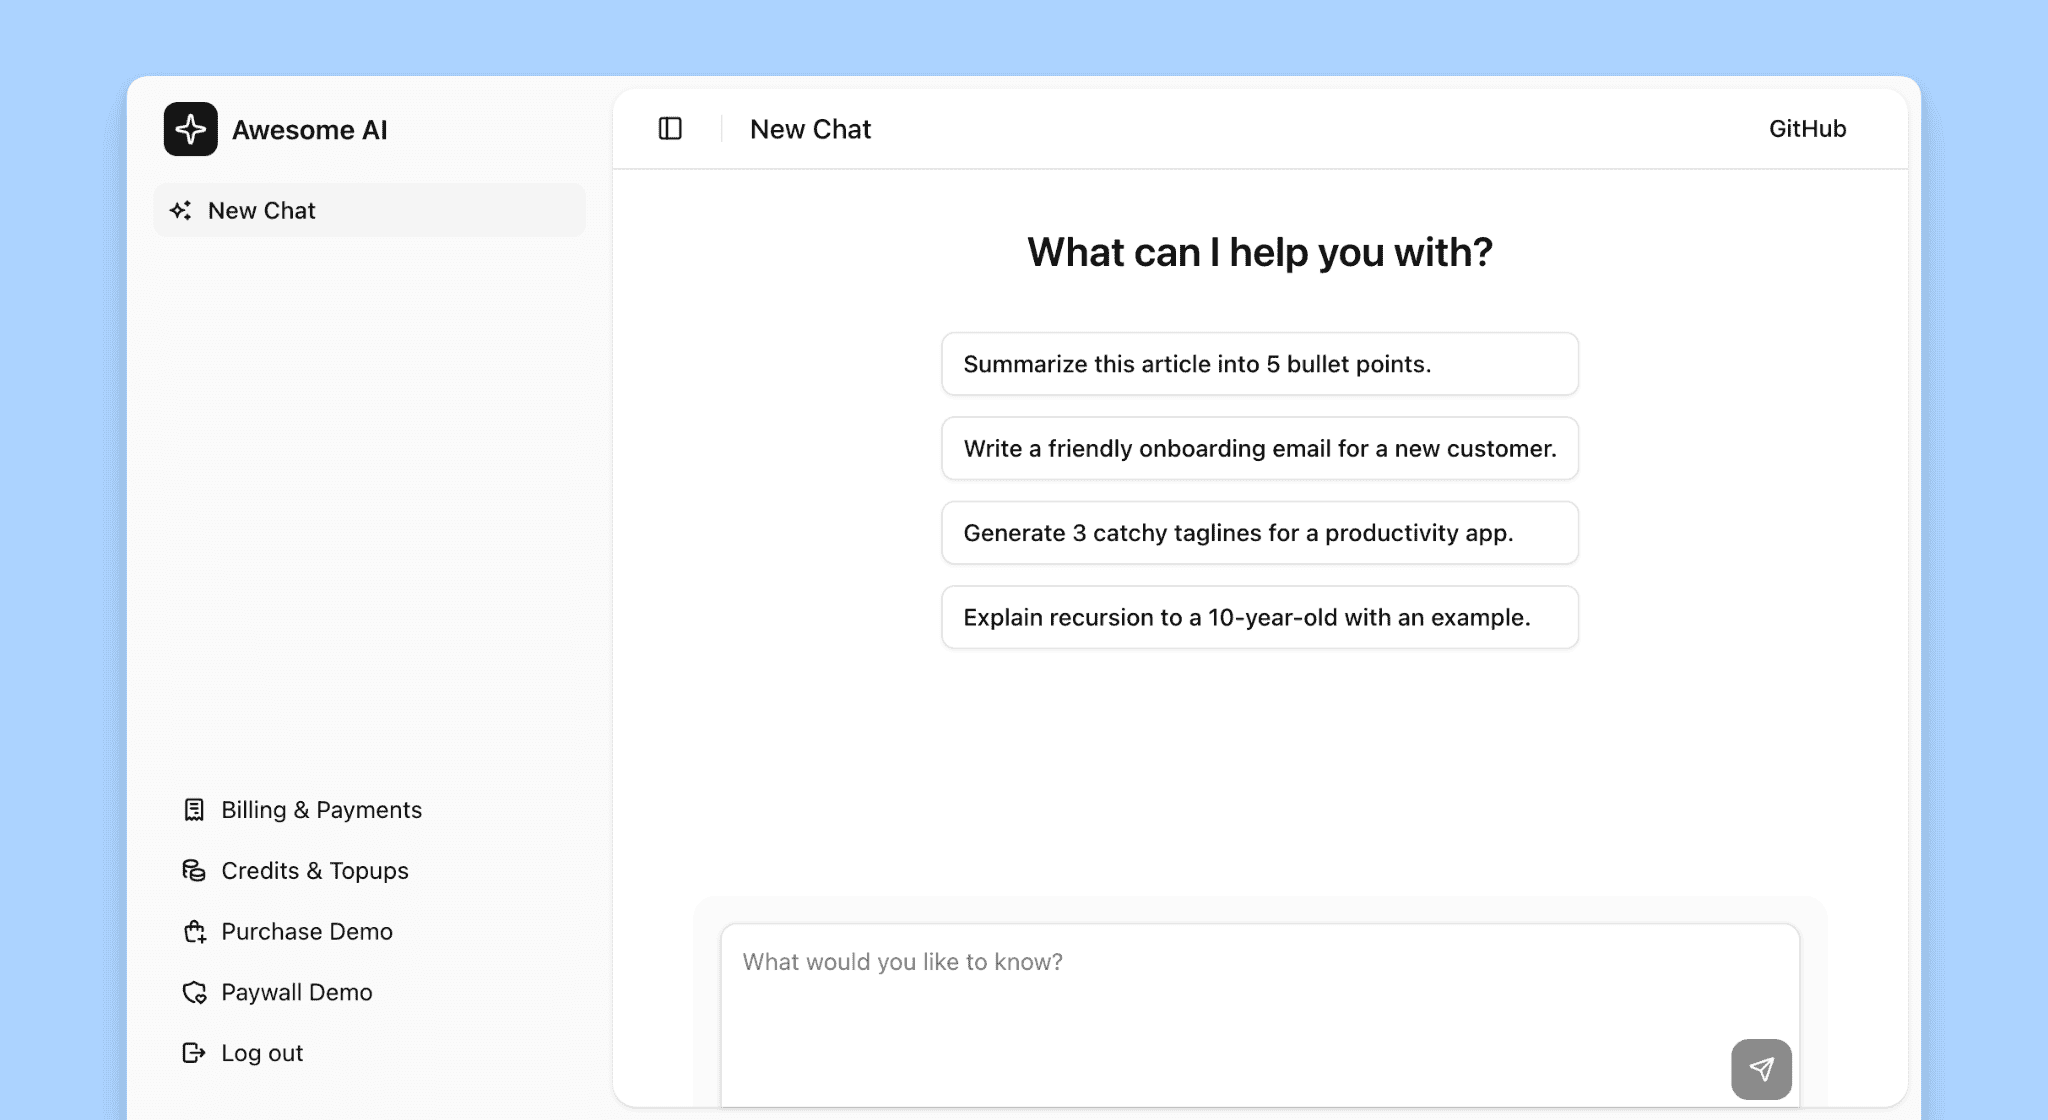
Step 4: Gate Access with Paywalls and Entitlements
This SDK-powered setup eliminated the need to build a custom billing system from scratch. Freemius handled the backend logic, while the Starter Kit gave components to build the frontend, including custom pricing UI, paywall enforcement, and credit usage handling.
After getting the core app up and running, Swas added access control logic to ensure monetization wasn’t just a feature but fundamental to the user experience.
The first layer: block access unless the user has an active subscription. The second: if the subscription is active but credits are low, offer a way to top up directly in the flow.
The app now uses entitlement checks to determine whether a user can continue using the chat feature. If the user fails entitlement checks, the appropriate Freemius paywall is dynamically triggered using the Starter Kit components.
- If the user has no subscription → a subscription paywall appears
- If the user has run out of credits → a top-up paywall loads with preset bundles (e.g., 1K, 5K, or 10K credits)
This means you’re not redirecting users to a separate page or hoping they discover a billing section buried in the dashboard. The monetization layer is built into the core app UX, showing up only when needed and in exactly the right context.
Paywalls work best when they feel like part of the product and not an interruption. Swas also highlighted that dynamic paywalls reduce friction: users hit an upgrade or top-up moment naturally in-flow, without feeling like they’re being sold to.
Step 5: Launch Freemius Checkout Anywhere
With all of the above configured in no time, it was time to bring everything to life inside the app. The goal here was to create a seamless, in-app checkout experience that lets users purchase subscriptions or top up credits without ever leaving the product interface.
What Was Implemented
To embed the Freemius Checkout directly into the Next.js app, we:
- Created a checkout endpoint
A dedicated API route was built to initiate and manage checkout sessions using the Freemius SDK.
- Wrapped the UI with
AppCheckoutProvider
This component from the Freemius React Starter Kit ensures that checkout state and behavior can be accessed anywhere in the app. It acts as the central context provider for all monetization-related flows.
This approach keeps all checkout behavior consistent — whether triggered by a missing subscription, low credits, or a manual upgrade click — making testing and maintenance much simpler.
- Rendered the components:
How the Flow Works
Backend checks entitlements
Every request to the AI assistant verifies two things:
- Is the user subscribed?
- Do they have enough credits?
Frontend responds with smart paywalls
Based on the response:
- If no active subscription → show the Paywall in upgrade mode
- If credits are low → show the Paywall in top-up mode
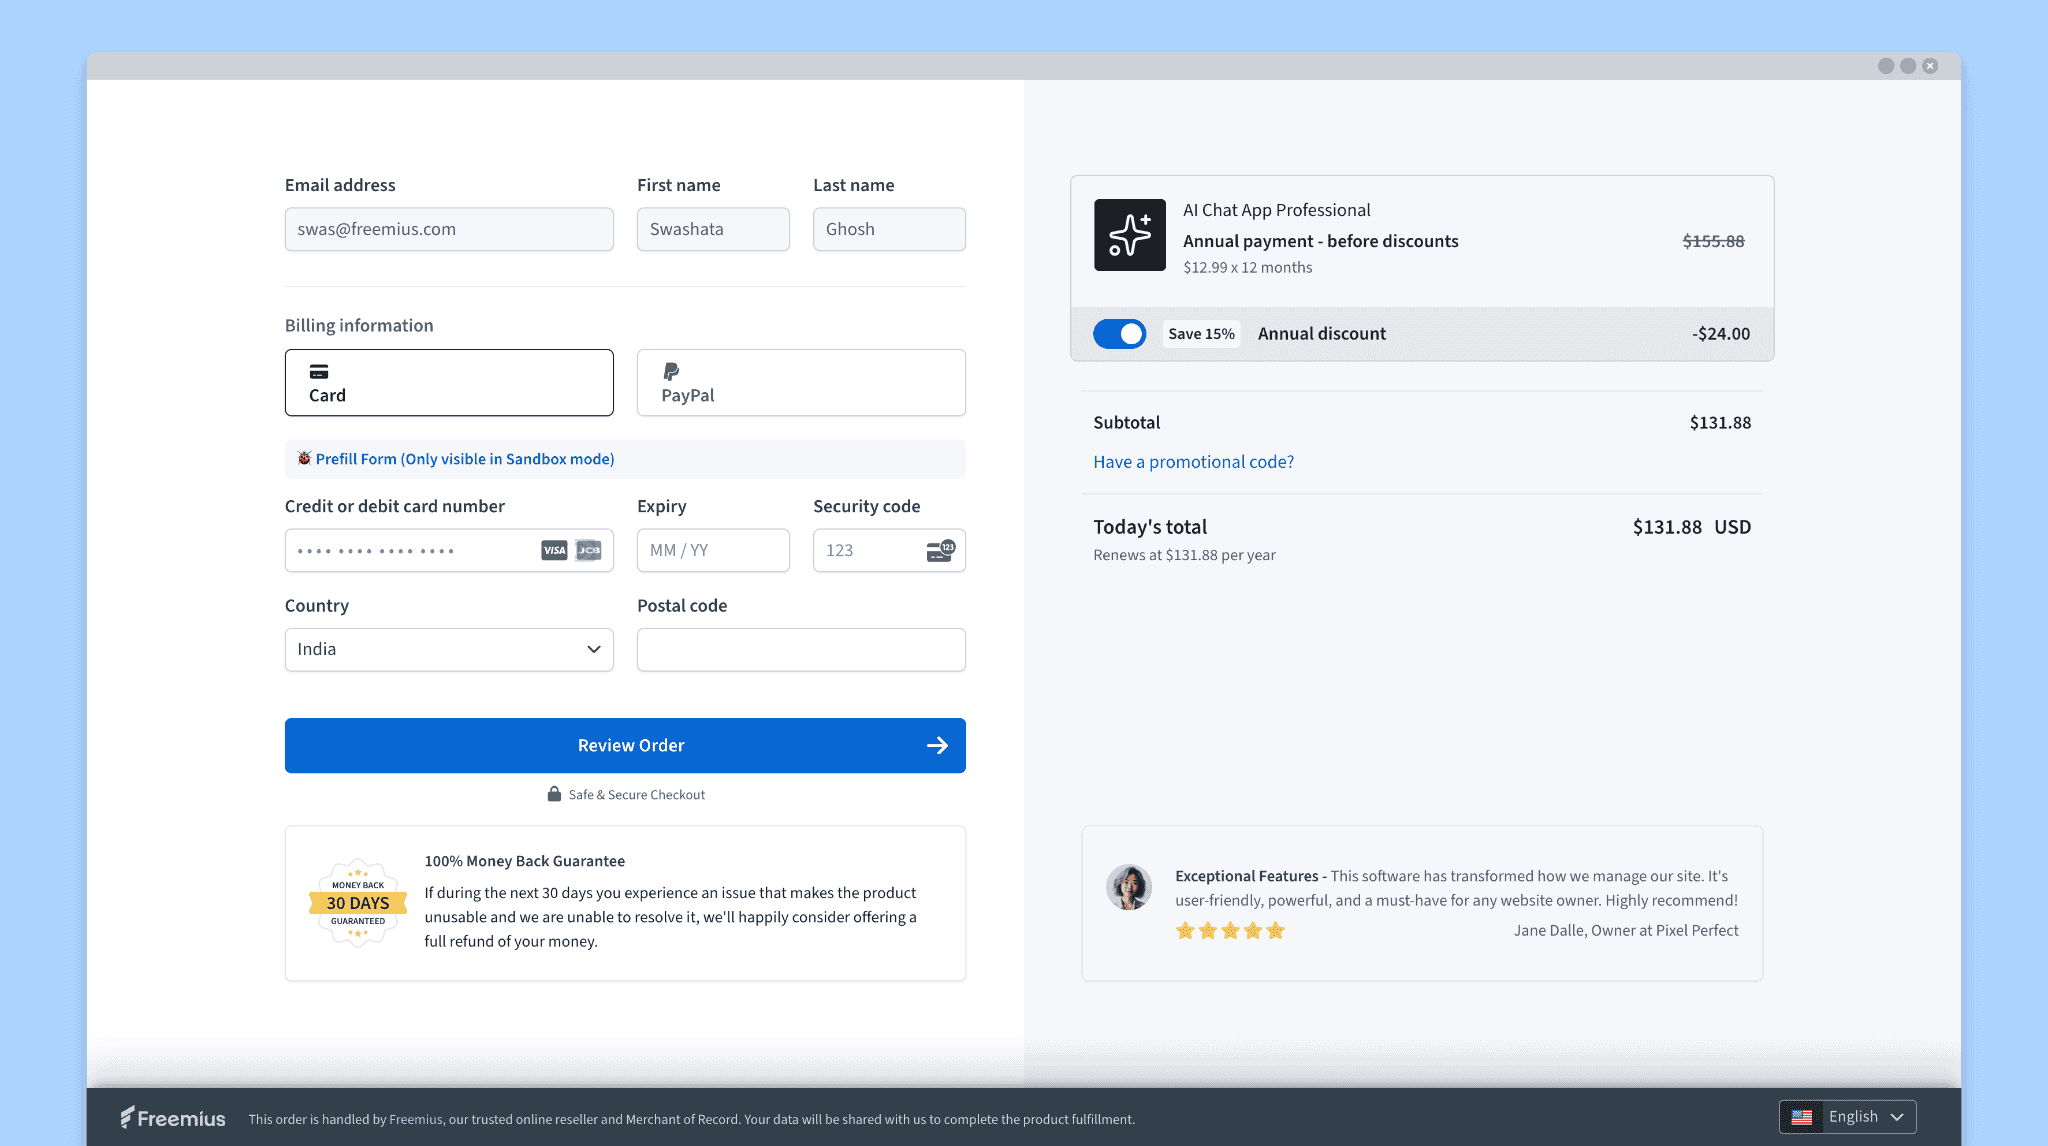
Checkout launches in-app, prefilled and seamless
- The overlay opens within the app window
- User info and pricing are fetched dynamically
- No redirects or page reloads
Post-purchase: instant access
- The app saves the purchase via
processPurchaseInfo - Entitlements are updated on the spot
Result: Smooth, Embedded Monetization
This was the turning point in the live coding session: the app went from functional to fully monetized.
Swas embedded the Freemius Checkout directly into the app, with no redirects or friction. Subscriptions and credit packs were purchased in-app, through a sleek, prefilled overlay.
The entire flow — plan selection, checkout, instant access — happened in one seamless experience.
Step 6: Give Customers Control with a Self-Service Portal
With just a few lines of code, Swas then added a fully functional billing center.
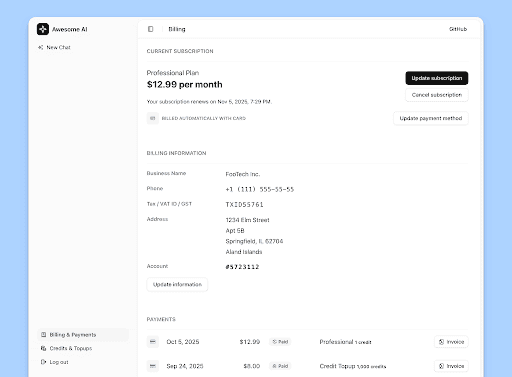
Now, users can:
- View and upgrade their plans
- Update payment method
- Cancel their subscription
- Update billing info
- Download invoices
- Review payment history
This simple addition had a big impact. Giving users control over their billing improves the overall experience, reduces churn, and cuts down on support tickets.
In practice, the Customer Portal uses the same concept of creating an API endpoint and a front-end page with no backend scripting or dashboard management required.
Step 7: Add a Credit Top-Up Flow to the Credits Page
Swas then wrapped the Credits page in <AppCheckoutProvider> and dropped in the <Topup /> component from the Freemius Starter Kit. This gave us a slick, self-serve UI with:
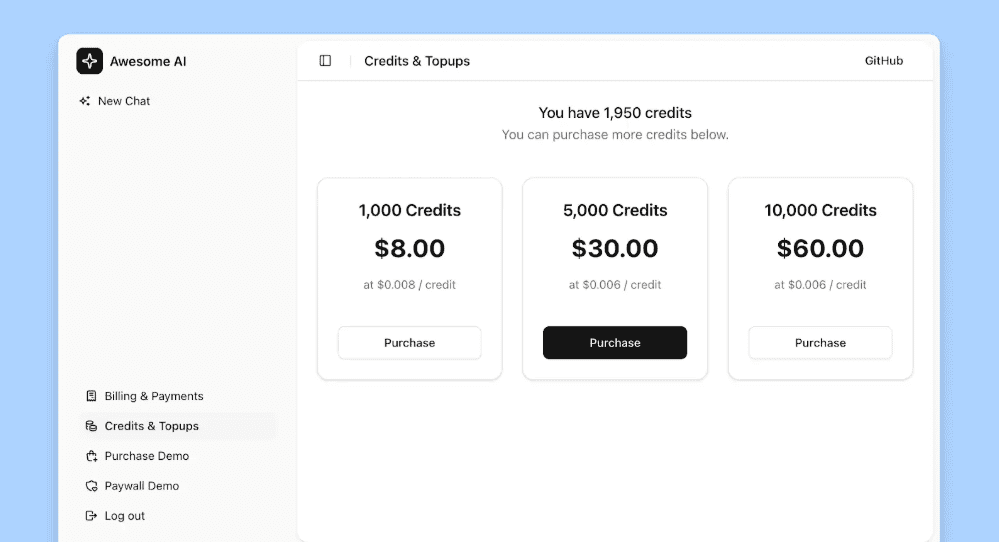
- Live credit balance
- Purchase buttons with dropdown options
- Real-time credit updates after purchase
Customers can now top up instantly without leaving the app. Swas pointed out that adding this component turned what was just a display page into a direct revenue-generation touchpoint.
It’s a reminder that UX and monetization can (and should) coexist.
Step 8: Use Webhooks to Sync External Events
To make your SaaS app fully production-ready, we closed the loop by syncing external subscription events using webhooks.
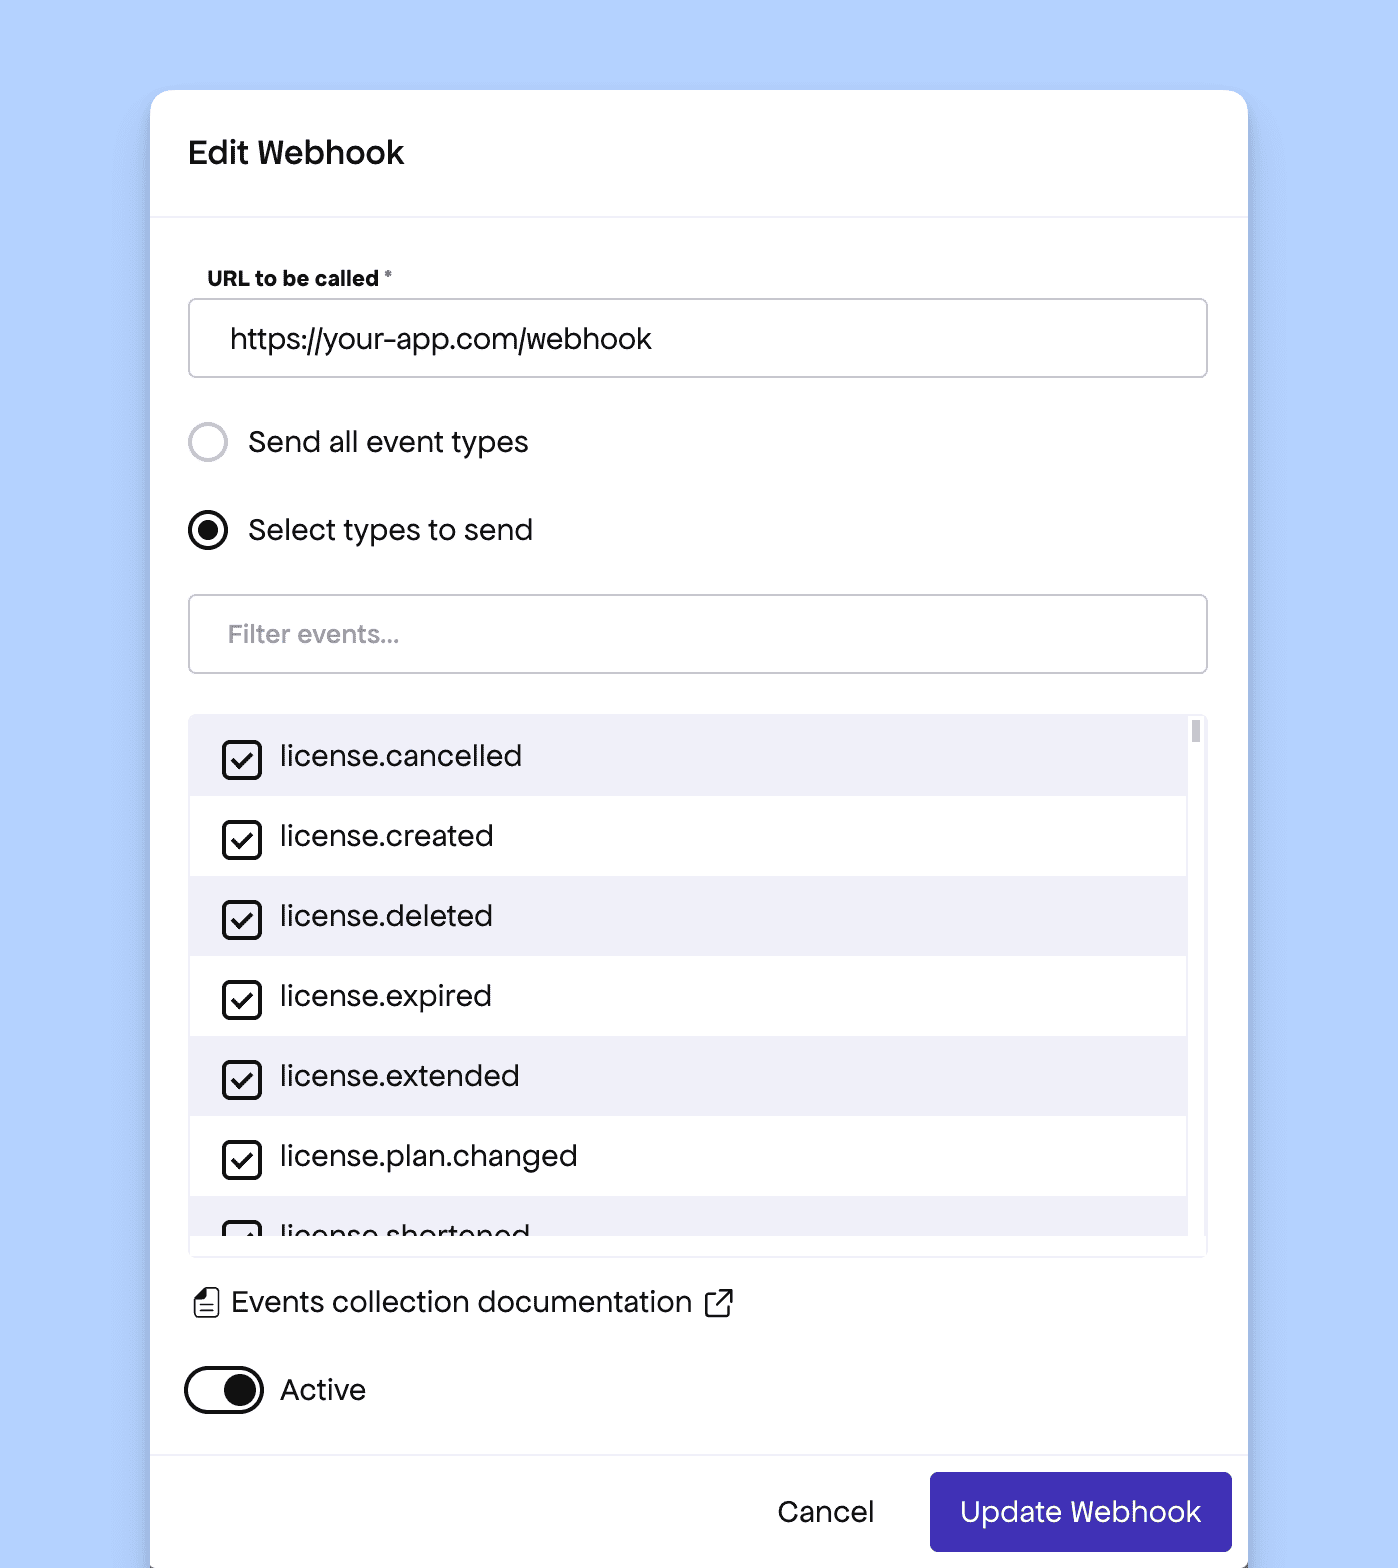
Why it matters: The subscription renewal happens outside of the SaaS, through Freemius. We want our system to automatically reflect the renewal and process any entitlement, such as credits.
And there we go! Your SaaS now stays in sync with Freemius, no manual intervention required.
Step 9: Deploy Your SaaS
With app logic and monetization flow complete, it was time to ship it to the world.
Swas reminded makers that deployment shouldn’t be an afterthought — hosting, environment variables, and database connectivity are all handled cleanly by available platforms, letting you focus on product logic instead of DevOps.
He recommends:
Application Hosting:
- Vercel: Seamless integration with Next.js, CI/CD out of the box, and easy environment variable management.
Database:
- Supabase: A Firebase alternative powered by PostgreSQL, perfect for managing your database, authentication, and serverless functions.
Alternative:
- Self-host on a VPS if you want full control over the stack, costs, and performance.
One-Click Deploy
Everything shown in the session — from plans to paywalls — was published as an open GitHub template, so makers can clone, customize, and go live within minutes:
- GitHub repo → freemius.com/go/nextjs-ai-chat
With the stack deployed and monetization wired in, your SaaS is no longer just a side project — it’s a real product ready to serve customers and generate revenue.
From Demo to Deploy: What We Built
In just 30 minutes, Swas transformed a basic AI app into a fully monetized SaaS product, complete with secure checkout, subscriptions, credit top-ups, customer billing, and a real-time paywall experience.
Using the Freemius SDK, a smart modular stack, and some sharp architecture choices, he proved that SaaS monetization doesn’t have to take weeks of setup or custom infrastructure.
The larger message behind the demo was clear:
Building and monetizing a SaaS isn’t only about technical brilliance — it’s about speed, clarity, and leverage. By relying on proven tools like Next.js and Freemius, solo makers and small teams can skip the billing rabbit hole and focus on what really matters: solving problems and getting paid for it.
Start building and selling… today: