Integrating your First product
Integrating Freemius into your product is faster than you might expect. With our step-by-step workflow, you can sign up, integrate, and start selling—all in the same day.
Once you've repeated the process a few times, it will become almost second nature. Let’s walk through the first step: adding your initial plugin, theme, or SaaS product to the Freemius Developer Dashboard.
Add a new product
After creating your Freemius account and logging into the Developer Dashboard, start by adding your first software product.
Click the Add product / bundle menu link on the left-hand side of the page to begin adding a new product.
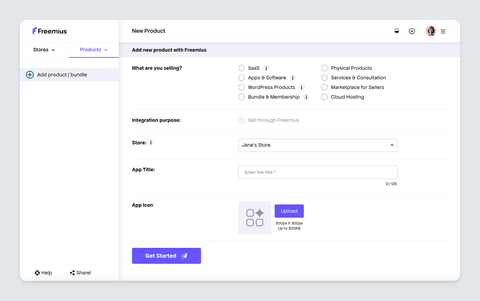
Choose the type of product. you would like to sell. You can even create bundle or membership type products too.
Enter a product title and optionally upload a product icon, although this doesn't have to be done right away. You can update the icon at any time in the product's settings later on.
Click the Get Started button to finish.
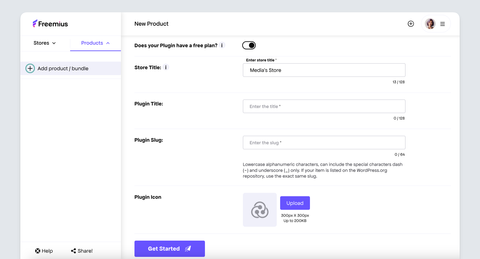
Set up a paid plan
Now that your product is added to the dashboard, it’s time to define how you'll make money from it.
Freemius gives you complete flexibility to create pricing plans tailored to your business model—whether it’s a one-time payment, subscription, license-based access, or a combination.
The exact setup process varies depending on your product type. Choose the guide that matches your product:
- SaaS, Apps, and Desktop Software: See how to set up monthly/yearly plans, add trials, and set up your checkout flow in our SaaS Plans & Pricing Guide
- WordPress Plugin or Theme: Learn how to configure pricing, add support channels, and configure your features free trials in our WordPress Plans & Pricing Guide
You can start with a single plan and expand later. Many software makers begin with a simple monthly + annual offering, then introduce additional tiers based on user demand and feature segmentation.