Integrating the Freemius SDK into your product is a quick step you need to complete in order to be able to take advantage of all the benefits that come with using Freemius. After completing these instructions your product will be all set up and ready to sell.
Here’s how to do it:
After logging in to your Freemius account and clicking on the ‘ADD PLUGIN / THEME / BUNDLE’ button at the top left hand corner you will be able to provide some basic settings for your product, including Slug and Title:
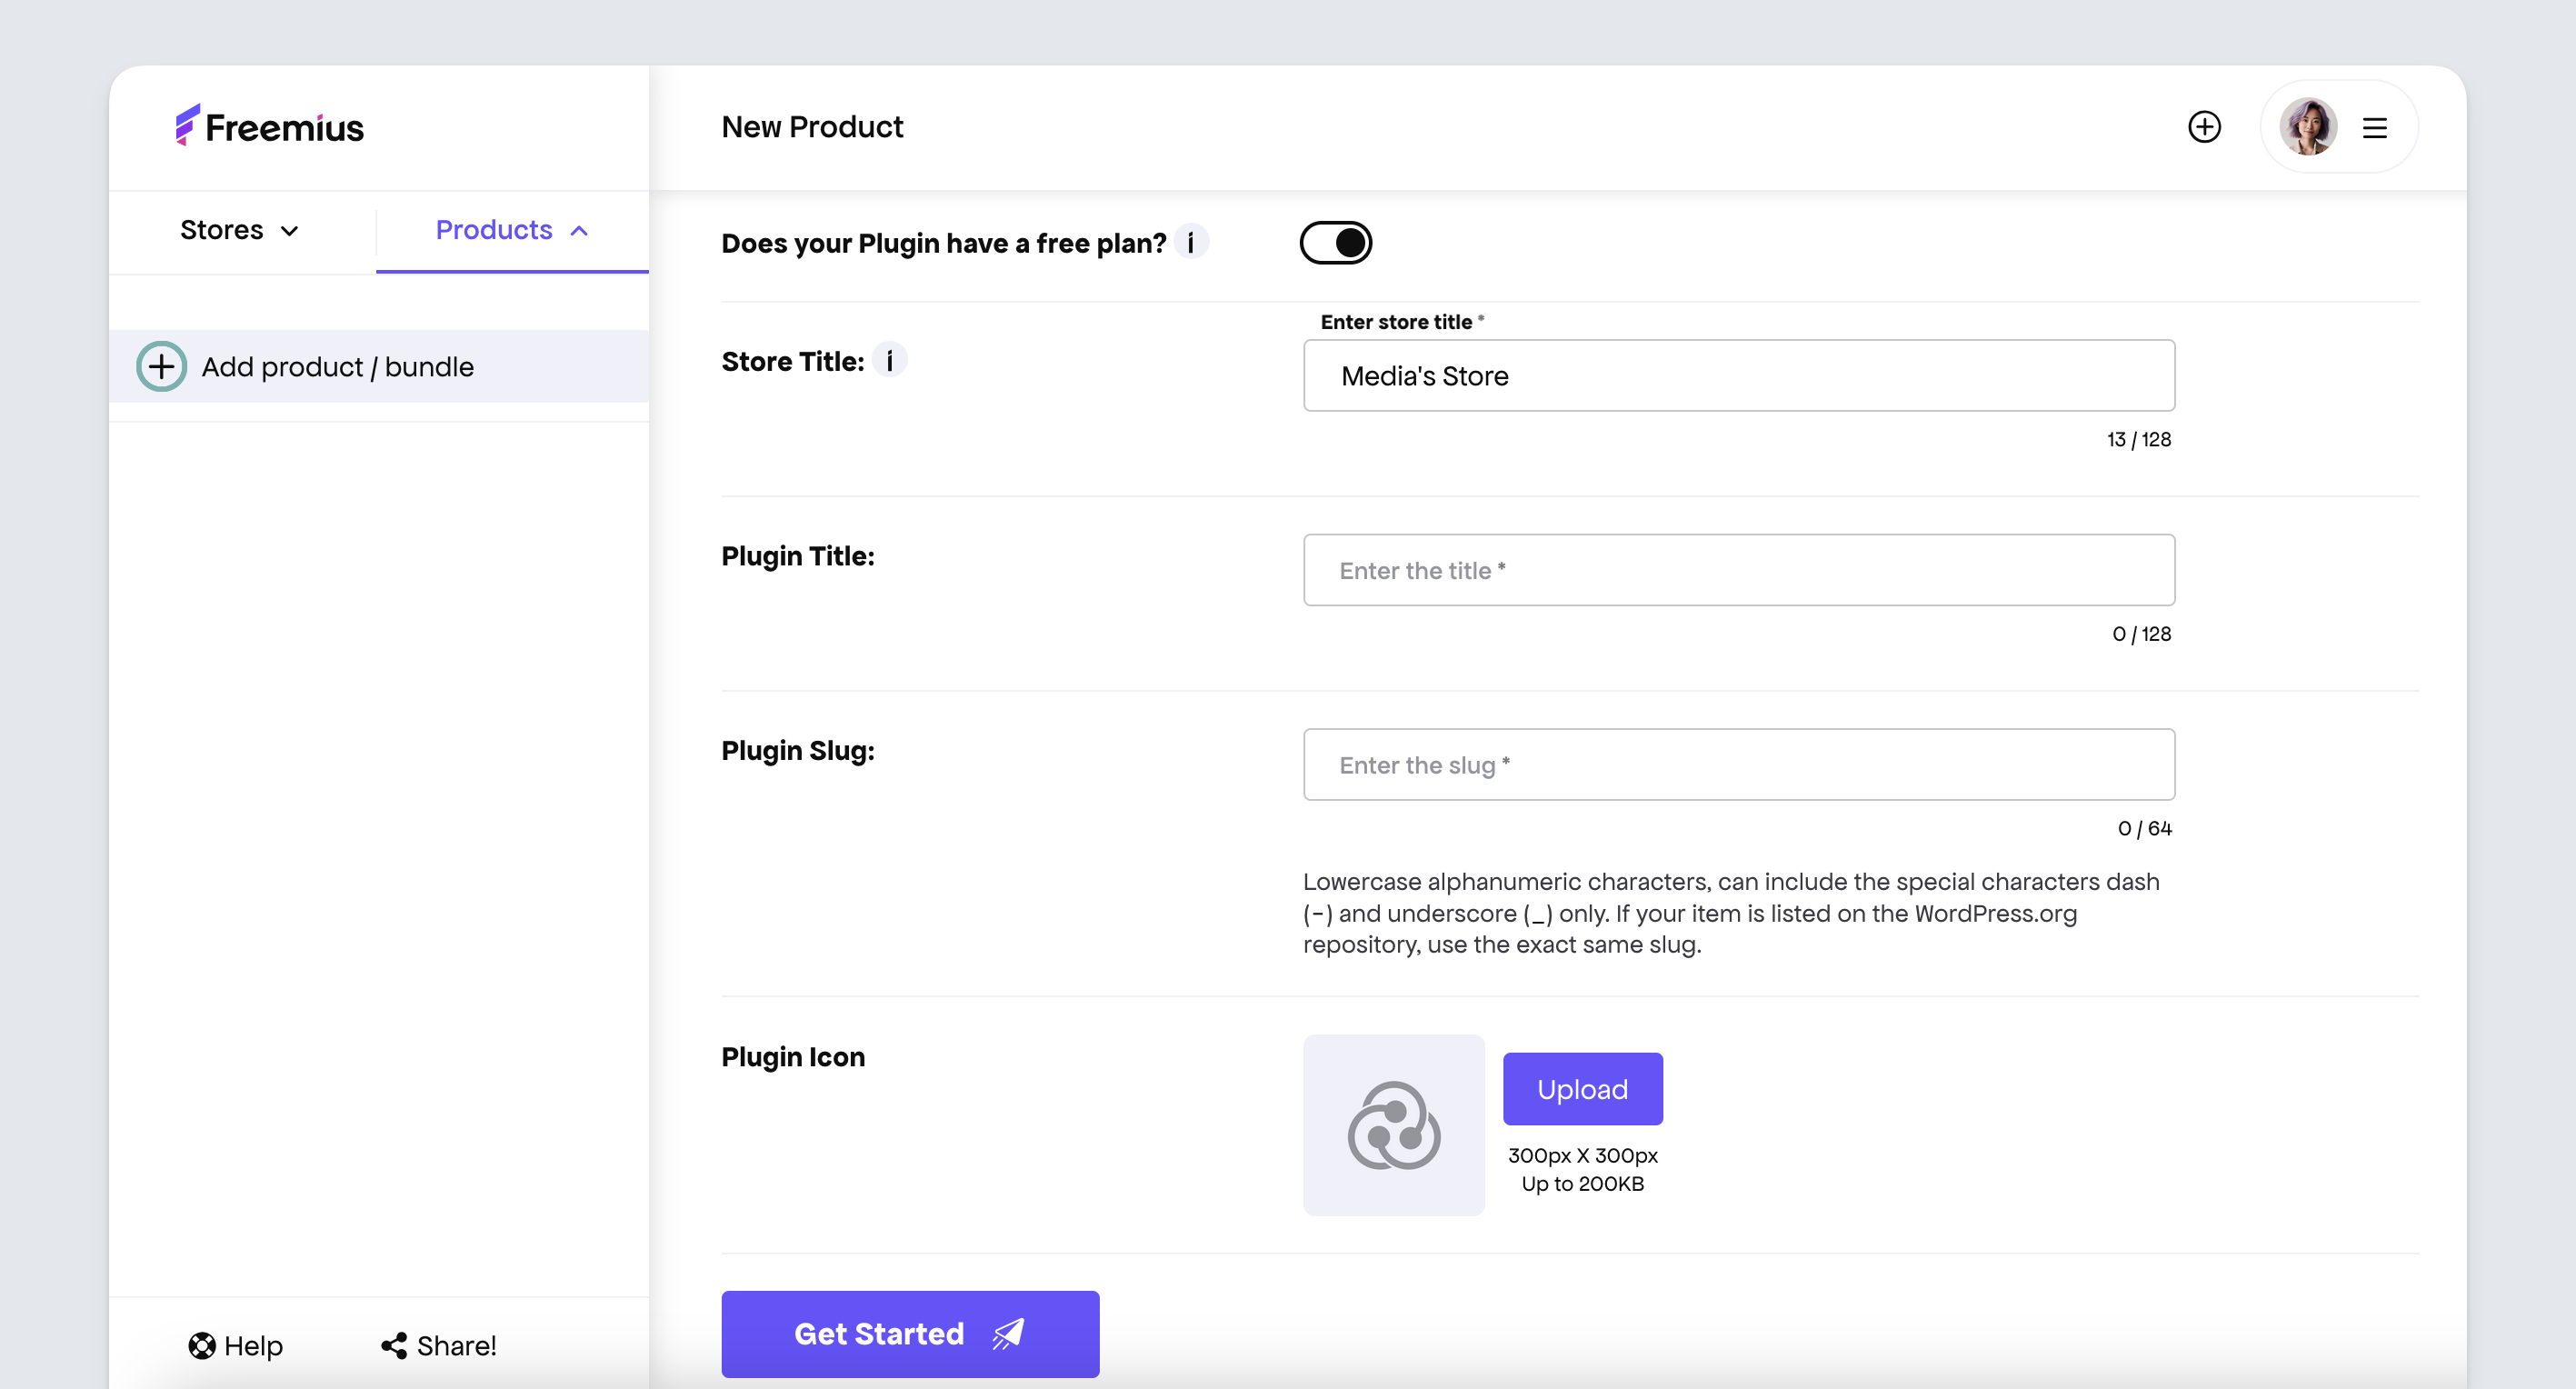
Upon hitting the ‘Create New’ button, you are then redirected to the 5-minute integration guide.
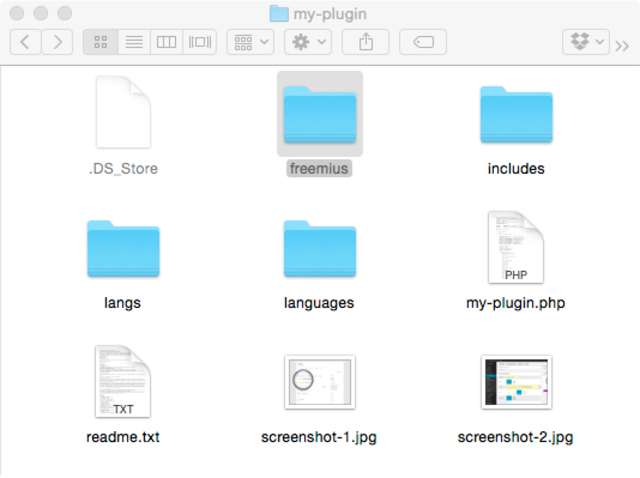
The next step is to download the ZIP file that contains the Freemius SDK and all of the Freemius magic that comes with it. You can download the latest release from our GitHub repository, unzip it, rename it to ‘freemius’, and copy it into your product’s main folder.
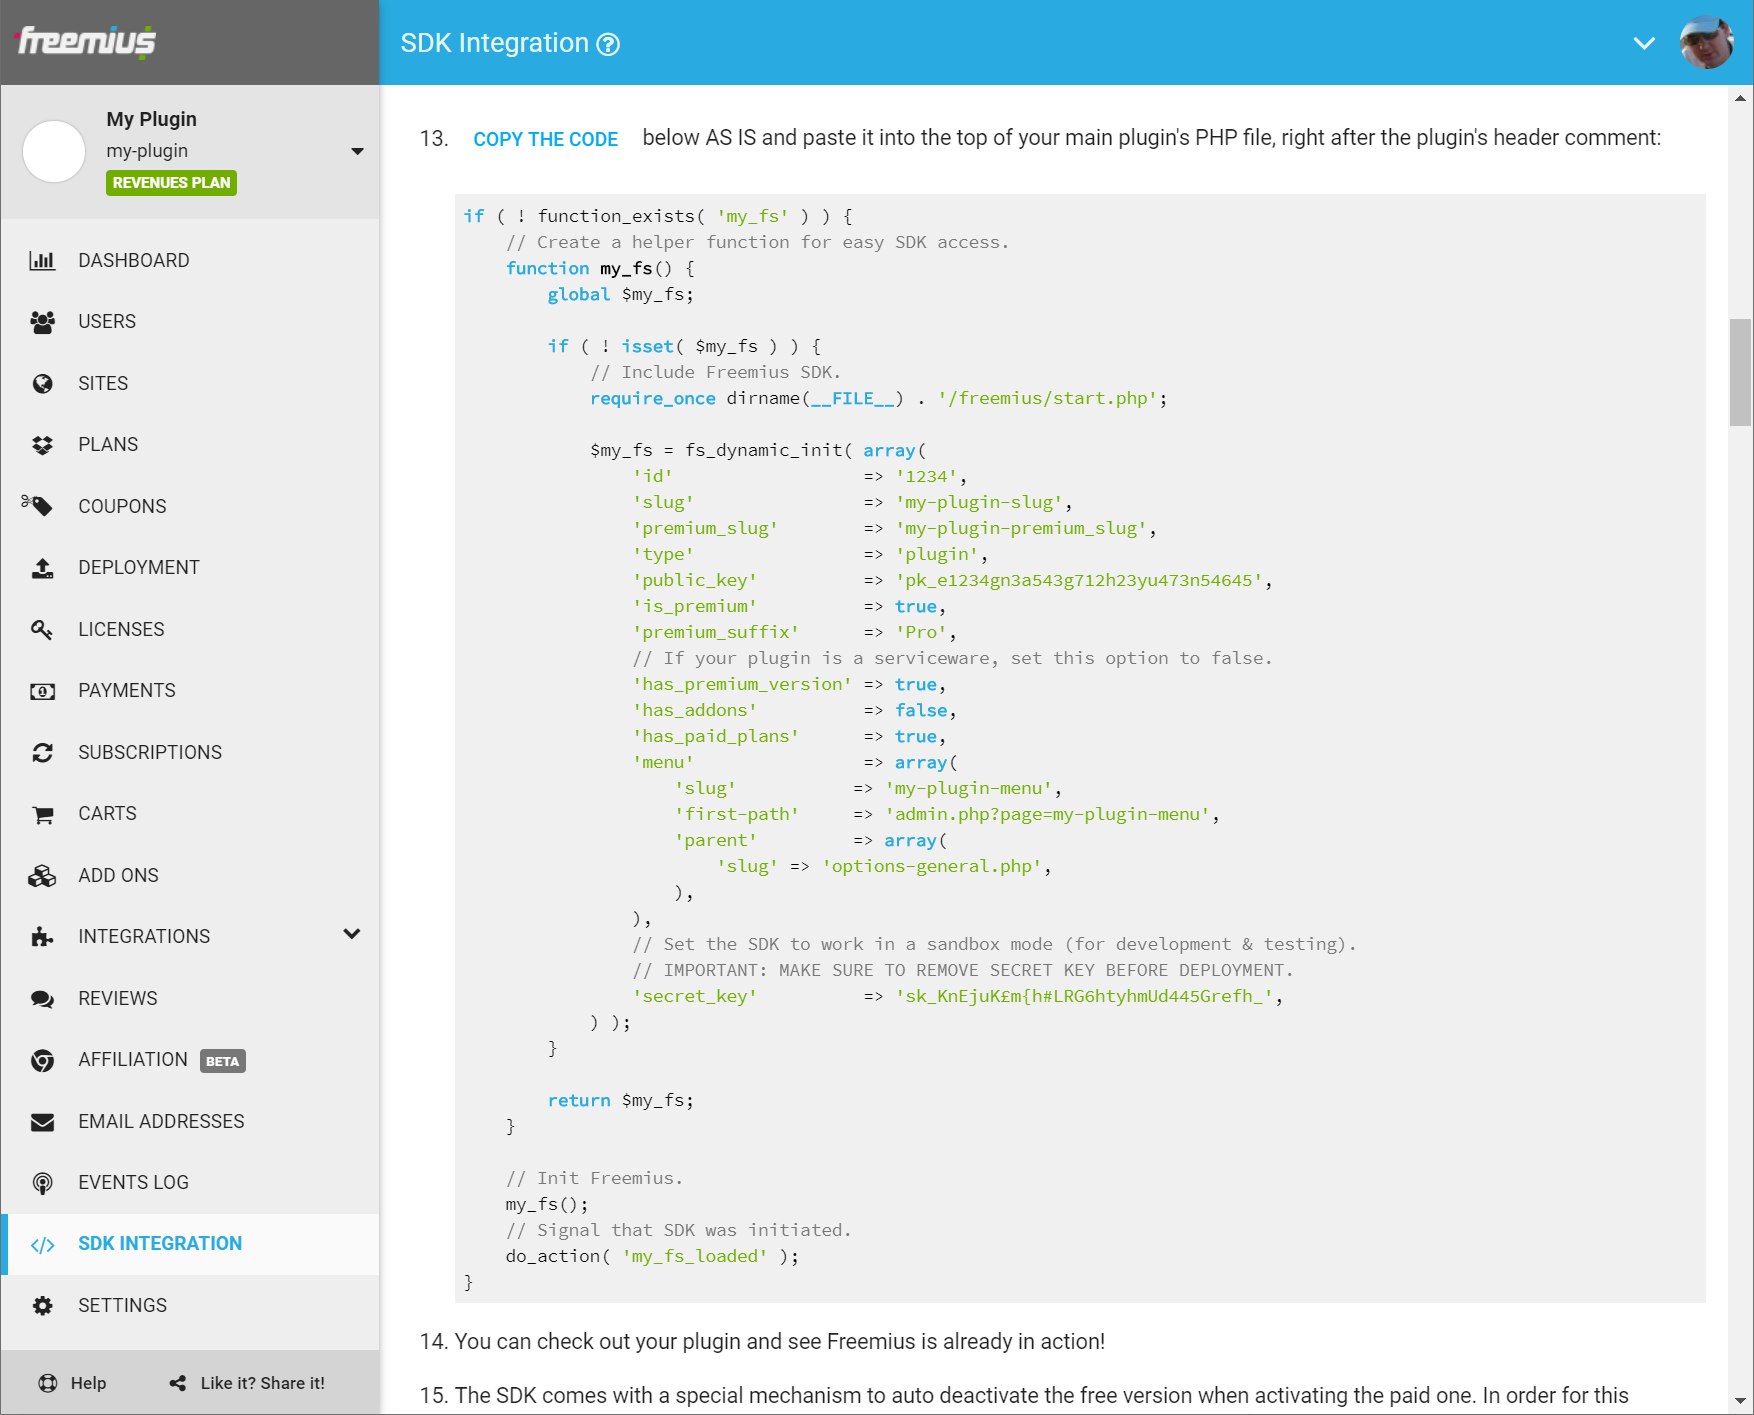
With the Freemius SDK folder included in your product’s main folder, you can complete the quick customization process according to the instructions on the SDK Integration page of the Developer Dashboard.
When you’re done, your customized ‘easy SDK access’ function will be auto-generated for you.
Note: This snippet of code initializes the Freemius SDK using an array of key/value pairs that contains specific information about your Freemius product and unlocks the full range of features available. Access to the Freemius SDK features comes via a global variable defined as part of the snippet.
For WordPress plugins, copy & paste it into the top of your main plugin’s PHP file, right after the plugin’s header comment and if ( ! defined( 'ABSPATH' ) ) exit; check.
For WordPress themes, copy & paste it into the top of your theme’s functions.php file.
Here’s how the code should look:
Under normal circumstances, we don’t recommend editing the snippet directly once it’s added to your WordPress product. However, there are times when you may need to tweak it manually. We’ll cover when you might want to do this in a later section.
However, in all cases, you should begin by copying the snippet from the SDK Integration page of the Developer Dashboard and pasting it into your plugin or theme. Don’t be tempted to try and create the snippet from scratch as this method is prone to errors. It’s always best to start with the auto-generated snippet and tweak it when necessary.
Where to Add the SDK Integration Snippet
Depending on the structure of your plugin you may wish to add the SDK snippet to another location than your main plugin file. For themes, the SDK relies on the snippet to be placed in functions.php, if you place it elsewhere you are risking unexpected behavior – so please don’t do it.
Regardless of where it’s added, it’s recommended that initialization of the Freemius SDK should be completed as soon as possible and preferably before any other code is executed inside your WordPress product.
This will help to minimise issues with trying to access SDK features before they are initialized. Also, SDK initialization should not occur after the WordPress 'plugins_loaded' hook. This is incorrect and will break some of the SDK’s logic due to the execution order of other logic contained in WordPress core.
If you experience problems when placing the SDK snippet in a file alternative location than the recommended ones, then try adding it back in the main plugin file, to rule out any implementation errors.
Snippet Settings Reference
The array that’s passed to fs_dynamic_init() consists of key-value pairs, including nested arrays for some settings. All possible values are covered as a reference guide, but not all will necessarily be relevant to your particular plugin or theme.
Specific settings will be generated depending on the information entered in the Developer Dashboard. Don’t worry if your SDK snippet doesn’t include all of the settings. This is perfectly normal.
All settings are listed below along with a description. Expected valid values for each are shown in brackets.
Note: All settings apply to both plugins and themes unless otherwise stated.
| Setting | Value | Description |
|---|---|---|
'id' |
e.g. '1234' |
Auto-generated Freemius product ID which uniquely identifies your plugin or theme. This is created when the product is first created and cannot be changed. |
'slug' |
e.g. 'my-plugin' |
Used to create the product folder name during deployment and in the updates mechanism. Also used in dynamically generated URLs (e.g. EULA). |
'premium_slug' |
e.g. 'my-plugin-pro' |
Used for freemium products to create the premium product’s version folder name during deployment. This needs to be different from the free version slug. Also used in dynamically generated URLs (e.g. EULA). |
'type' |
Type: stringValues: 'plugin'|'theme'Default: 'plugin' |
Type of WordPress product. |
'public_key' |
Type: stringe.g. 'pk_n56hrjss36joj632vgyy345ggv555' |
Public key is a unique key prefixed with ‘pk_’ specific to the Freemium product. This is typically used for authentication with public Freemius API endpoints. |
'is_premium' |
Type: booleanValues: true|false |
Specify if the product’s codebase is the free or premium version. |
'premium_suffix' |
Type: stringe.g. 'Pro' |
The suffix added to a premium plugin’s paid version title. This option is relevant for freemium products. |
'is_premium_only' |
Type: booleanValues: true|falseDefault: false |
Specify if the plugin or theme is premium-only (i.e. no free version). This setting is added automatically if the default free plan is deleted and there’s at least one paid plan. |
'has_premium_version' |
Type: booleanValues: true|falseDefault: false |
Does the plugin or theme have a premium version available? |
'has_addons' |
Type: booleanValues: true|falseDefault: false |
Does the plugin or theme have any associated addons? |
'has_paid_plans' |
Type: booleanValues: true|falseDefault: false |
Does the plugin or theme have any paid plans? |
'is_org_compliant' |
Type: booleanValues: true|falseDefault: true |
Is the product’s free version WordPress.org compliant. |
'has_affiliation' |
Type: boolean|stringValues: 'selected'|'customers'|'users'Default: false |
This setting is included if the affiliate program for the product is enabled (via the Developer Dashboard Affiliation page). Its value is determined by the “Who can be an affiliate?” setting. When “customers” is selected, it means the seller only allows customers to become affiliates so the admin notice and menu item will only show up for customers. From the SDK’s point of view, “users” and “selected” are identical, since only users will be exposed to the settings of the product in the WordPress admin. |
'menu' |
Type: array |
An array that denotes which Freemius pages to display in the WordPress admin menu, and how the plugin settings page menu is handled. |
'opt_in_moderation' |
Type: array |
An associative array containing configuration for opt-in moderation of your product. More on this later. |
'secret_key' |
Type: stringe.g. 'sk_84gbhR634gb732vy796h4gTY43' |
Secret key is a unique key prefixed with ‘sk_’ specific to the Freemium product. When present it enables sandbox mode for development & testing. It also elevates additional permissions that are helpful for development and testing modes. |
Note: The secret key is automatically included in the SDK snippet for convenience. As per the comments in the snippet, this should be removed from production code, but don’t worry if you forget as the PHP processor removes it automatically in the Deployment mechanism
Configuration for 'menu' array
Possible settings for the 'menu' array are:
| Setting | Value | Description |
|---|---|---|
'slug' |
Type: stringe.g. 'my-plugin-menu' |
WordPress admin menu slug used for the plugin settings page. |
'parent' |
Type: stringe.g. array( 'slug' => 'options-general.php') |
The parent menu slug to use if the plugin settings page is a submenu of another menu. Even though this setting expects an array the 'slug' field is the only option currently available. |
'first-path' |
Type: stringe.g. 'admin.php?page=my-plugin-menu' |
This is where the plugin, or theme, will redirect to after activation. |
'contact' |
Type: booleanValues: true|falseDefault: true |
Display the Freemius Contact Us page in the WordPress admin menu for the plugin or theme? |
'support' |
Type: booleanValues: true|falseDefault: true |
Display the Freemius Support Forum page in the WordPress admin menu for the plugin or theme? |
'addons' |
Type: booleanValues: true|falseDefault: true |
Display the Freemius Add Ons page in the WordPress admin menu for the plugin or theme? |
'affiliation' |
Type: booleanValues: true|falseDefault: false |
Display the Freemius Affiliation page in the WordPress admin menu for the plugin or theme? |
'account' |
Type: booleanValues: true|falseDefault: true |
If you set this to false then the SDK will not include any links to the Account page. If you are selling with Freemius the Account page is essential, therefore, make sure to manually link to that page from your settings interface using my_fs()->get_account_url(). |
Configuration for 'opt_in_moderation' array
Note: This setting was introduced in version 2.5.4 of the SDK. With the removal of the connectivity test, the moderation capabilities have been transitioned to the SDK settings. You can read more about it in our new release note.
'opt_in_moderation' => array(
    'new'       => 100,
    'updates'   => 0,
    'localhost' => true,
),
'new'(int | boolean): An integer from0to100to control the exposure percentage of the opt-in to new product installs. It also supports a boolean value. When set totrue, then assume 100% exposure; if set tofalse, then no exposure at all. Defaults totrue(as 100%) when not set.'updates'(int | boolean): Exactly as the'new'parameter, but controls the opt-in exposure for product updates (i.e., what % of websites will see the opt-in after upgrading to a new version with the Freemius SDK, when the previous version didn’t include the SDK).'localhost'(boolean): Whether to show the opt-in on localhost sites. Default’s totrueif not set.
Manually Editing the SDK Integration Snippet
There are certain fields that aren’t updated or included by default in the auto-generated SDK snippet. Therefore, if you need to support a certain feature exposed by this type of field it will need to be added manually. This is best done after the snippet has been inserted into your WordPress product.
It’s not usually recommended to edit any fields directly from the auto-generated snippet. Instead, the snippet should be updated by changing the settings for your plugin or theme in the Developer Dashboard.
Here’s a list of the fields that can be manually inserted/edited:
| Setting | Value | Description |
|---|---|---|
'navigation' |
Type: stringValues: 'menu'|'tabs' |
Enable tabbed layout support for Freemius pages rather than display them as menu items. This is a very useful option to reduce clutter in your plugin’s admin menu structure. |
'pricing' |
Type: booleanValues: true|falseDefault: true |
Turn off all upgrade/pricing links except the account page. To enable this option it needs to be added to the 'menu' array which is automatically added to the snippet. If, for some reason, this doesn’t exist, then you can add it manually and create a single entry for 'pricing' as follows: 'menu' => array( 'pricing' => false,), |
'has_premium_version' |
Type: booleanValues: true|false |
If your product is a Serviceware (a SaaS wrapped into a plugin or theme), set this option to false. This is an example of an option that is initially set in the auto-generated snippet but can be updated manually. |
'bundle_id' |
Type: numbere.g. '1234' |
Auto-generated Freemius ID which uniquely identifies a specific bundle. |
'bundle_public_key' |
Type: stringe.g. 'pk_hrjss36joj632vgyy345ggv555' |
Bundle key is a unique key, and is specific to the Freemium bundle. |
'bundle_license_auto_activation' |
Type: booleanValues: true|falseDefault: false |
When set to true, an activation of a bundle license key will automatically activate the license key for all the other bundle’s paid products installed on the site that are not yet associated with a license key. |
The two bundle settings are required for products that are also sold as part of a bundle, when you want to sell the bundle via the WordPress admin instead of just the paid version of that product.
Example: For a freemium plugin with 10 paid add-ons, and you wish to sell a bundle of the plugin’s paid version and 5 of the paid add-ons. Without setting the bundle params in the SDK snippet, the in-dashboard pricing and checkout will be for the paid version of the plugin. On the other hand, when the params are set, the pricing page will show the prices of the bundle in context and that’s what the user will purchase if they go through the checkout.
'permissions' |
array<string,bool> |
This is a key/value array where the key is a string (the permission name), and the value a boolean variable – which determines whether that permission is requested or not. Currently the only supported key is 'newsletter' and will explicitly ask a permission for “Updates, announcements, marketing, no spam”. |
Additional permissions may be available in the future to make it easy for you to pick and choose what permission their product needs on opt-in for. It’s also possible for you to introduce yourr own custom permissions via the
permission_listFreemius filter.
'enable_anonymous' |
true|false |
If your plugin is a Serviceware and cannot be used before creating an account, you can set this option to true and it will require users to opt-in after activation by removing the option to skip the opt-in. |
'anonymous_mode' |
true|false |
When set to true it will automatically simulate a skip of an opt-in. This flag can be useful if you don’t want to ask users to opt-in to your free version or want to create your own custom opt-in interface, yet still utilize the power of the Freemius WordPress SDK (e.g. deactivation feedback form, in-dashboard checkout, etc.). We highly recommend to use the SDK’s high-performing and multi-site network ready default opt-in, except if your product comes with an onboarding wizard and you’d want to custom add the opt-in UI and decision as part of that wizard. To reset the “anonymous mode”, you can programmatically call my_fs()->connect_again(), which will also automatically redirect to the opt-in screen after resetting the flag. You can programmatically trigger a skip using my_fs()->skip_connection() or an opt-in consent using my_fs()->opt_in(). |
Some or all of these manual settings may be supported in the auto-generated snippet at some point, but, for now, if you need to access them, then adding them manually is the only option.
Updating the SDK Integration Snippet
Whenever you make changes to your plugin or theme settings in the Developer Dashboard, this may trigger an update to the auto-generated SDK Integration snippet. It’s important that whenever this is updated that you manually copy/paste it into your plugin or theme so that your product is always up to date with the latest version.
If the SDK integration snippet (minus any manual changes) doesn’t match the Developer Dashboard version, then you could run into problems, so it’s best to always keep it up-to-date and in sync when changes are made in the Developer Dashboard that affect the snippet.
The main reason why we don’t recommend manually editing the SDK integration snippet (unless you have to) is because every time the snippet is updated inside your plugin or theme, you’ll have to re-apply any manual changes you made previously. This can be tedious and prone to errors.
One final thing to remember is that if you have your SDK integration snippet in an alternative location (i.e. other than the main plugin file) then you’ll also need to update the path reference to the Freemius SDK start.php file every time the snippet is updated.
Activate Opt-ins
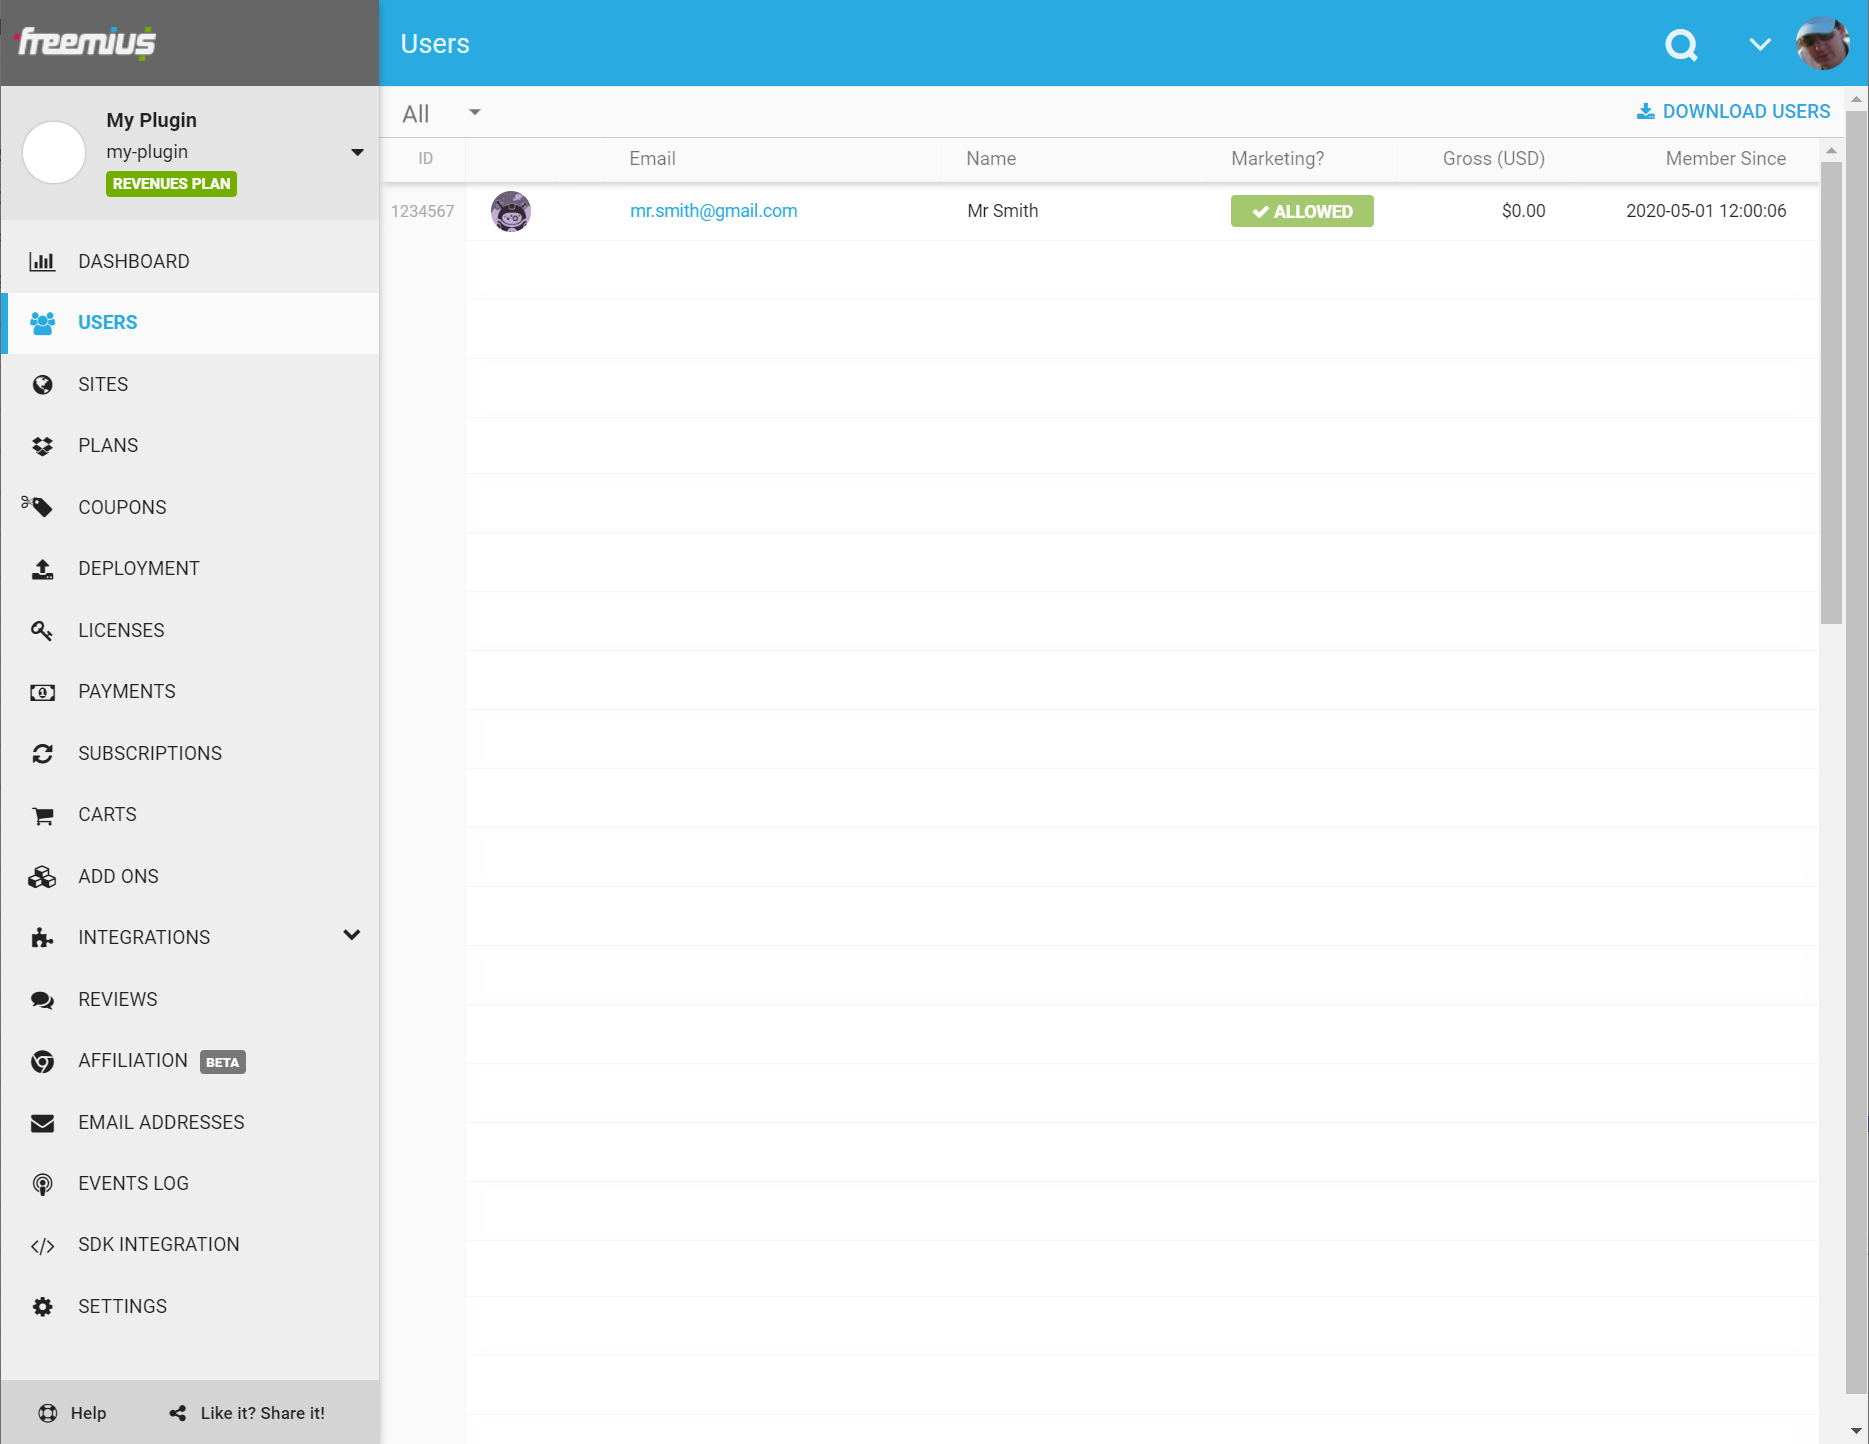
Once you’ve completed the SDK integration, you can go back to the WordPress admin and activate & opt-in to your product (plugin or theme). If everything was done correctly, you should be able to see the data flowing into your Freemius dashboard in real time.