The Freemius WordPress SDK contains an impressive set of features to help you sell your plugins and themes, and it’s regularly updated with new features and improvements.
To get notified about new SDK releases, it is recommended to Watch the GitHub repository. You can also Star the repository to bookmark it on your GitHub account.
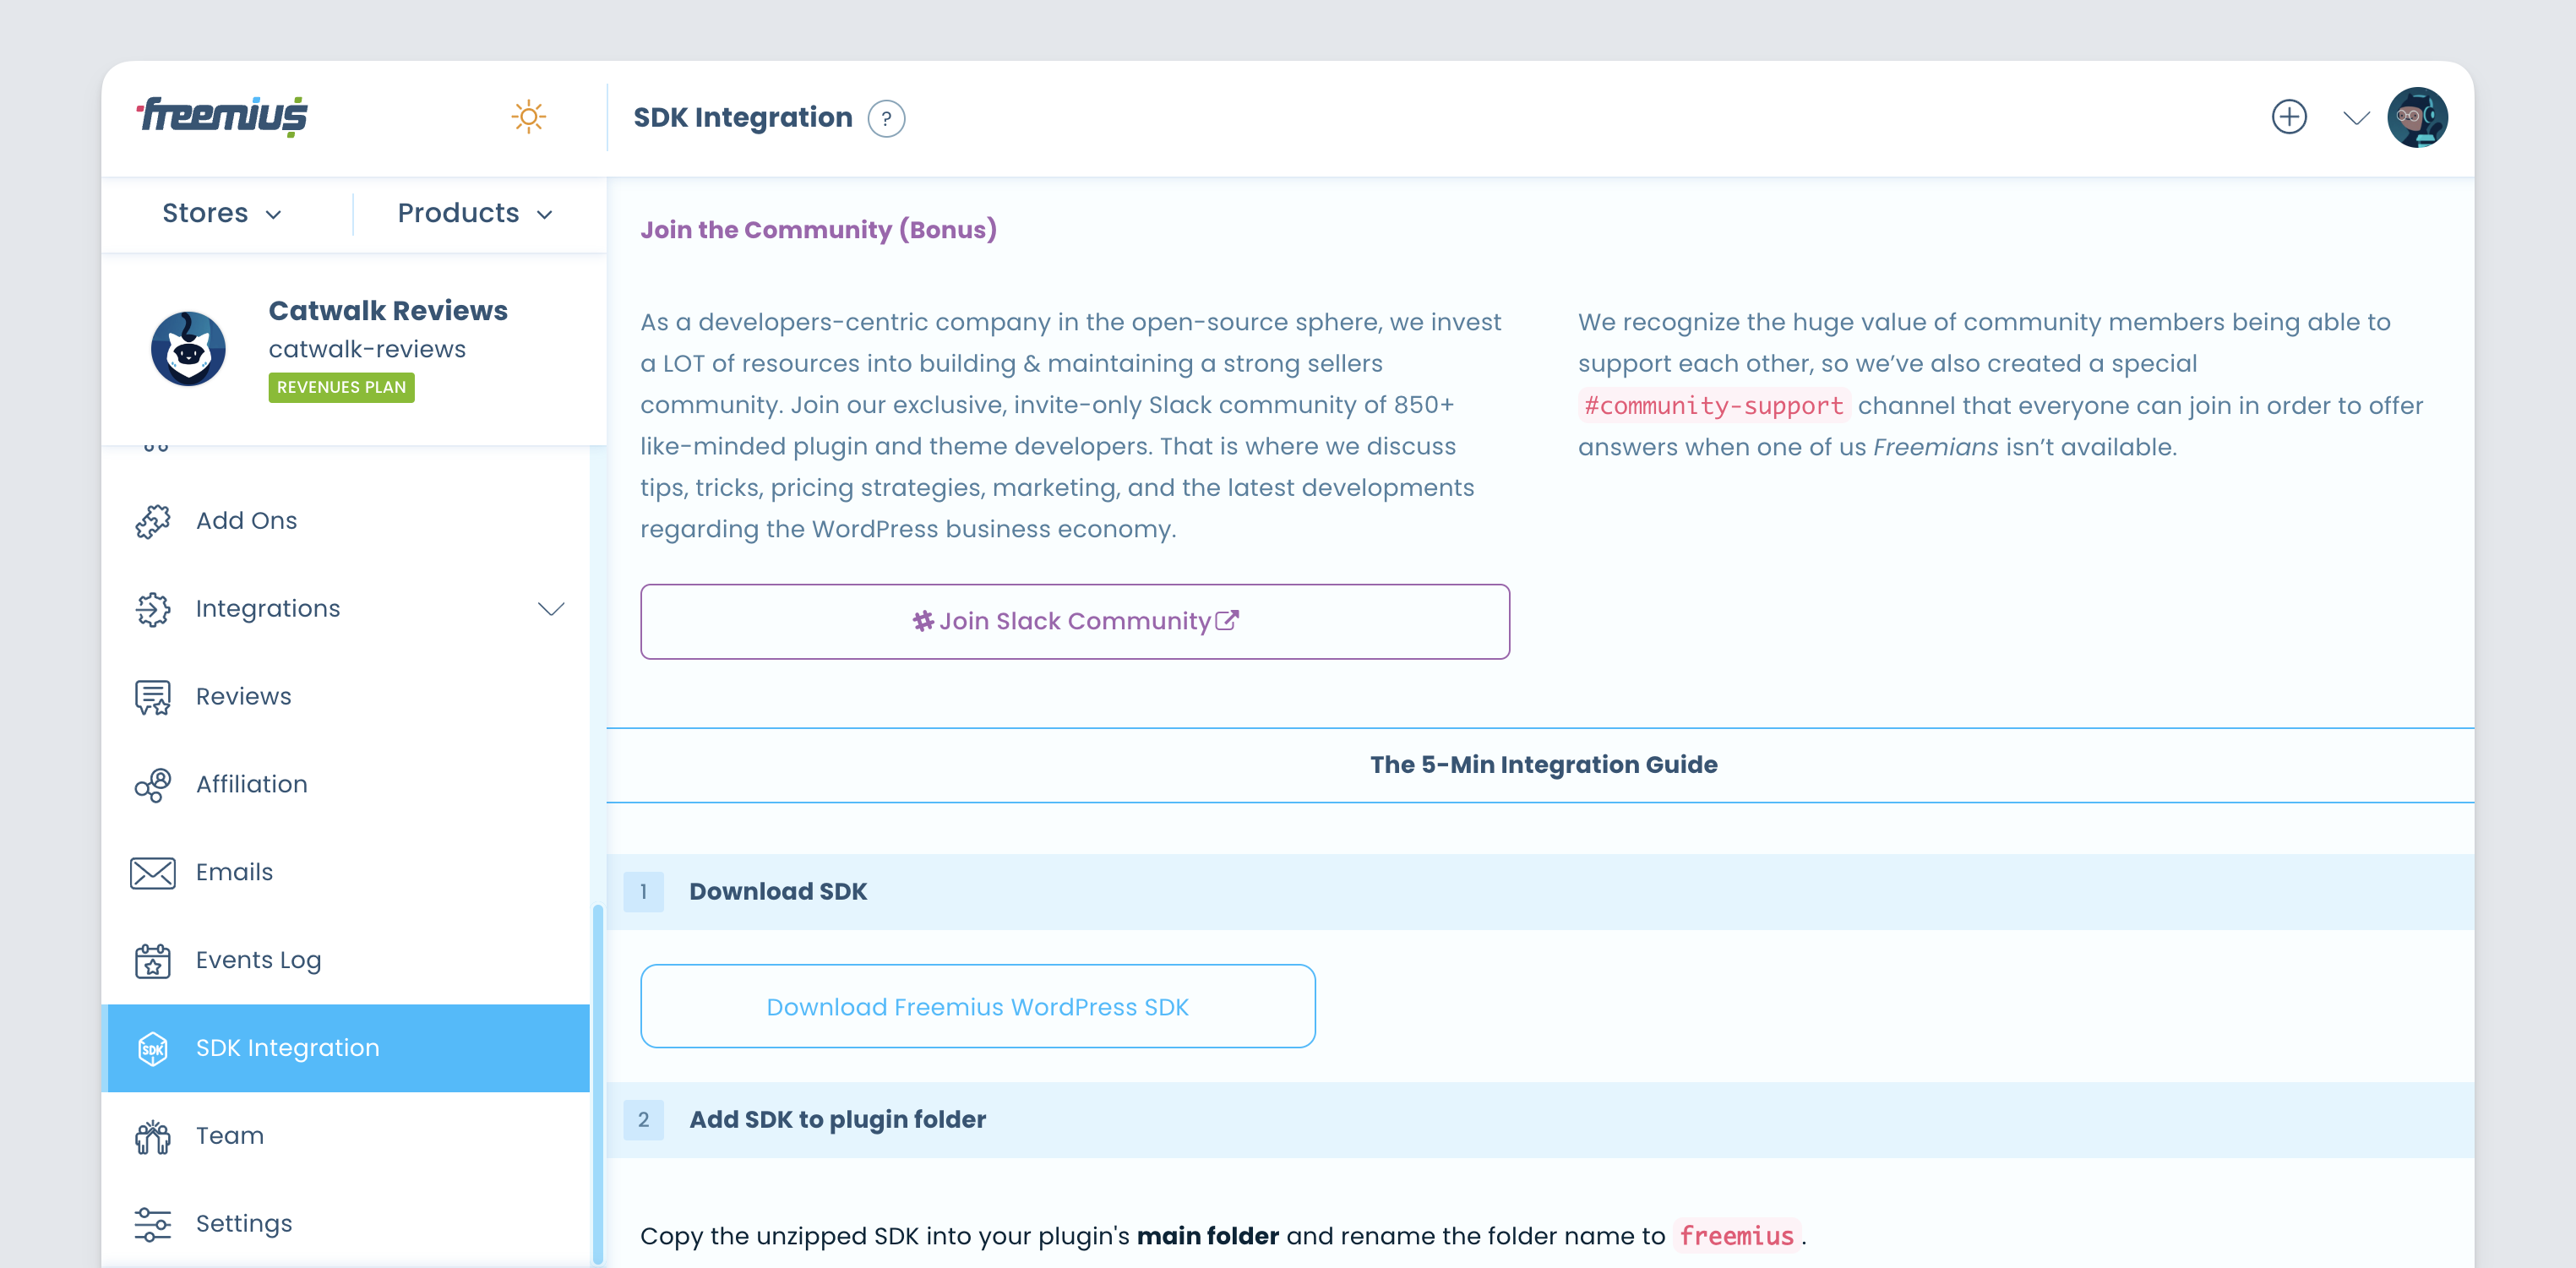
After setting up your product’s plans and pricing, go to the SDK Integration page to add the latest WordPress SDK into your Product.

This part of the integration process involves adding Freemius specific code to your plugin or theme. This is split into three parts:
- Add the core Freemius WordPress SDK.
- Add an auto-generated snippet of code to your product’s main PHP file.
- Wrap your product’s premium code with the proper SDK logic.
Add the core Freemius WordPress SDK
- Download the newest version of the WordPress SDK and extract the ZIP file.
- Rename the
wordpress-sdk-masterextracted folder tofreemius. - Create a new directory called `vendor` (if it does not exists).
- Move the renamed
freemiusfolder as-is into the vendor folder of your WordPress theme or plugin.

Fill out the SDK Integration Form
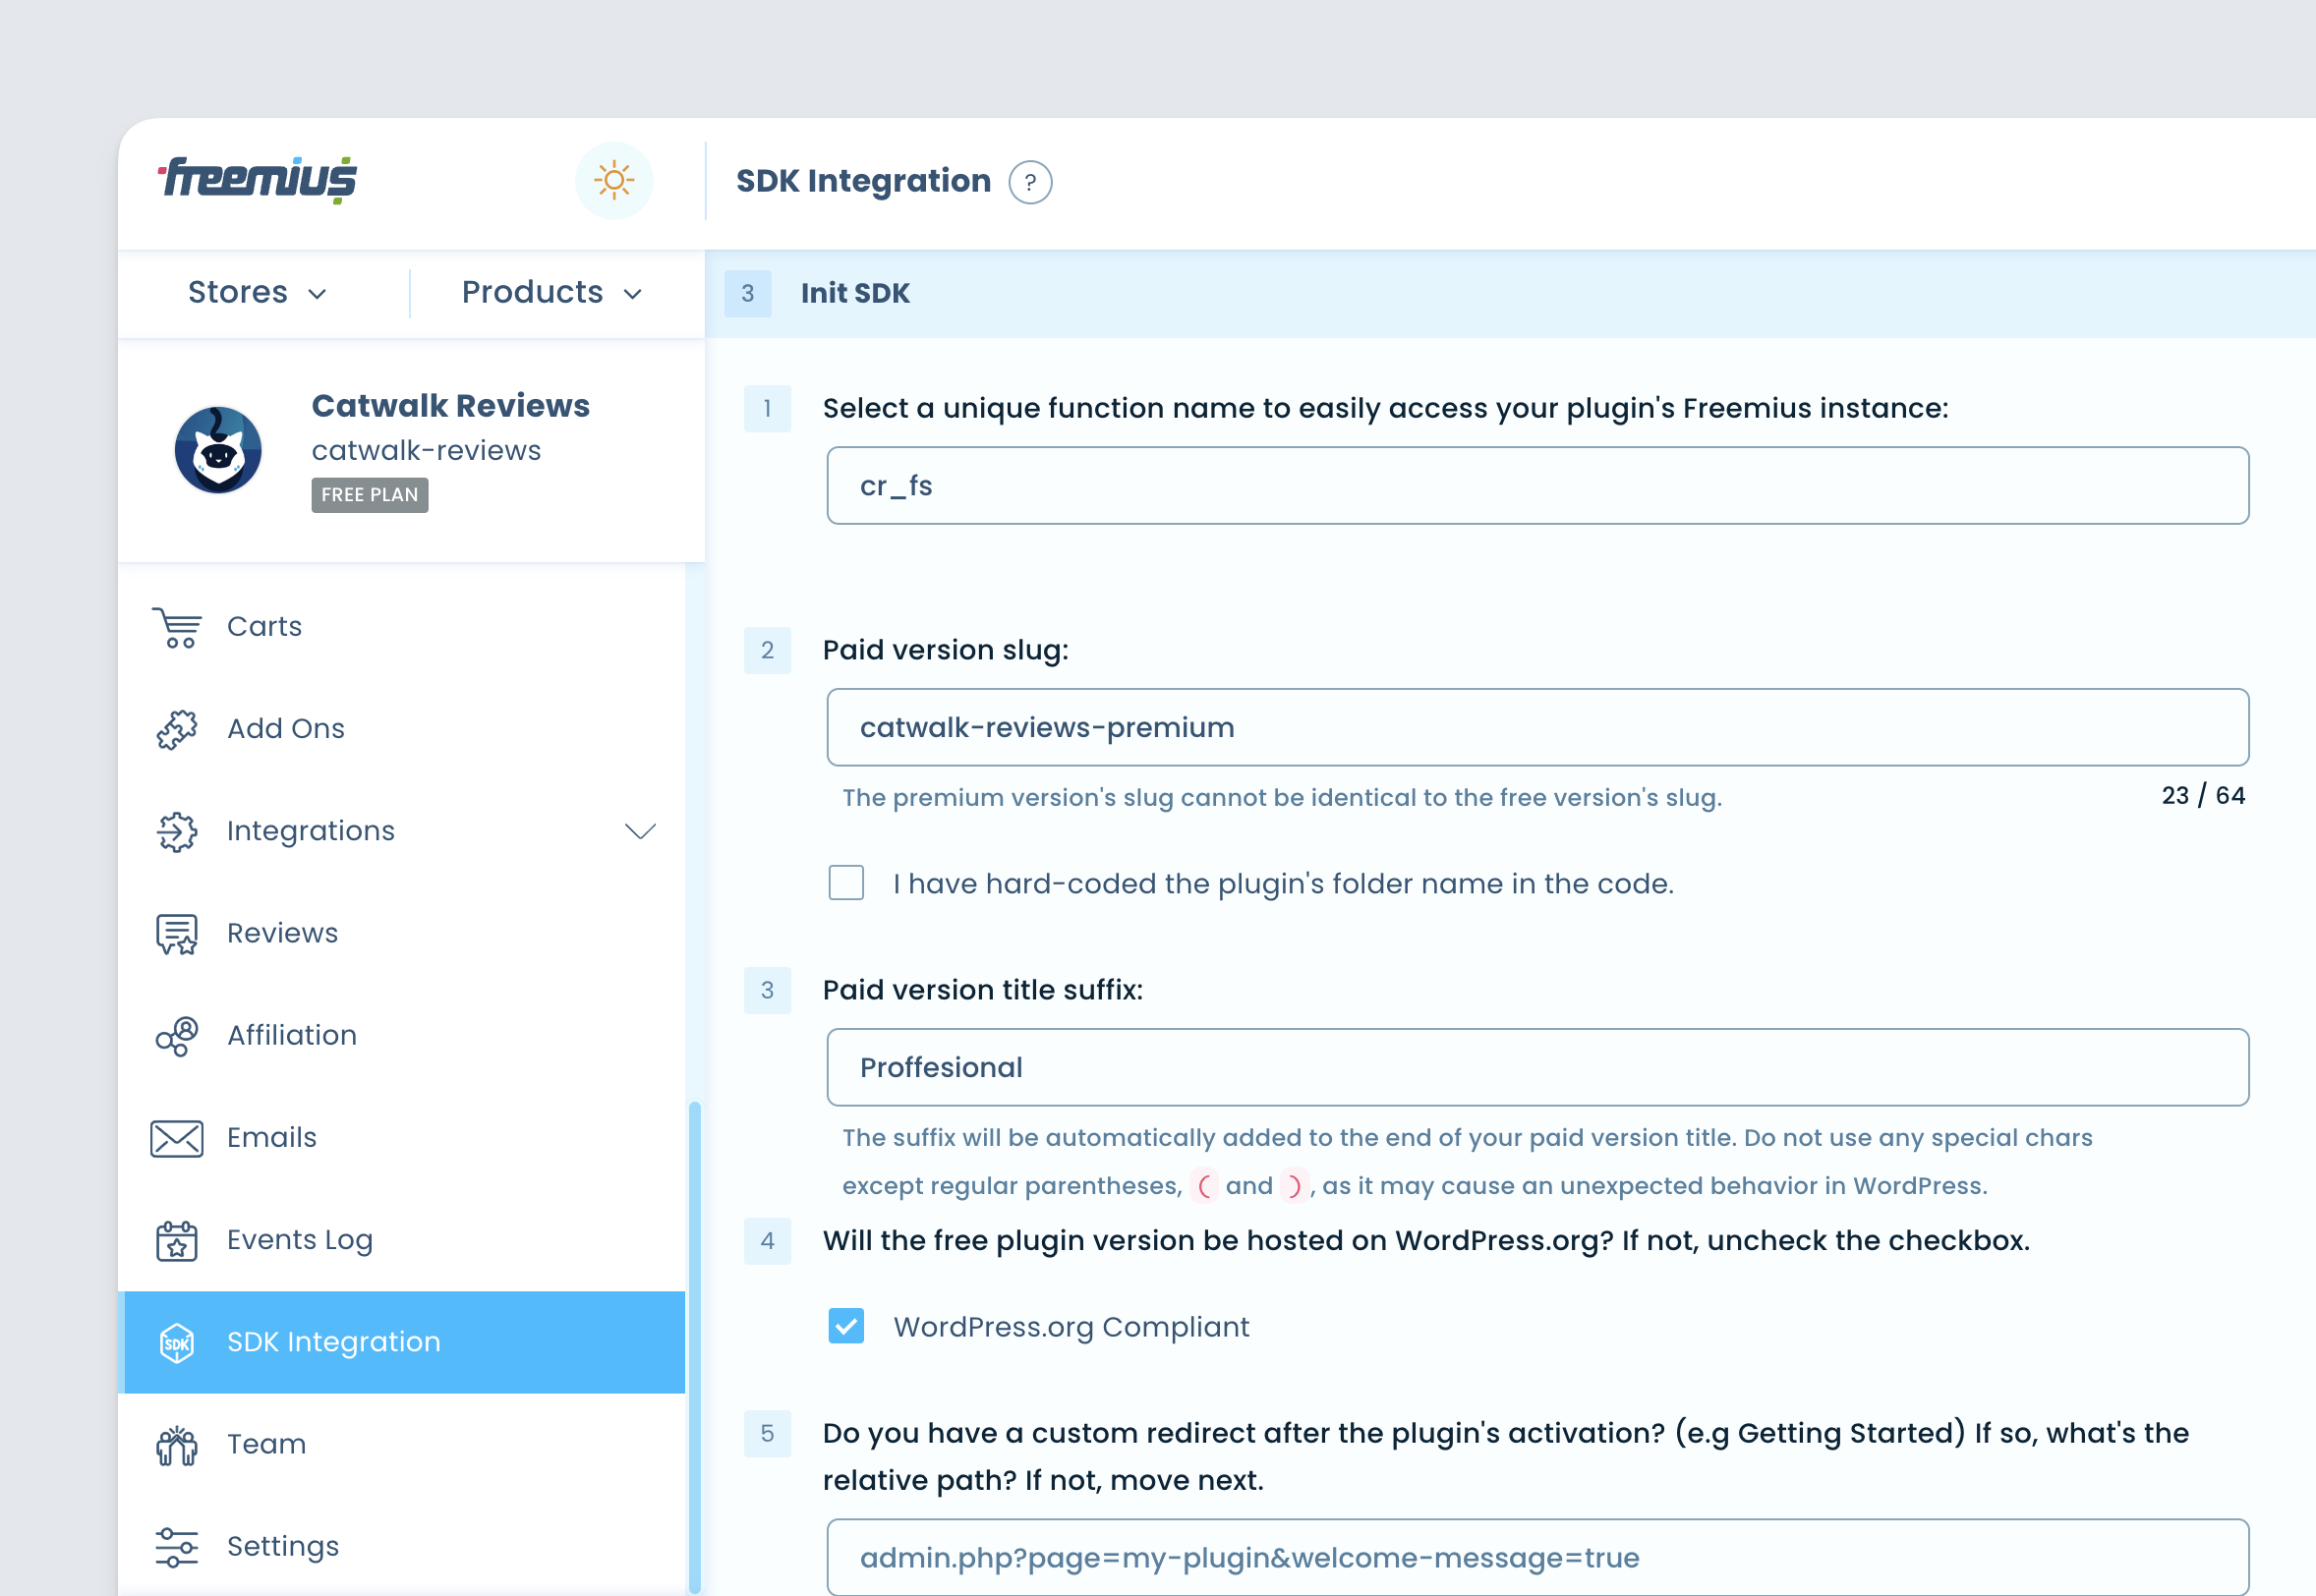
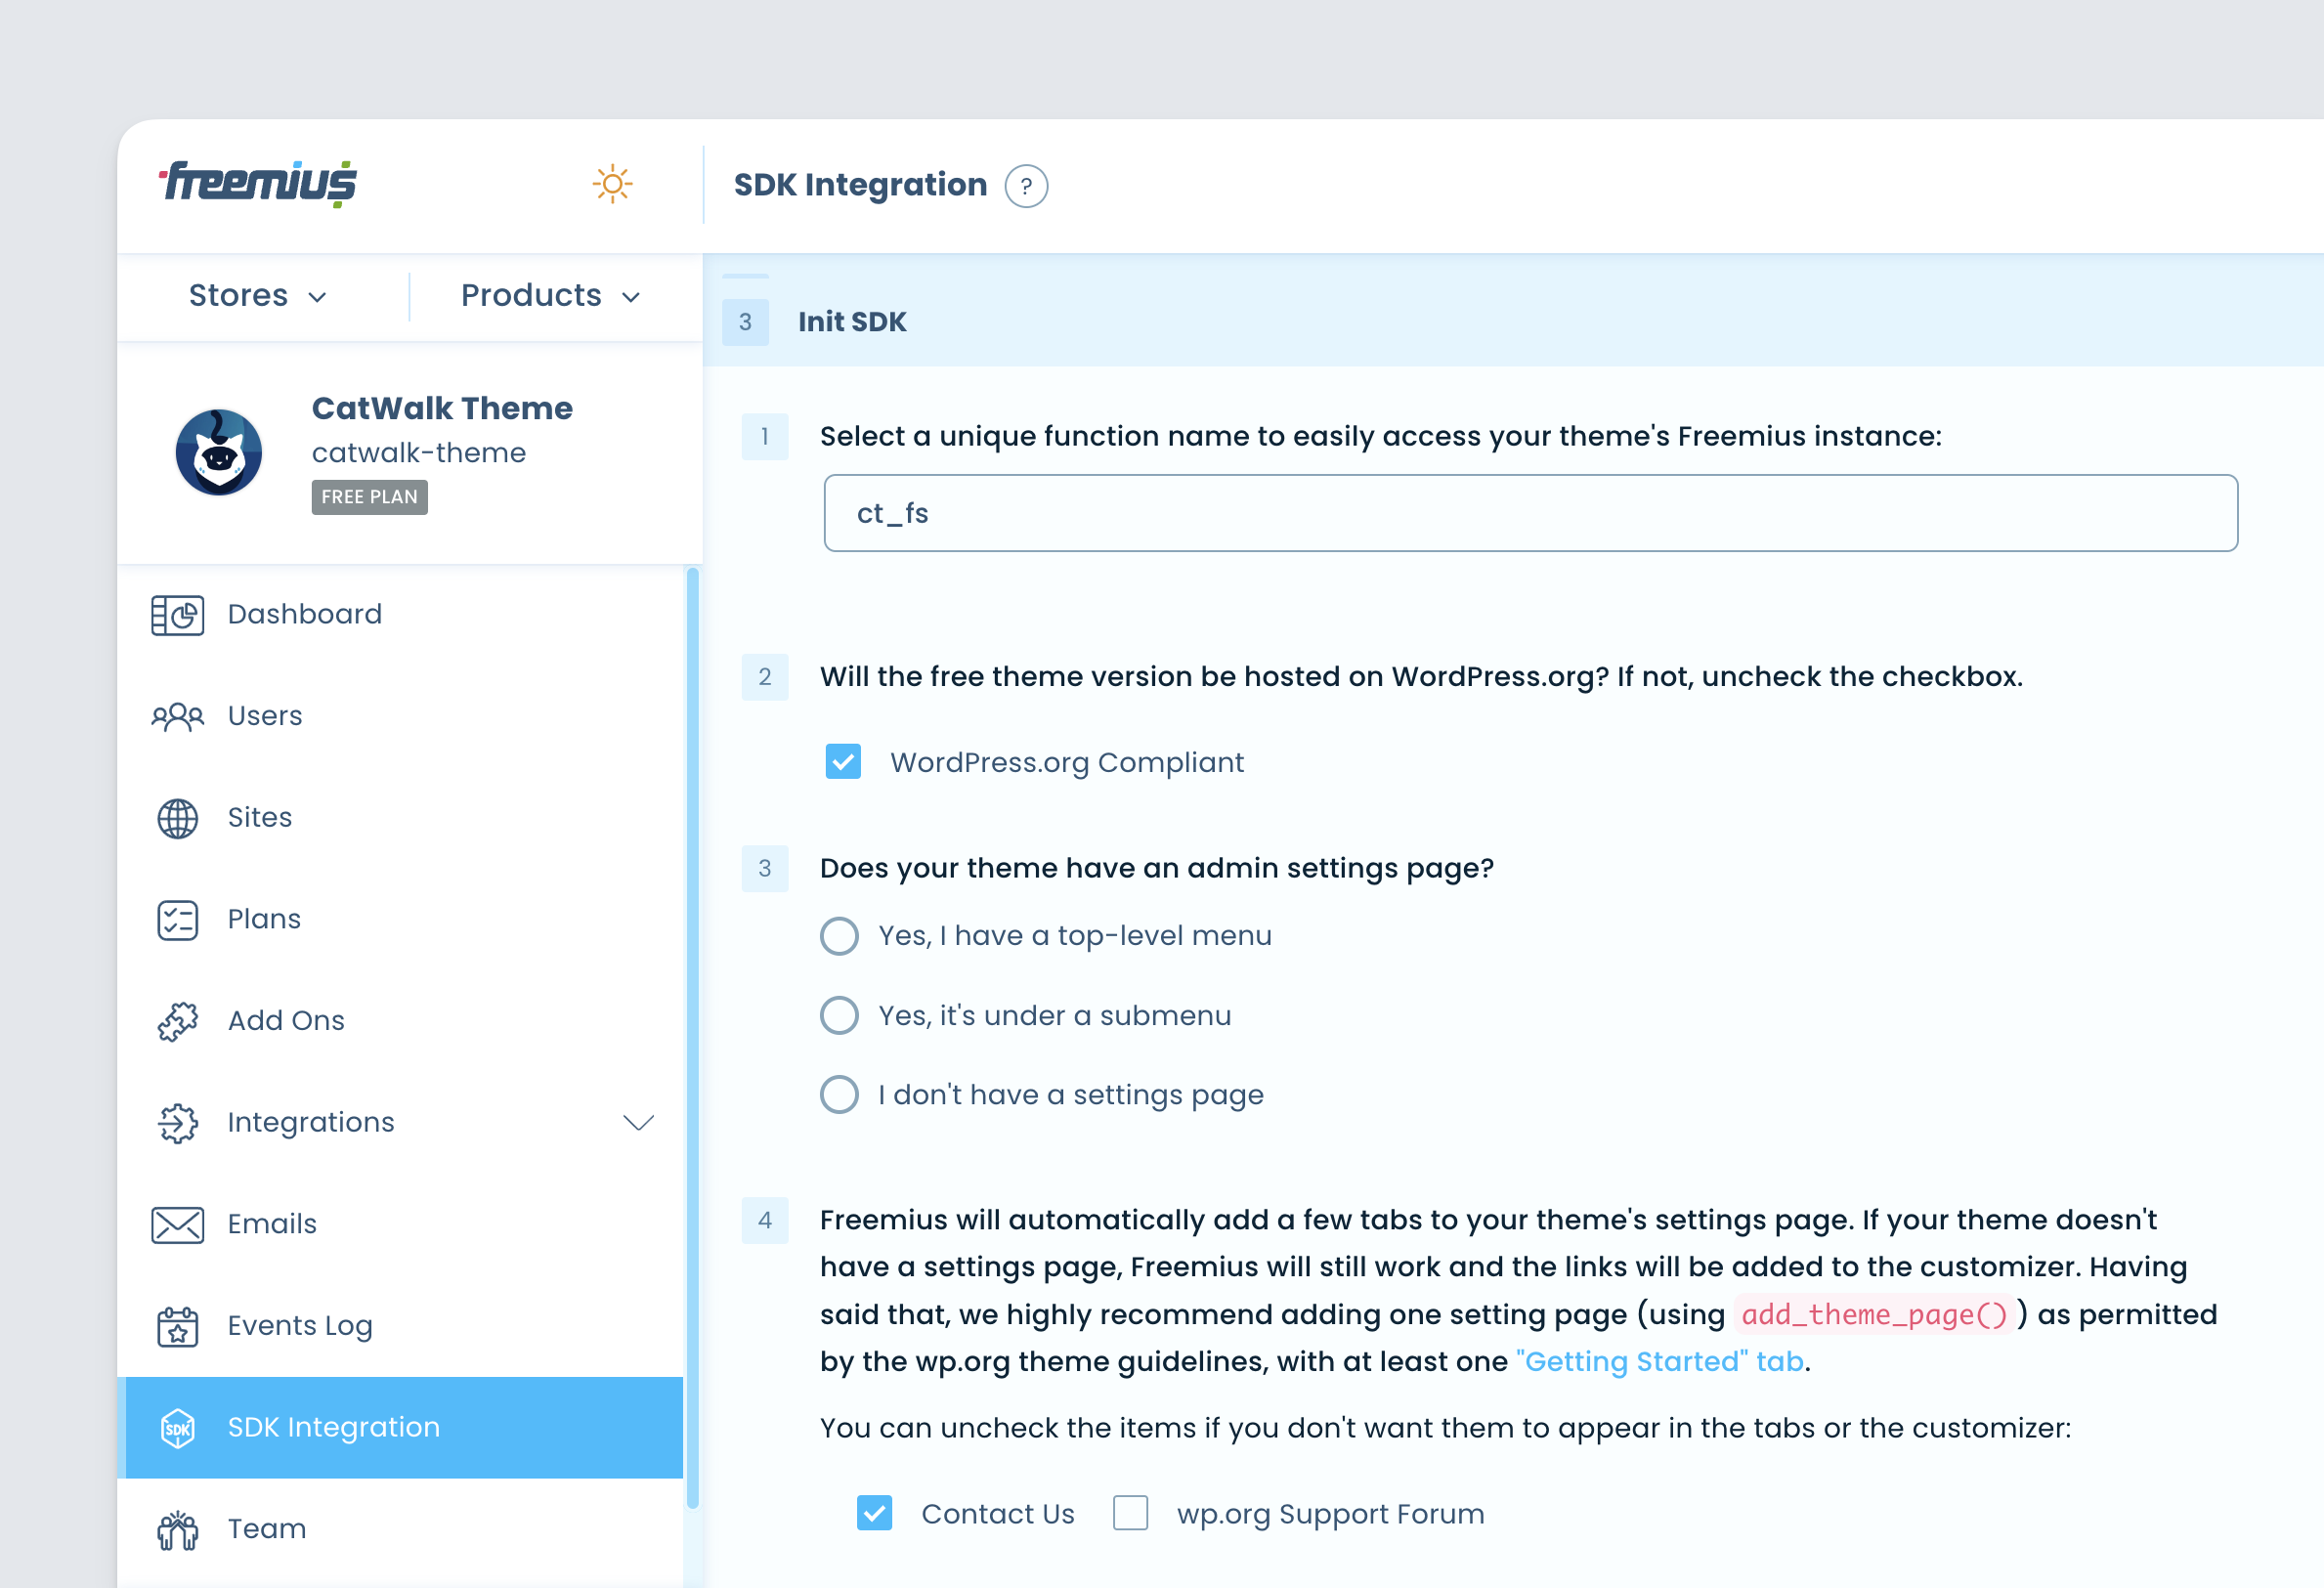
With the WordPress SDK inside your plugin or theme, fill out all the form fields in the Init SDK section. It’s pretty straightforward as each field is self-explanatory, but if you have questions, please email us or ask for details in the #integration channel in our Freemius Slack.

Note: The SDK integration page screenshot above is for a plugin and is very similar to the one for the theme, as you can see in the screenshot below.

Note: There is no save button on the SDK integration page because ALL changes are auto-saved when any field is edited, which regenerates the SDK code snippet on demand.
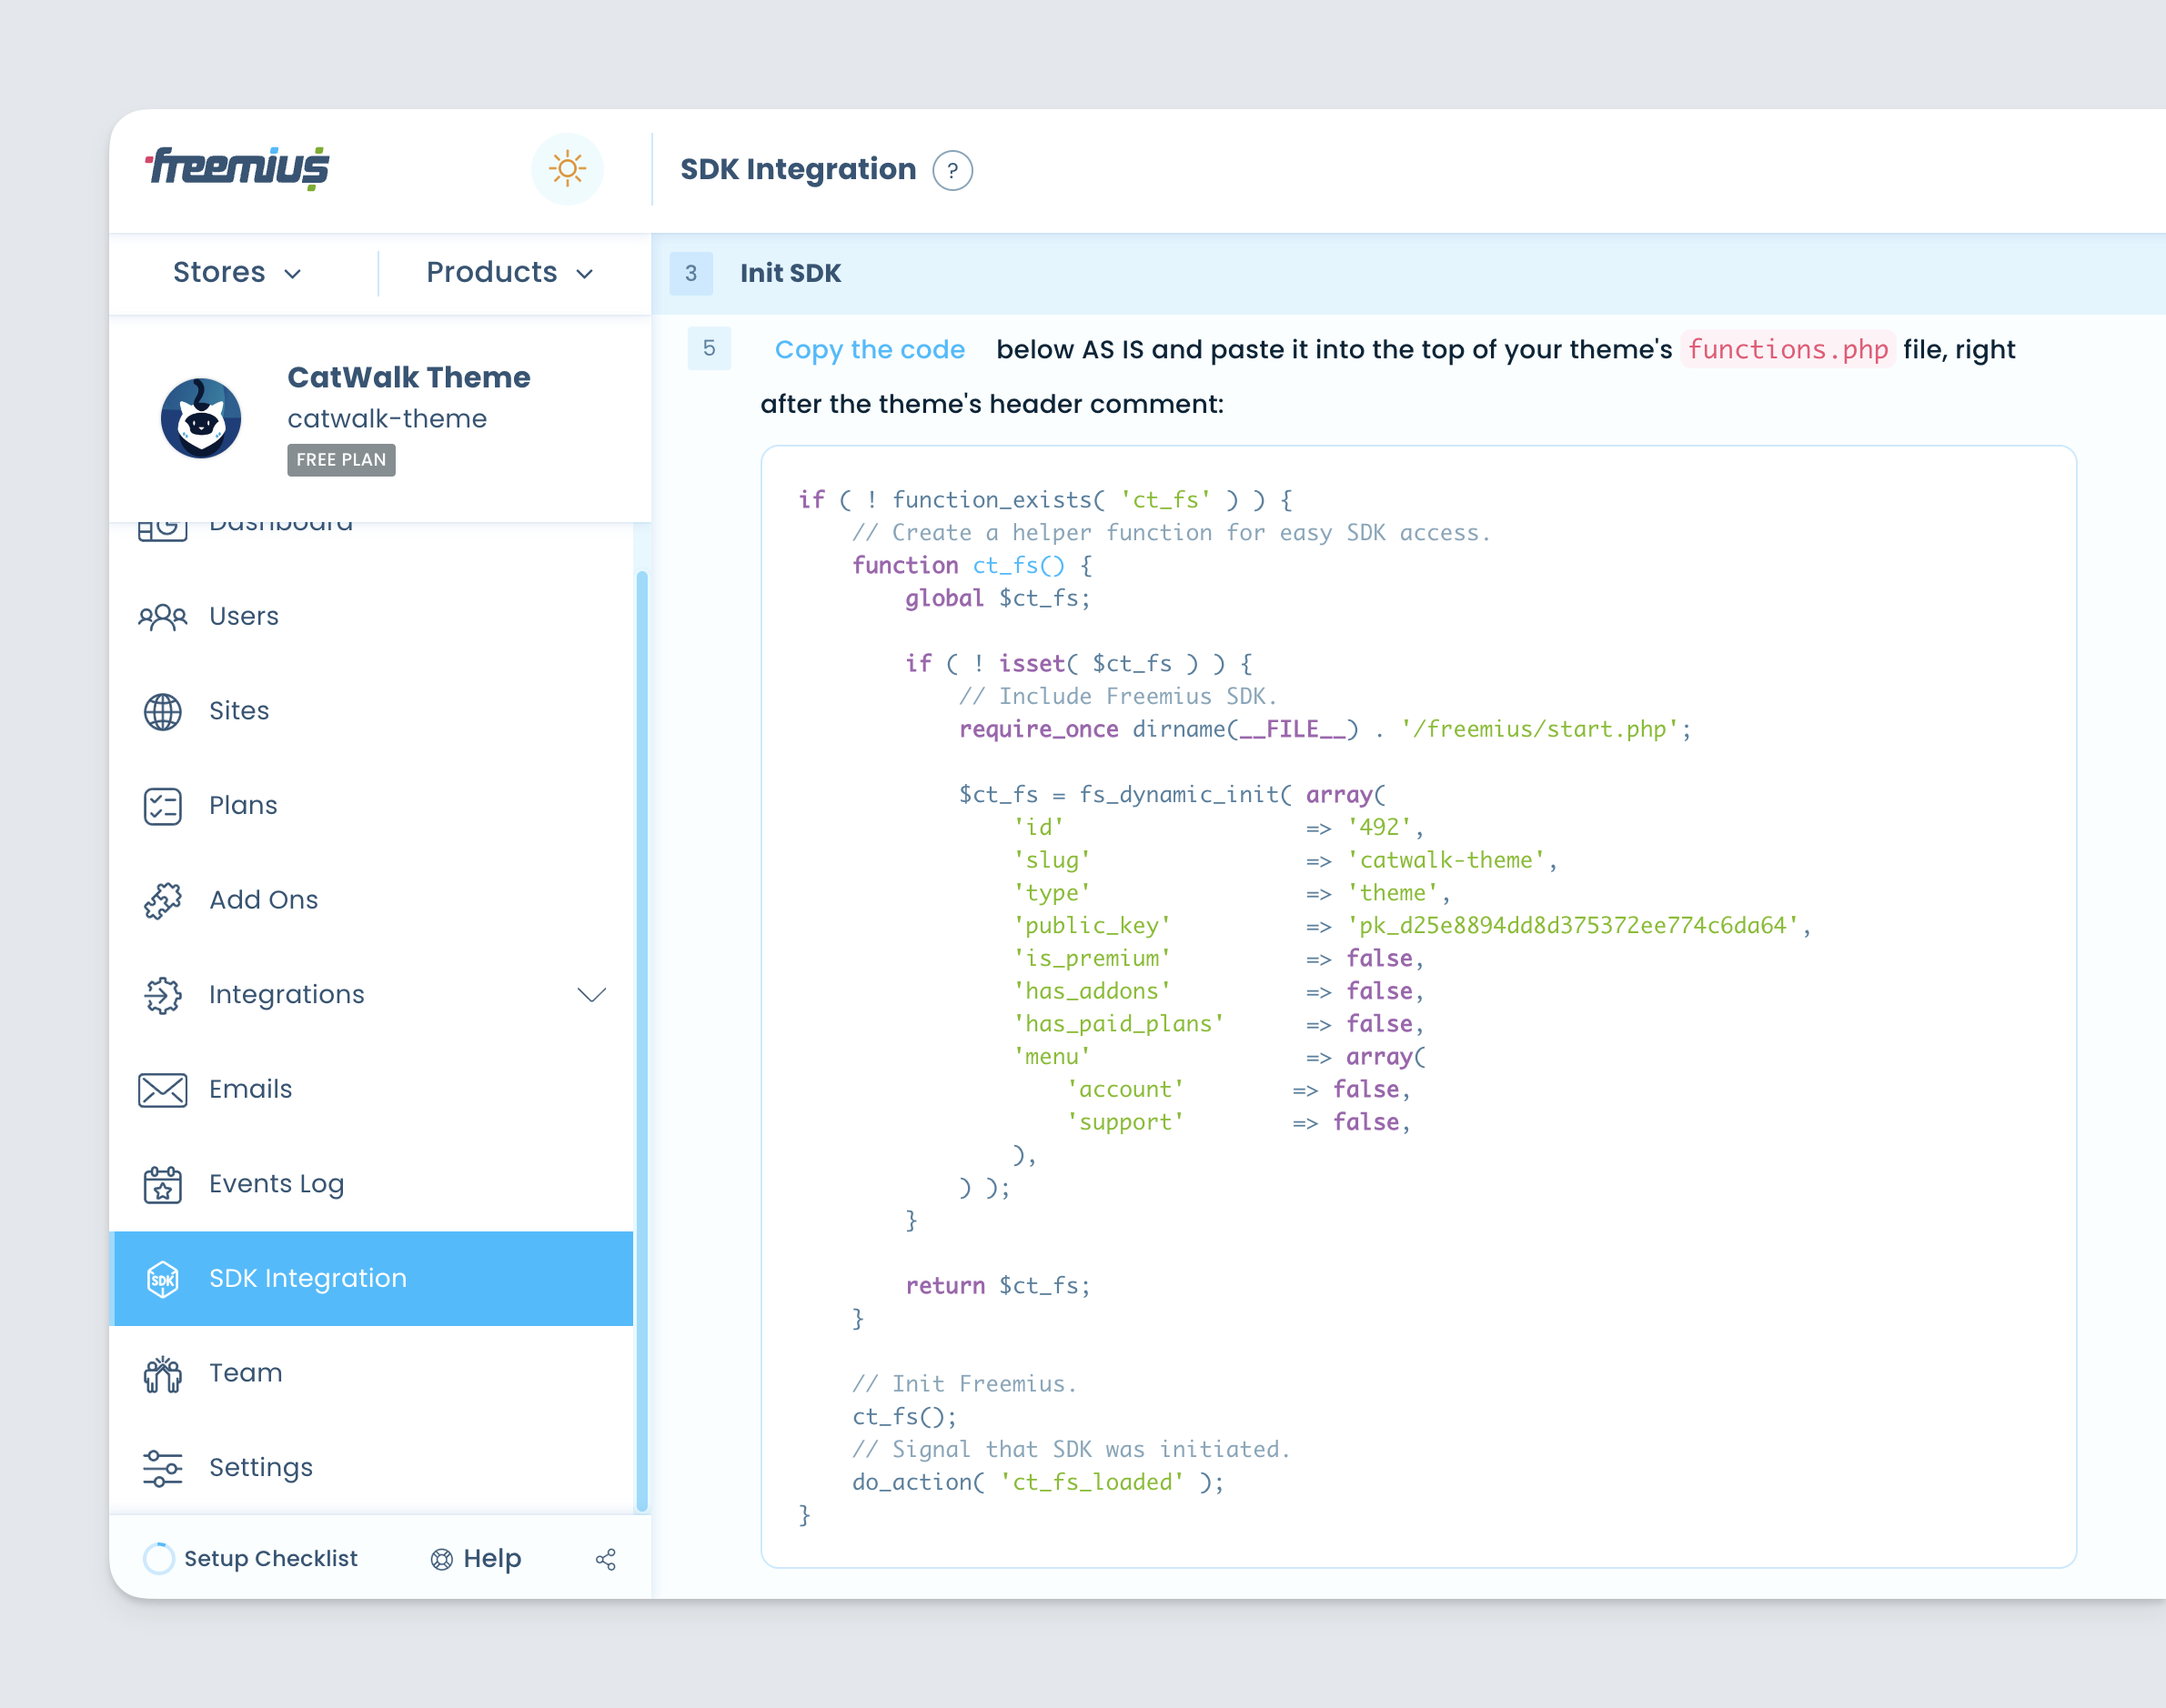
Insert the Auto-Generated SDK Integration Snippet
Once you’ve filled out the fields and created your pricing plans, the next step is to add the auto-generated SDK integration snippet to the plugin’s main file or theme’s function.php file.

Designate Your Premium Only Code
The last step in the integration process is to designate sections of your code that are premium-only so that Freemius knows what features are associated with each plan.
The benefit of this is that you can manage a single codebase and use the deployment feature to effectively “strip” premium-only features out of your Free version for easy deployment on WordPress.org. This way, you don’t have to manage two versions of your product separately.
There are various methods available to specify your premium code. For PHP, JavaScript and CSS code you can wrap specific sections of code with the corresponding premium logic.
This is usually in the form of conditional statements for PHP code and special meta comments for JavaScript and CSS. You can also choose to exclude entire files and folders from specific plans. This gives you a lot of flexibility in how to define premium-only features in your plugin or theme.
In addition, you can selectively ignore individual files and entire folders that should be included in all plans. This is ideal for 3rd party libraries (e.g. your vendor folder).
You can view the full range of functionality for designating premium-only sections of code with Freemius logic here.
Once completed, this step forms the full premium version of your plugin or theme. This deployment logic is a powerful tool that results in a very efficient workflow, allowing you to maintain a single codebase.
This tool is core to the Freemius concept, enabling a natural workflow of development and release cycles for both free and premium versions of your product.
If you already developed free and premium versions that are fundamentally different, you can either merge the versions into a single code base or ignore the free version generated by Freemius. If you go with the 2nd option, make sure also to integrate the SDK into your free version and set the
is_premiumflag tofalseto indicate the SDK that it is running in the scope of the free version.
