Configure pricing plans for your users, each with distinct billing cycles, prices, number of units (e.g., seats, devices, credits), currencies and feature sets.
Click here to set up WordPress and other products pricing.
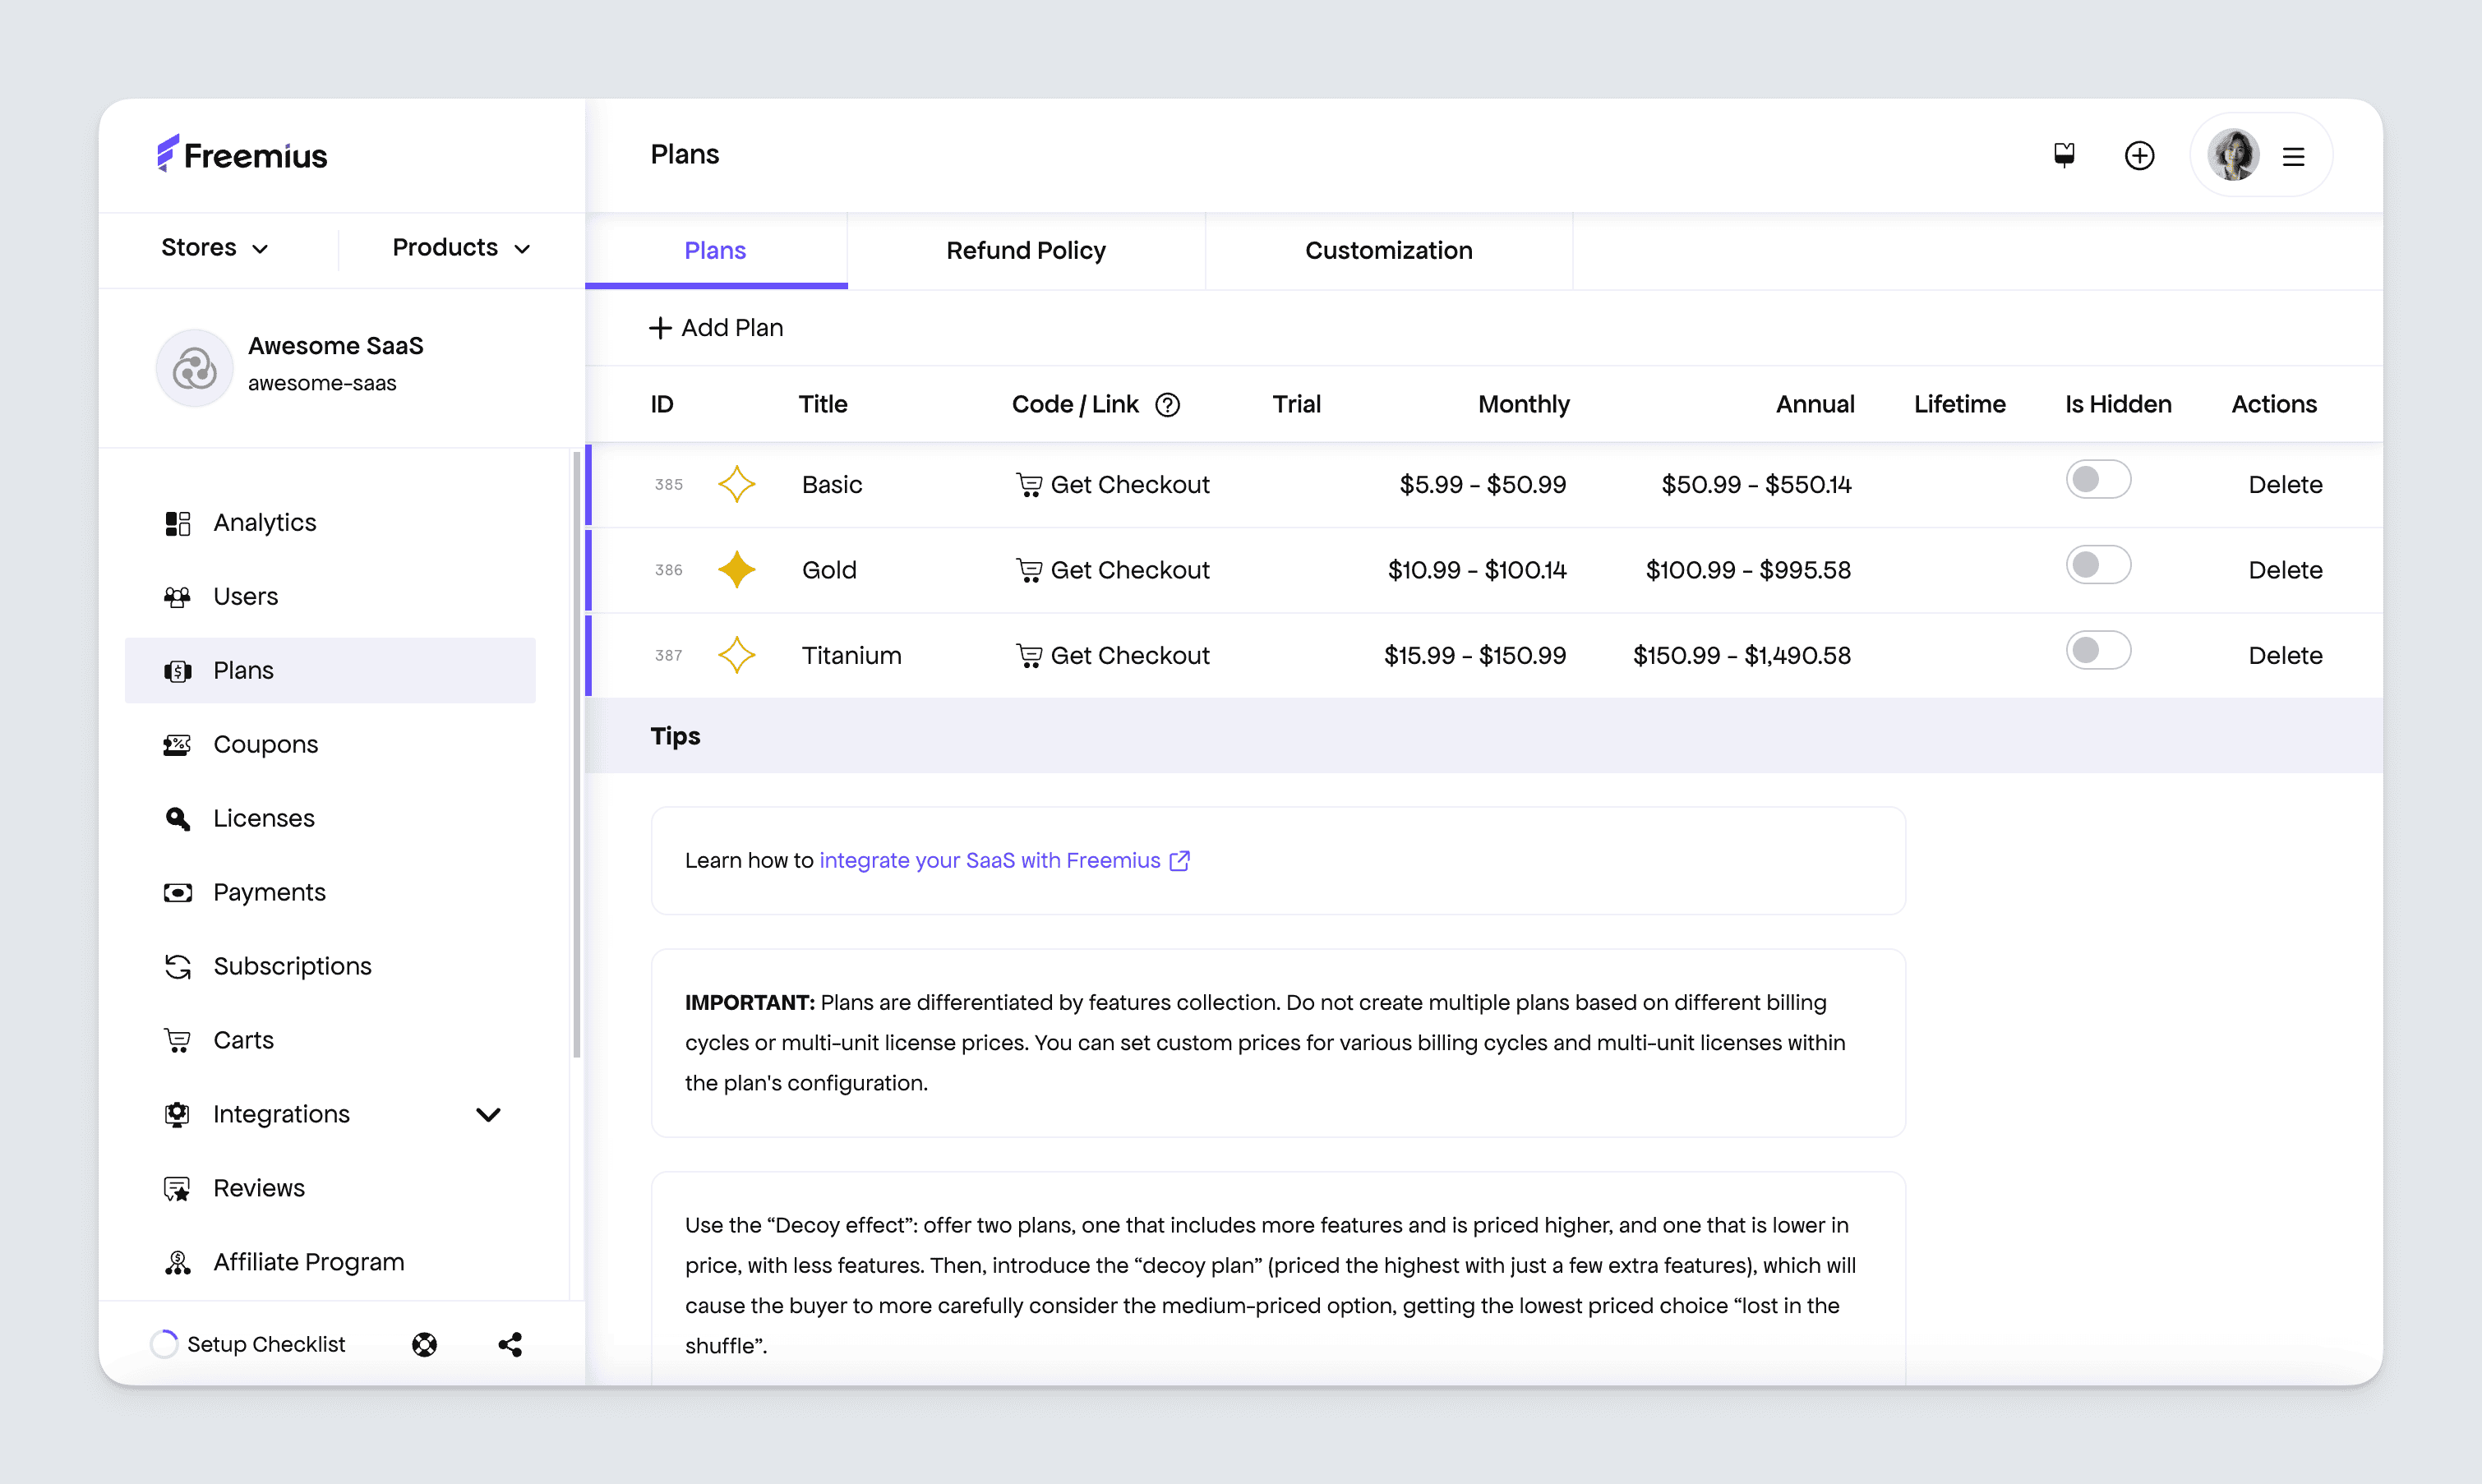
Setting up plans
To create your first plan:
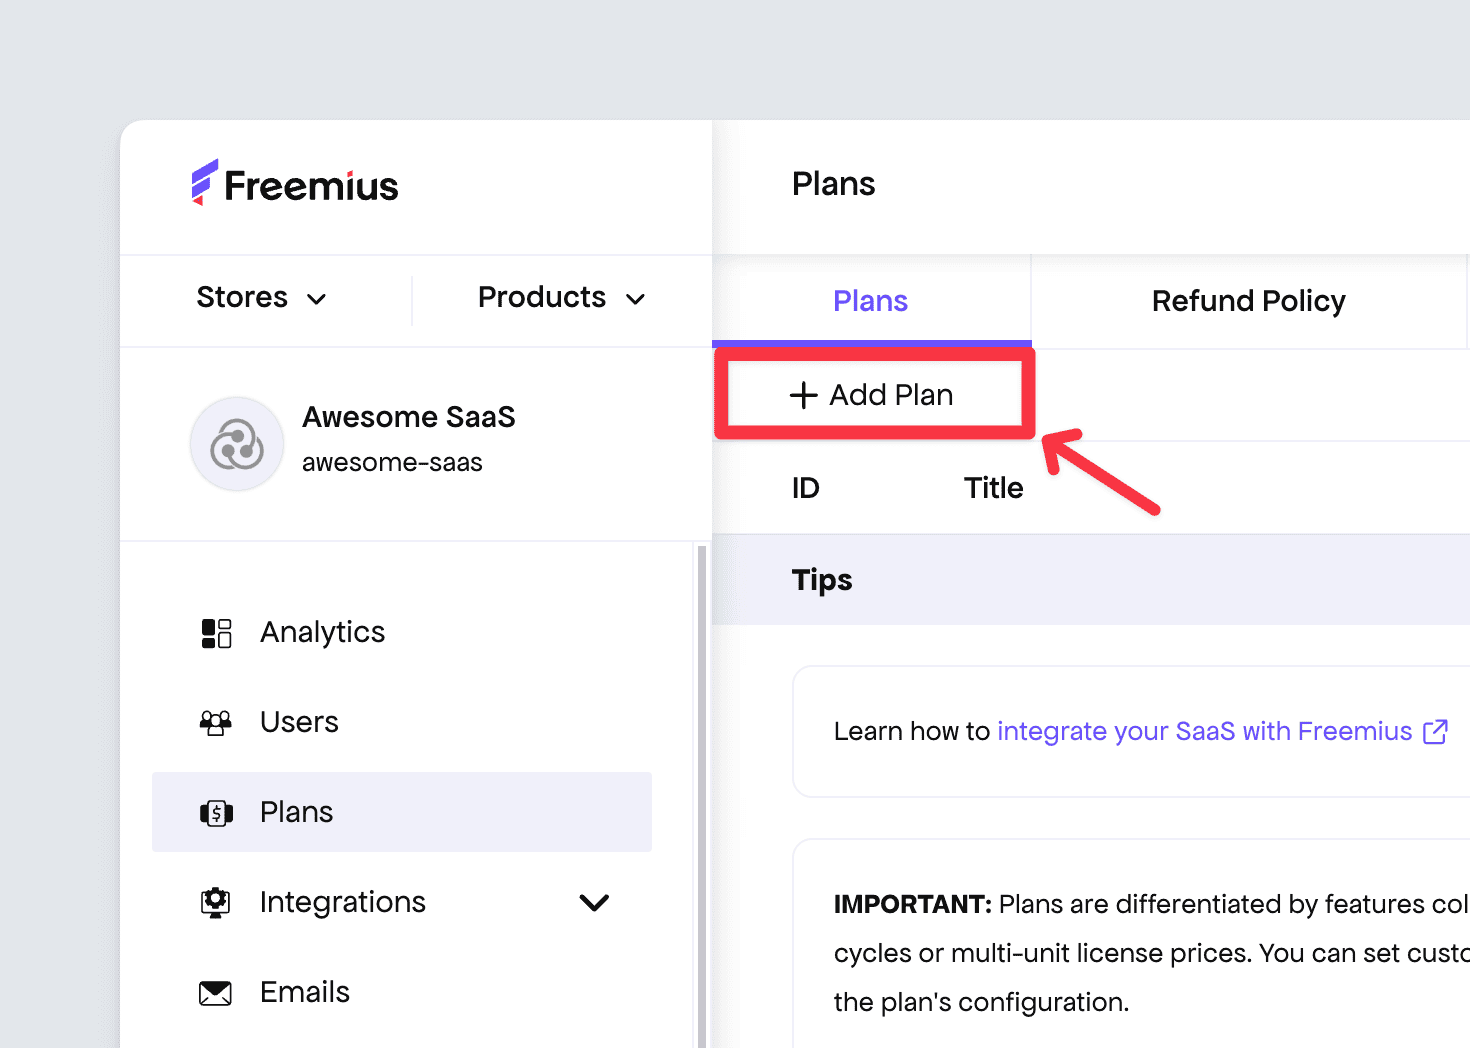
- Log in to the Developer Dashboard.
- Navigate to the Plans page.
- Click the Add Plan button to create a new plan.
- Then insert a specify a title and unique name e.g., ‘Pro’ and ‘pro’.
- Enter information about the plan such as pricing for the Single Unit option.
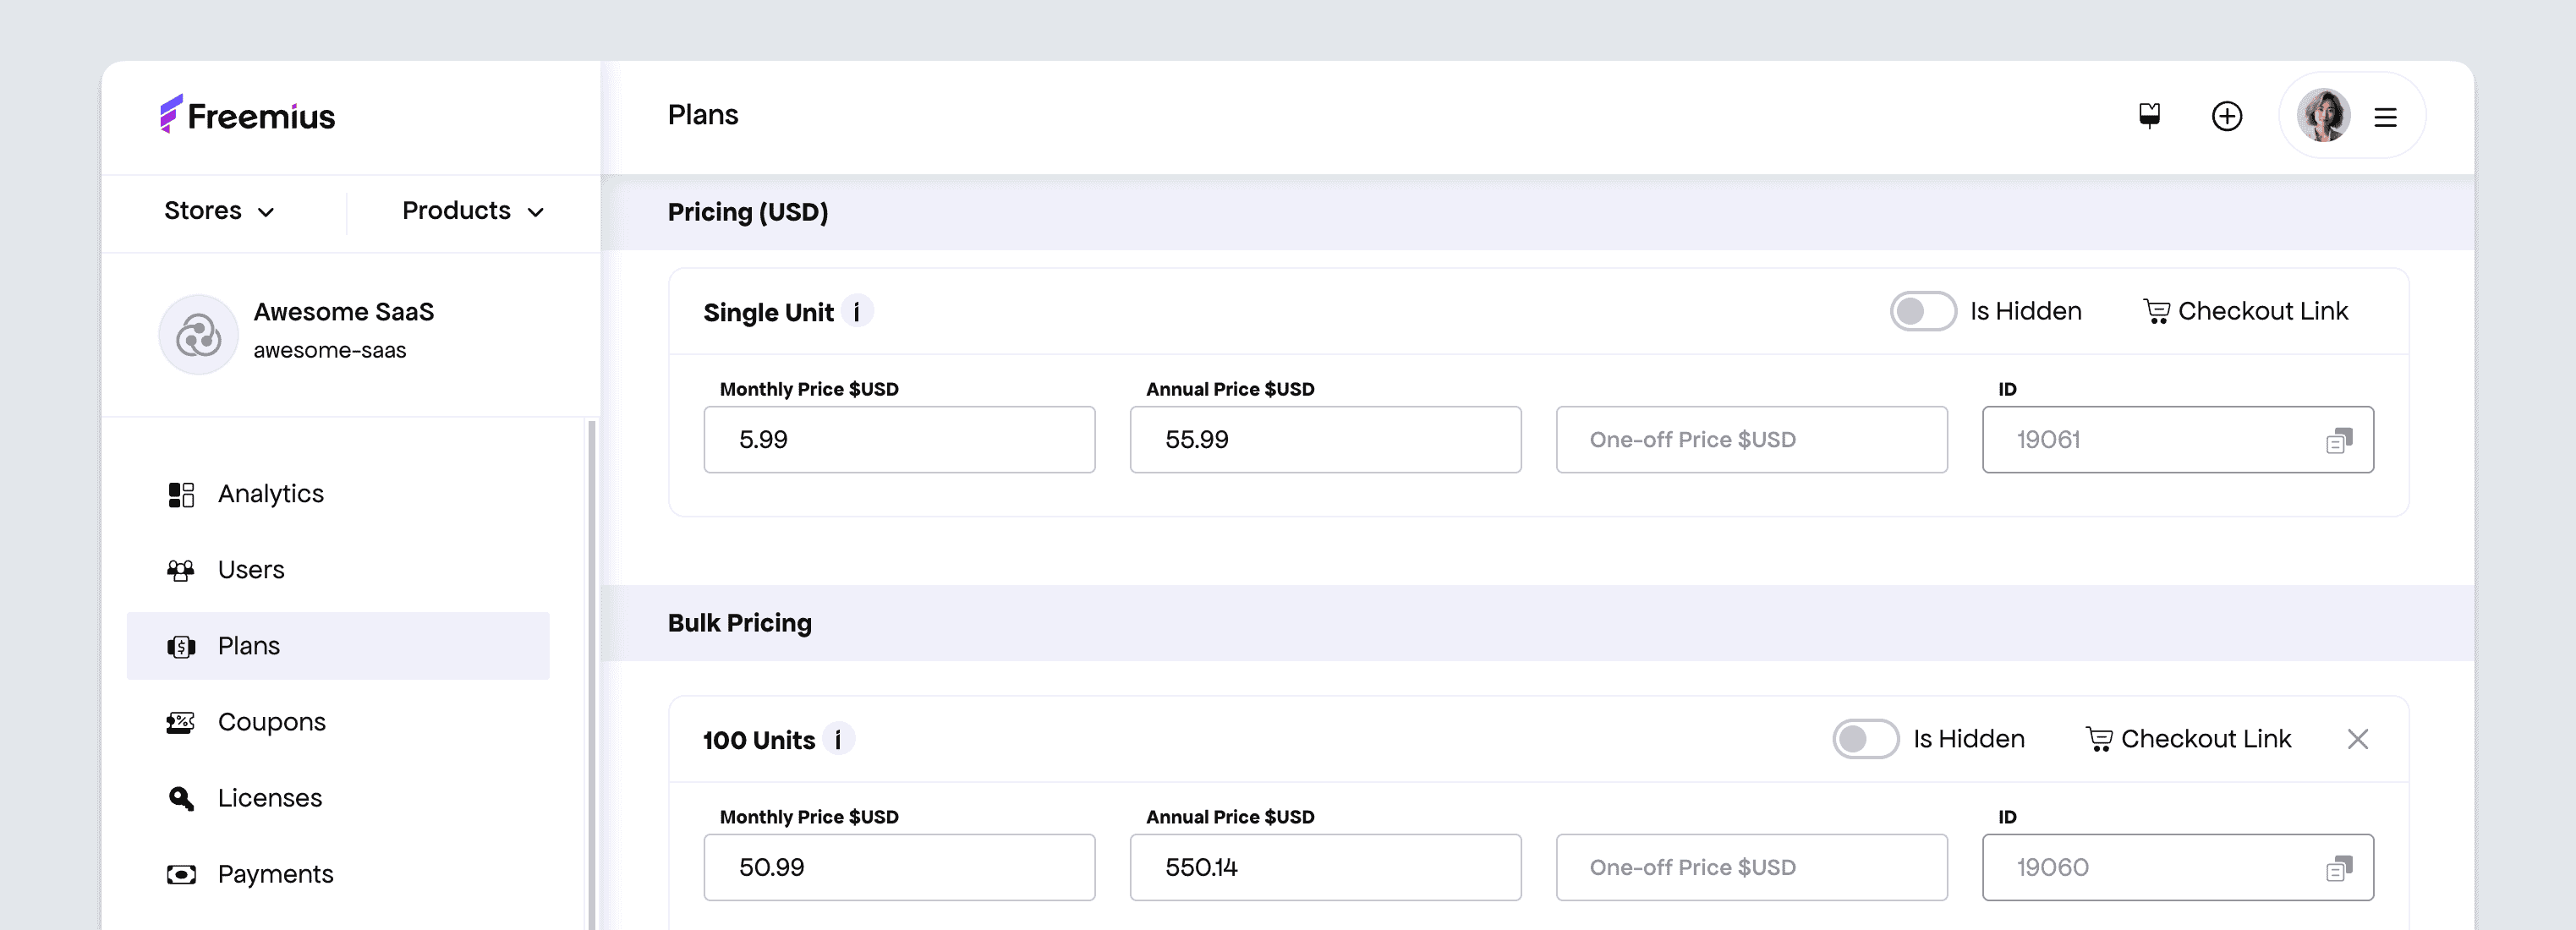
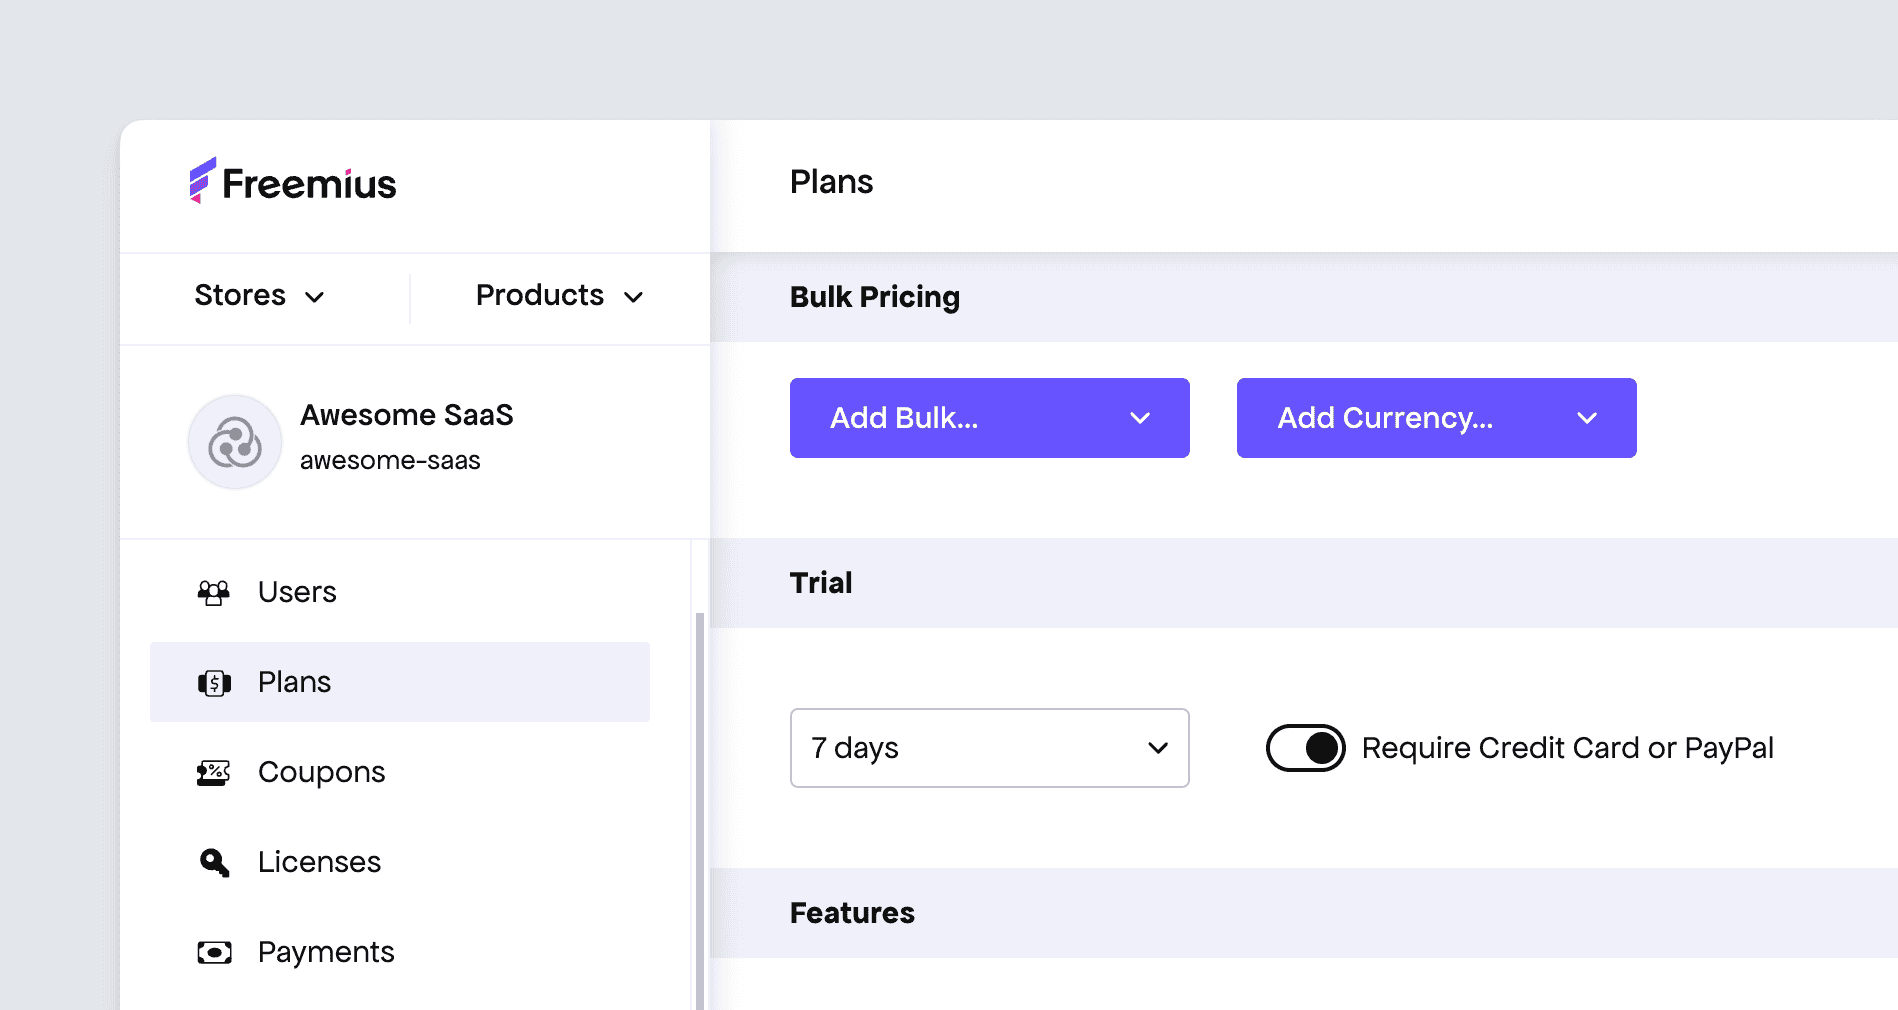
- You can create pricing options for plans that offer more than 1 unit. To do this click Add Bulk and select the number of units, then enter the relevant pricing options.
- Similarly, you can add pricing in other currencies. This is done by clicking Add Currency and select the number of units, then enter the relevant pricing options.
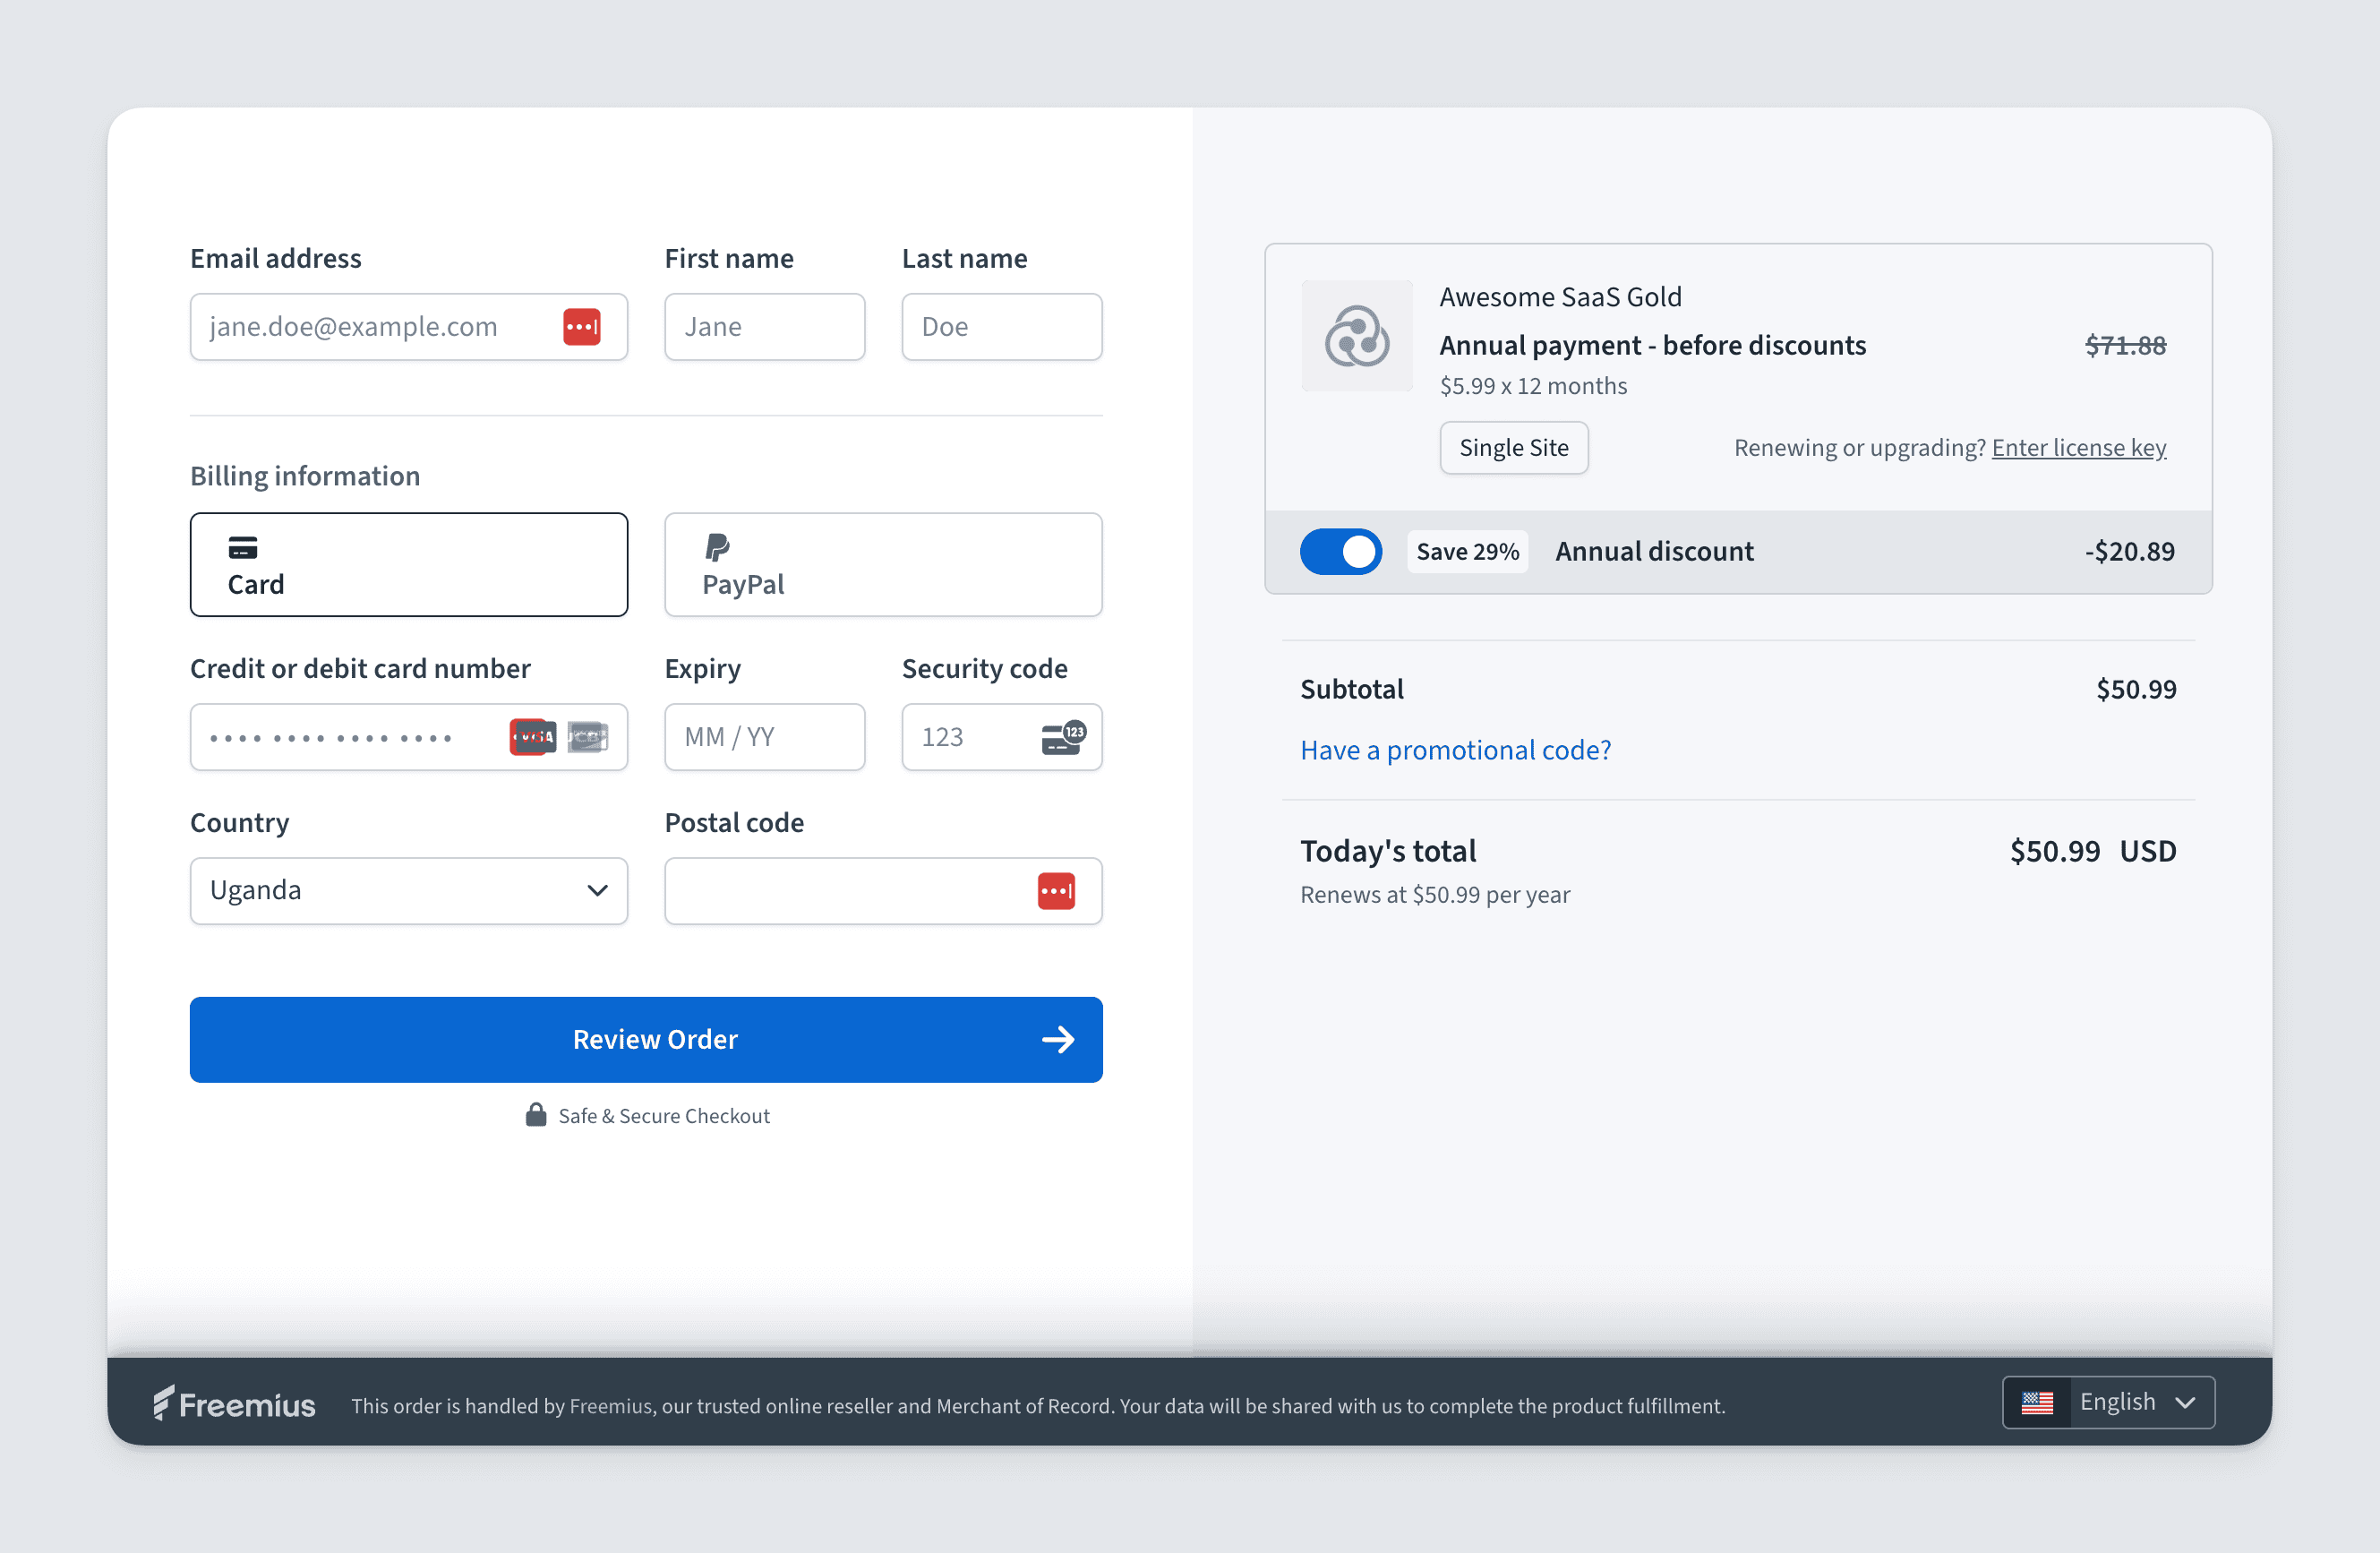
The pricing plans will be displayed in the Freemius Checkout when customers purchase your product, as seen here:
Plans Customization
There are other settings you can fill out to customize your plans, such as:
- Additional currencies
- Free and Paid Trials
- Features
- Refund Policy
- Checkout Confirmation Dialog
- Checkout Success Redirection
- Customize License Unit Label
- Checkout CSS
Free and Paid Trials
Freemius enables you to easily offer free trials for your users, with or without requiring a payment method. Offering a free trial may help you increase your product’s distribution and sales. See the supported trial types.
Configure a Plan’s Features
You can set up the features for each plan.

These can be set up by:
- Navigating to Plans page.
- Click the relevant plan to edit its details.
- Scroll down to the Features section.
- Add the respective feature details. Type the name of the feature and click the “+” button or press enter to add it to the plan. Repeat this step until you’ve added all the required features.
These features can be accessed later using the Features API endpoint.
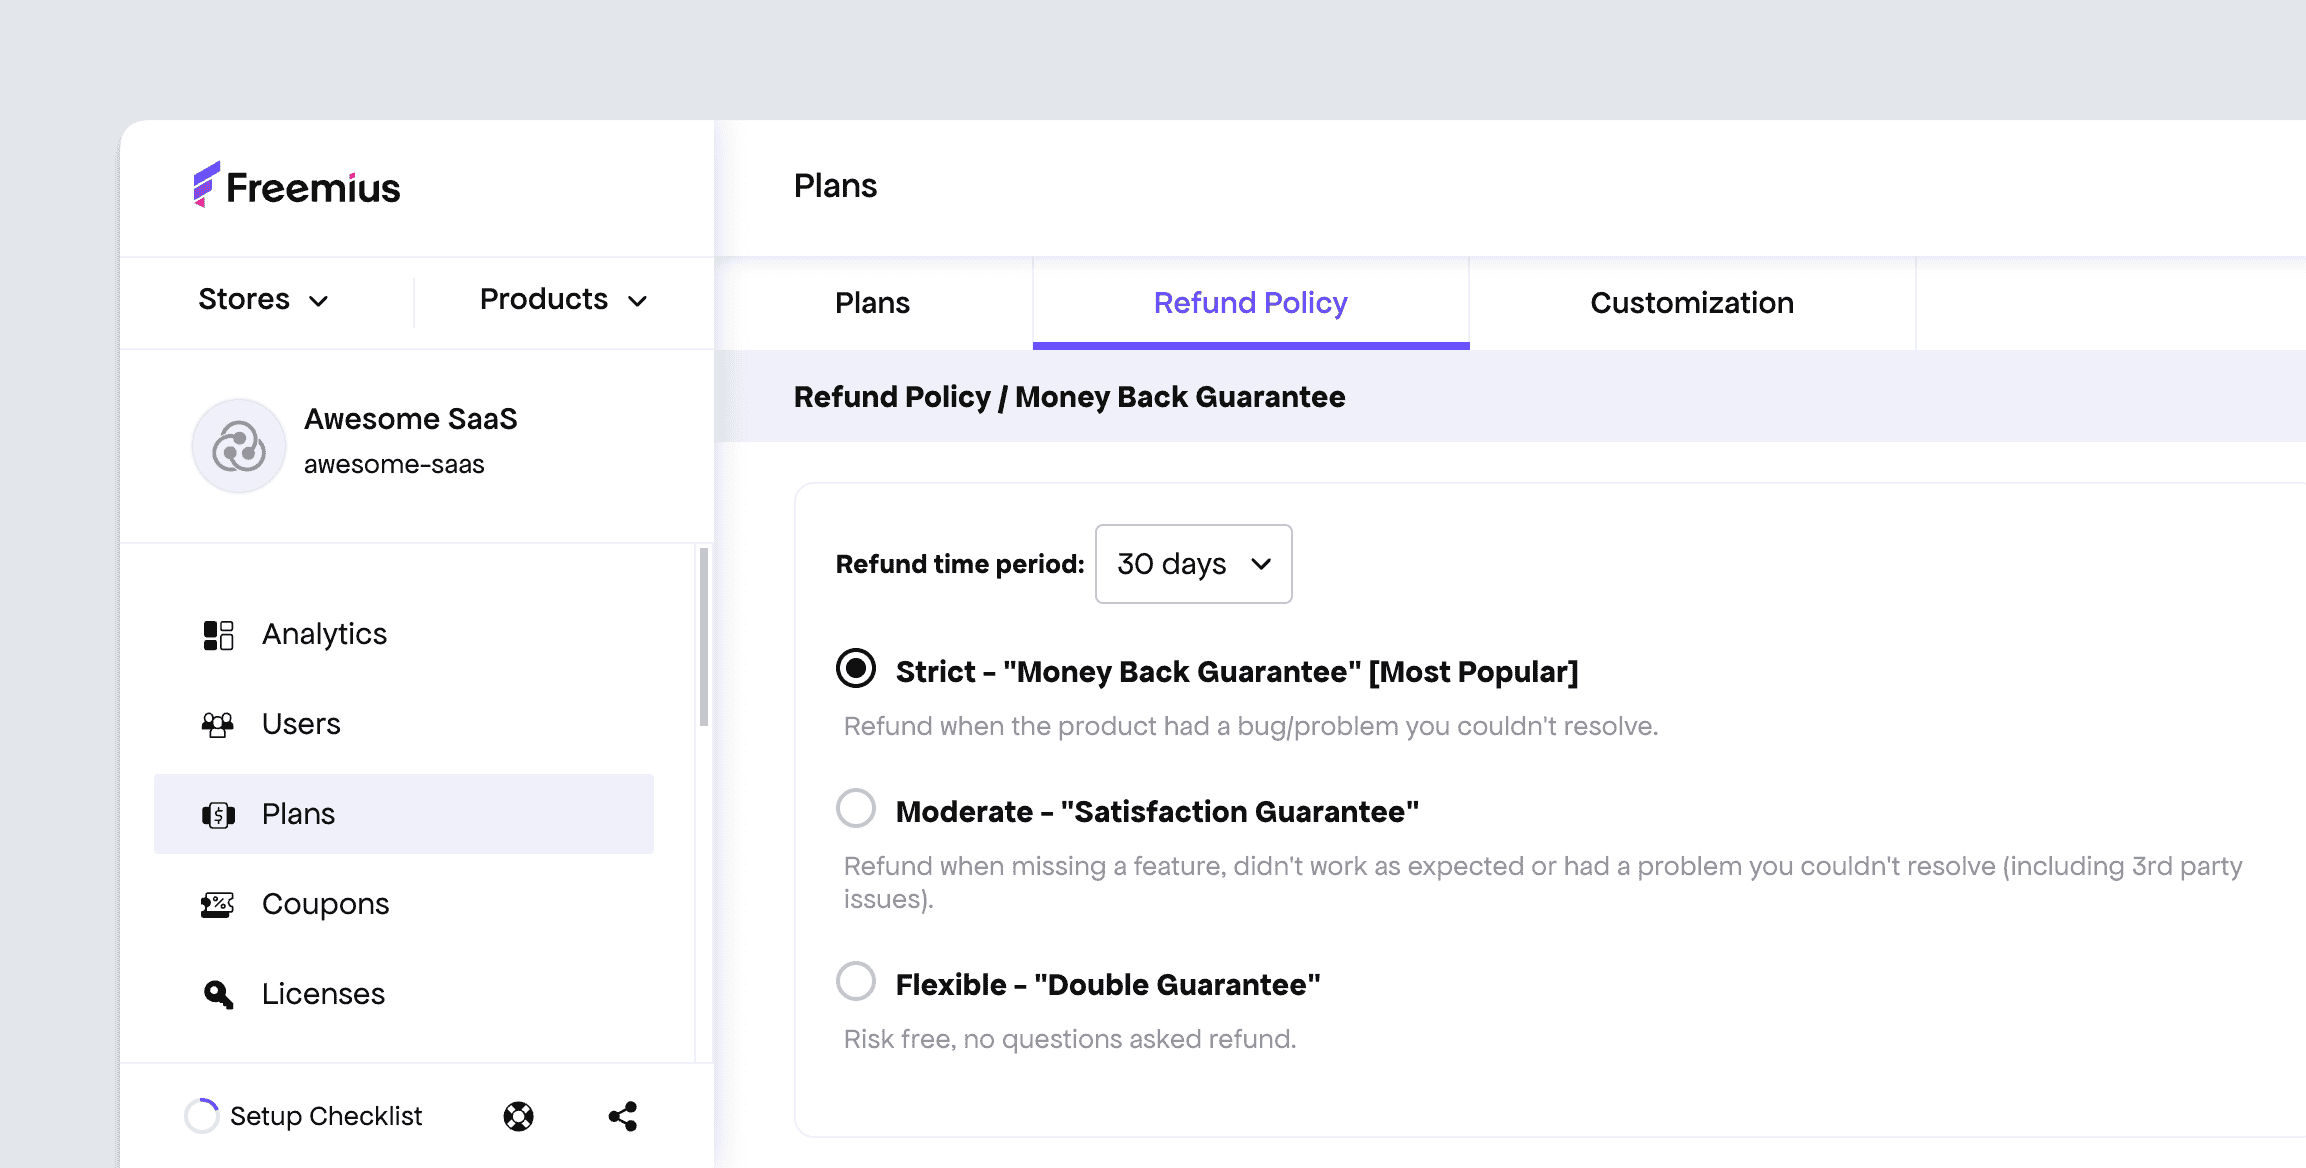
Refund Policy
This enables the setting up the type of refund policy to protect you and the customer. It is accessible via the Plans page. Next, click the Refund Policy tab to reveal the settings.
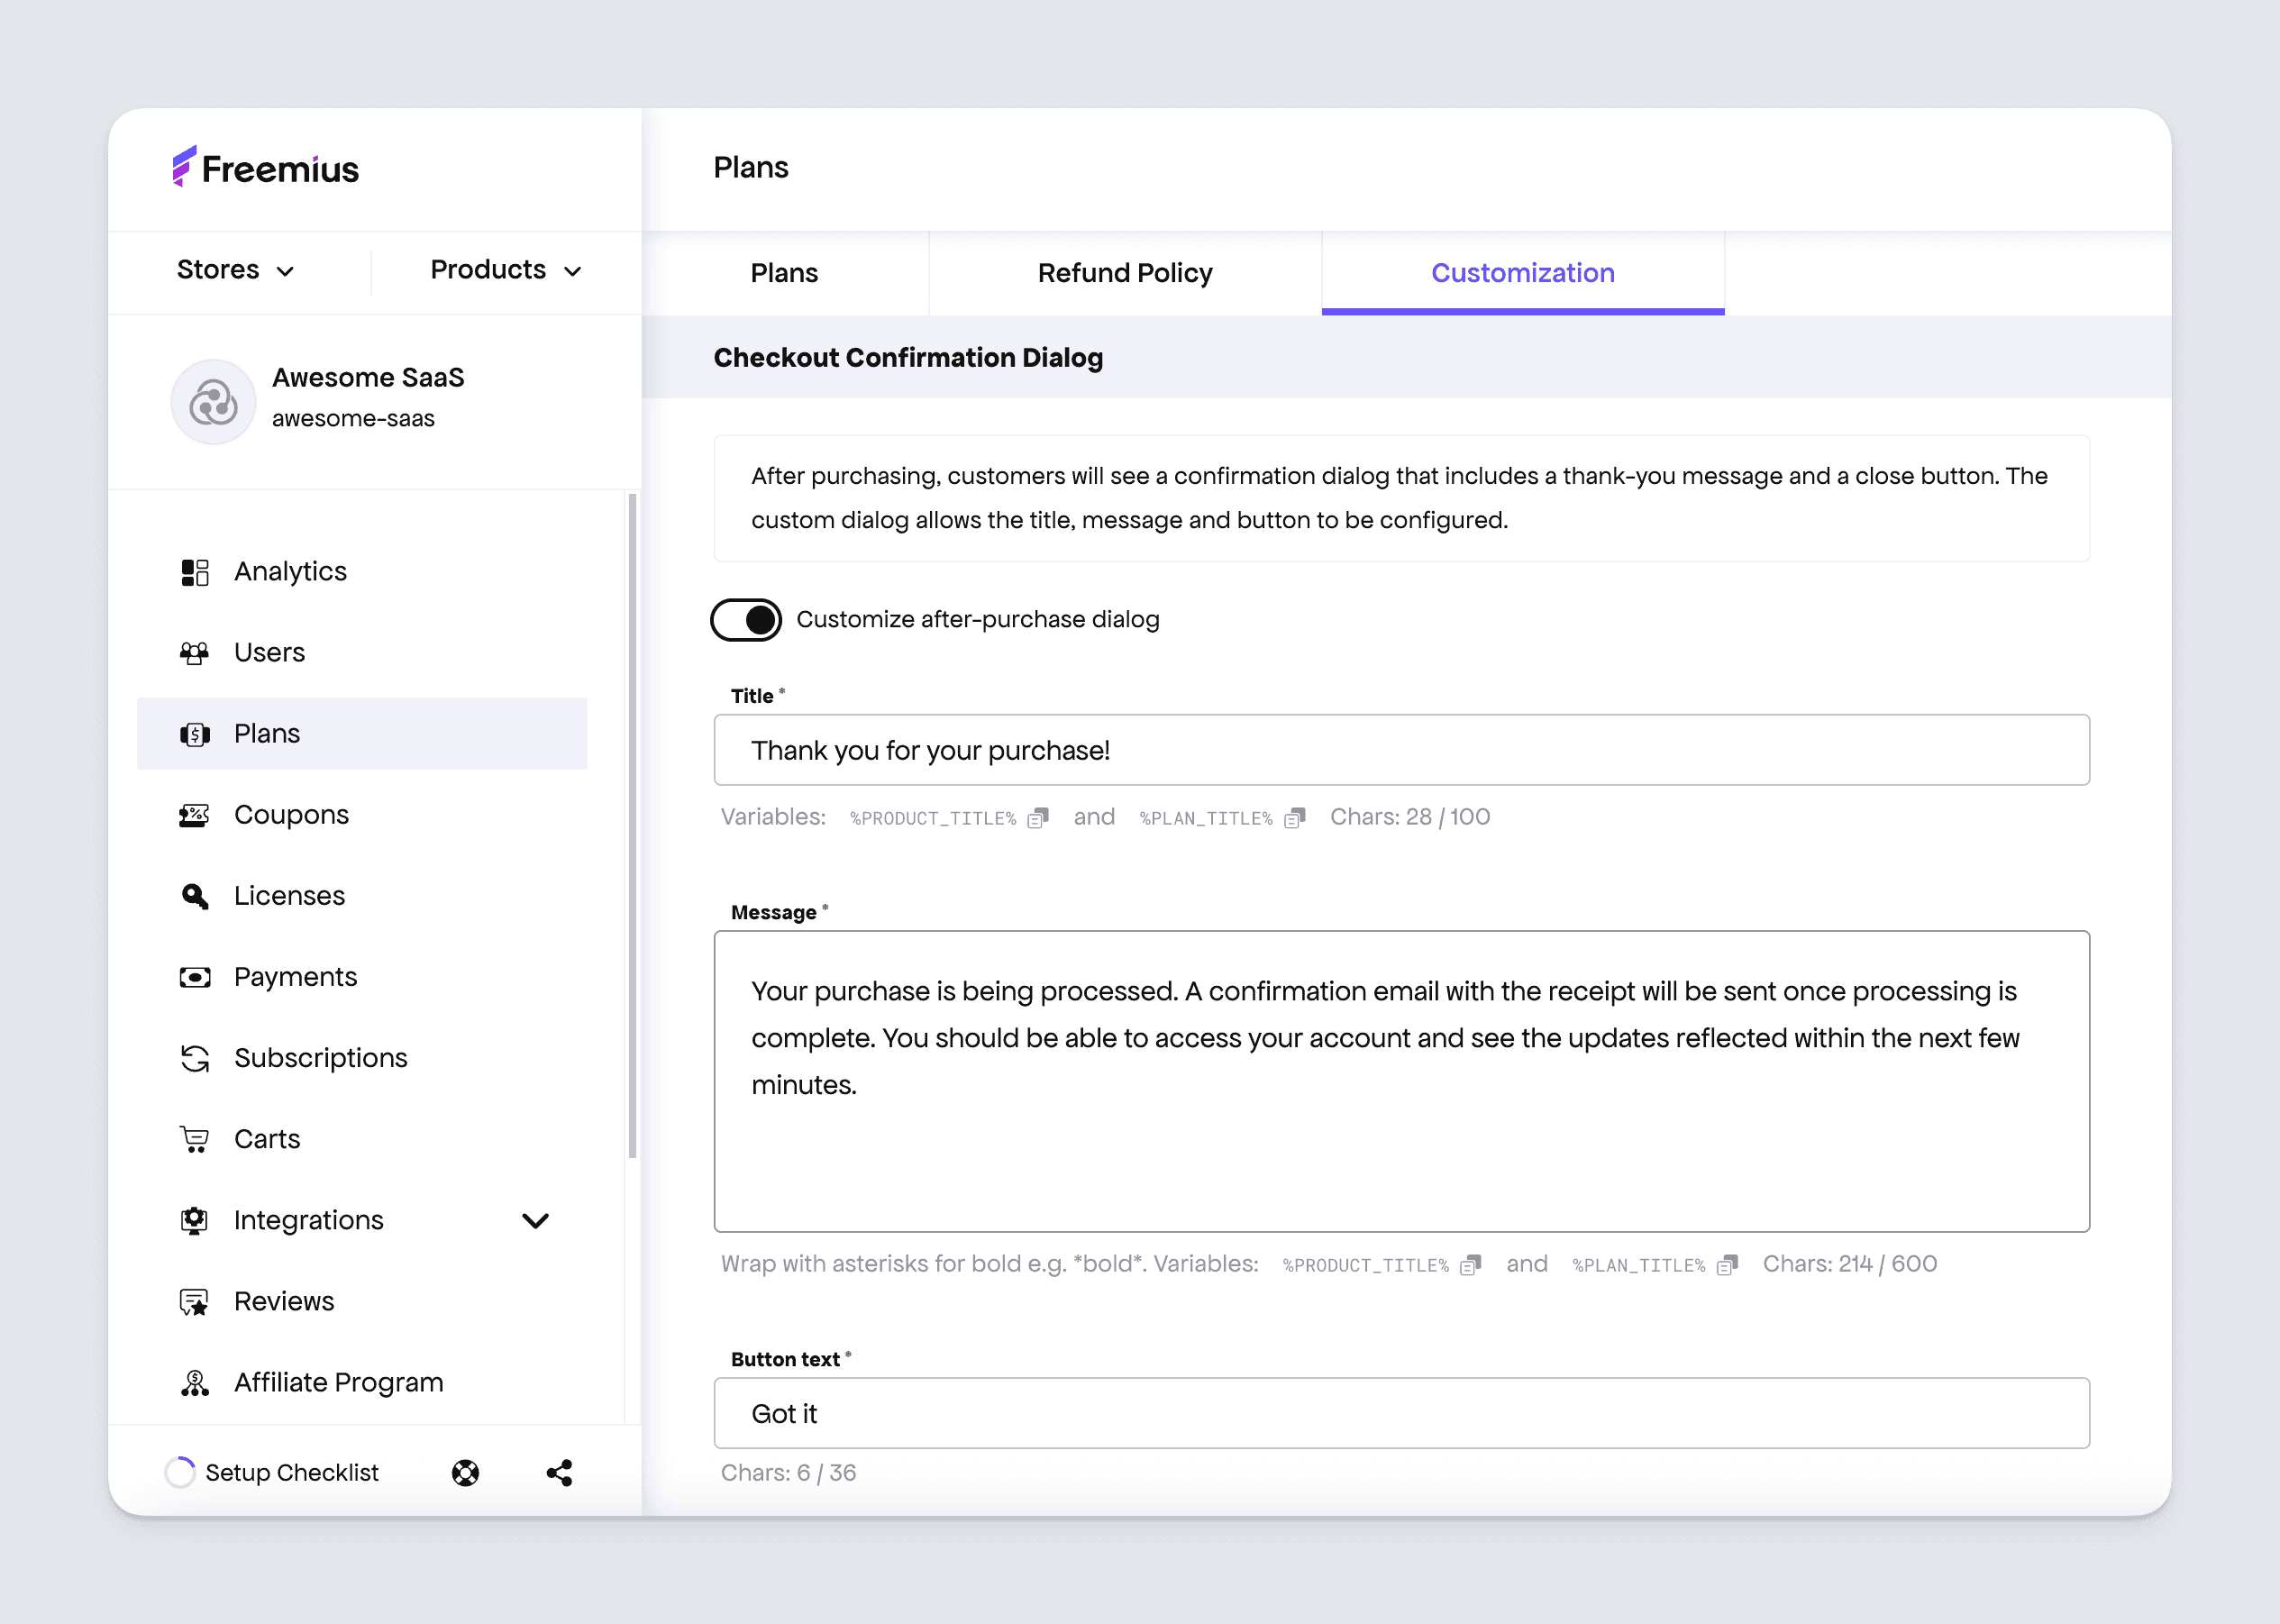
Checkout Confirmation Dialog
After purchasing, customers will see a confirmation dialog that includes a thank-you message and a close button. The custom dialog allows the title, message and button to be configured. It is accessible via the Customization tab, under the Plans page.
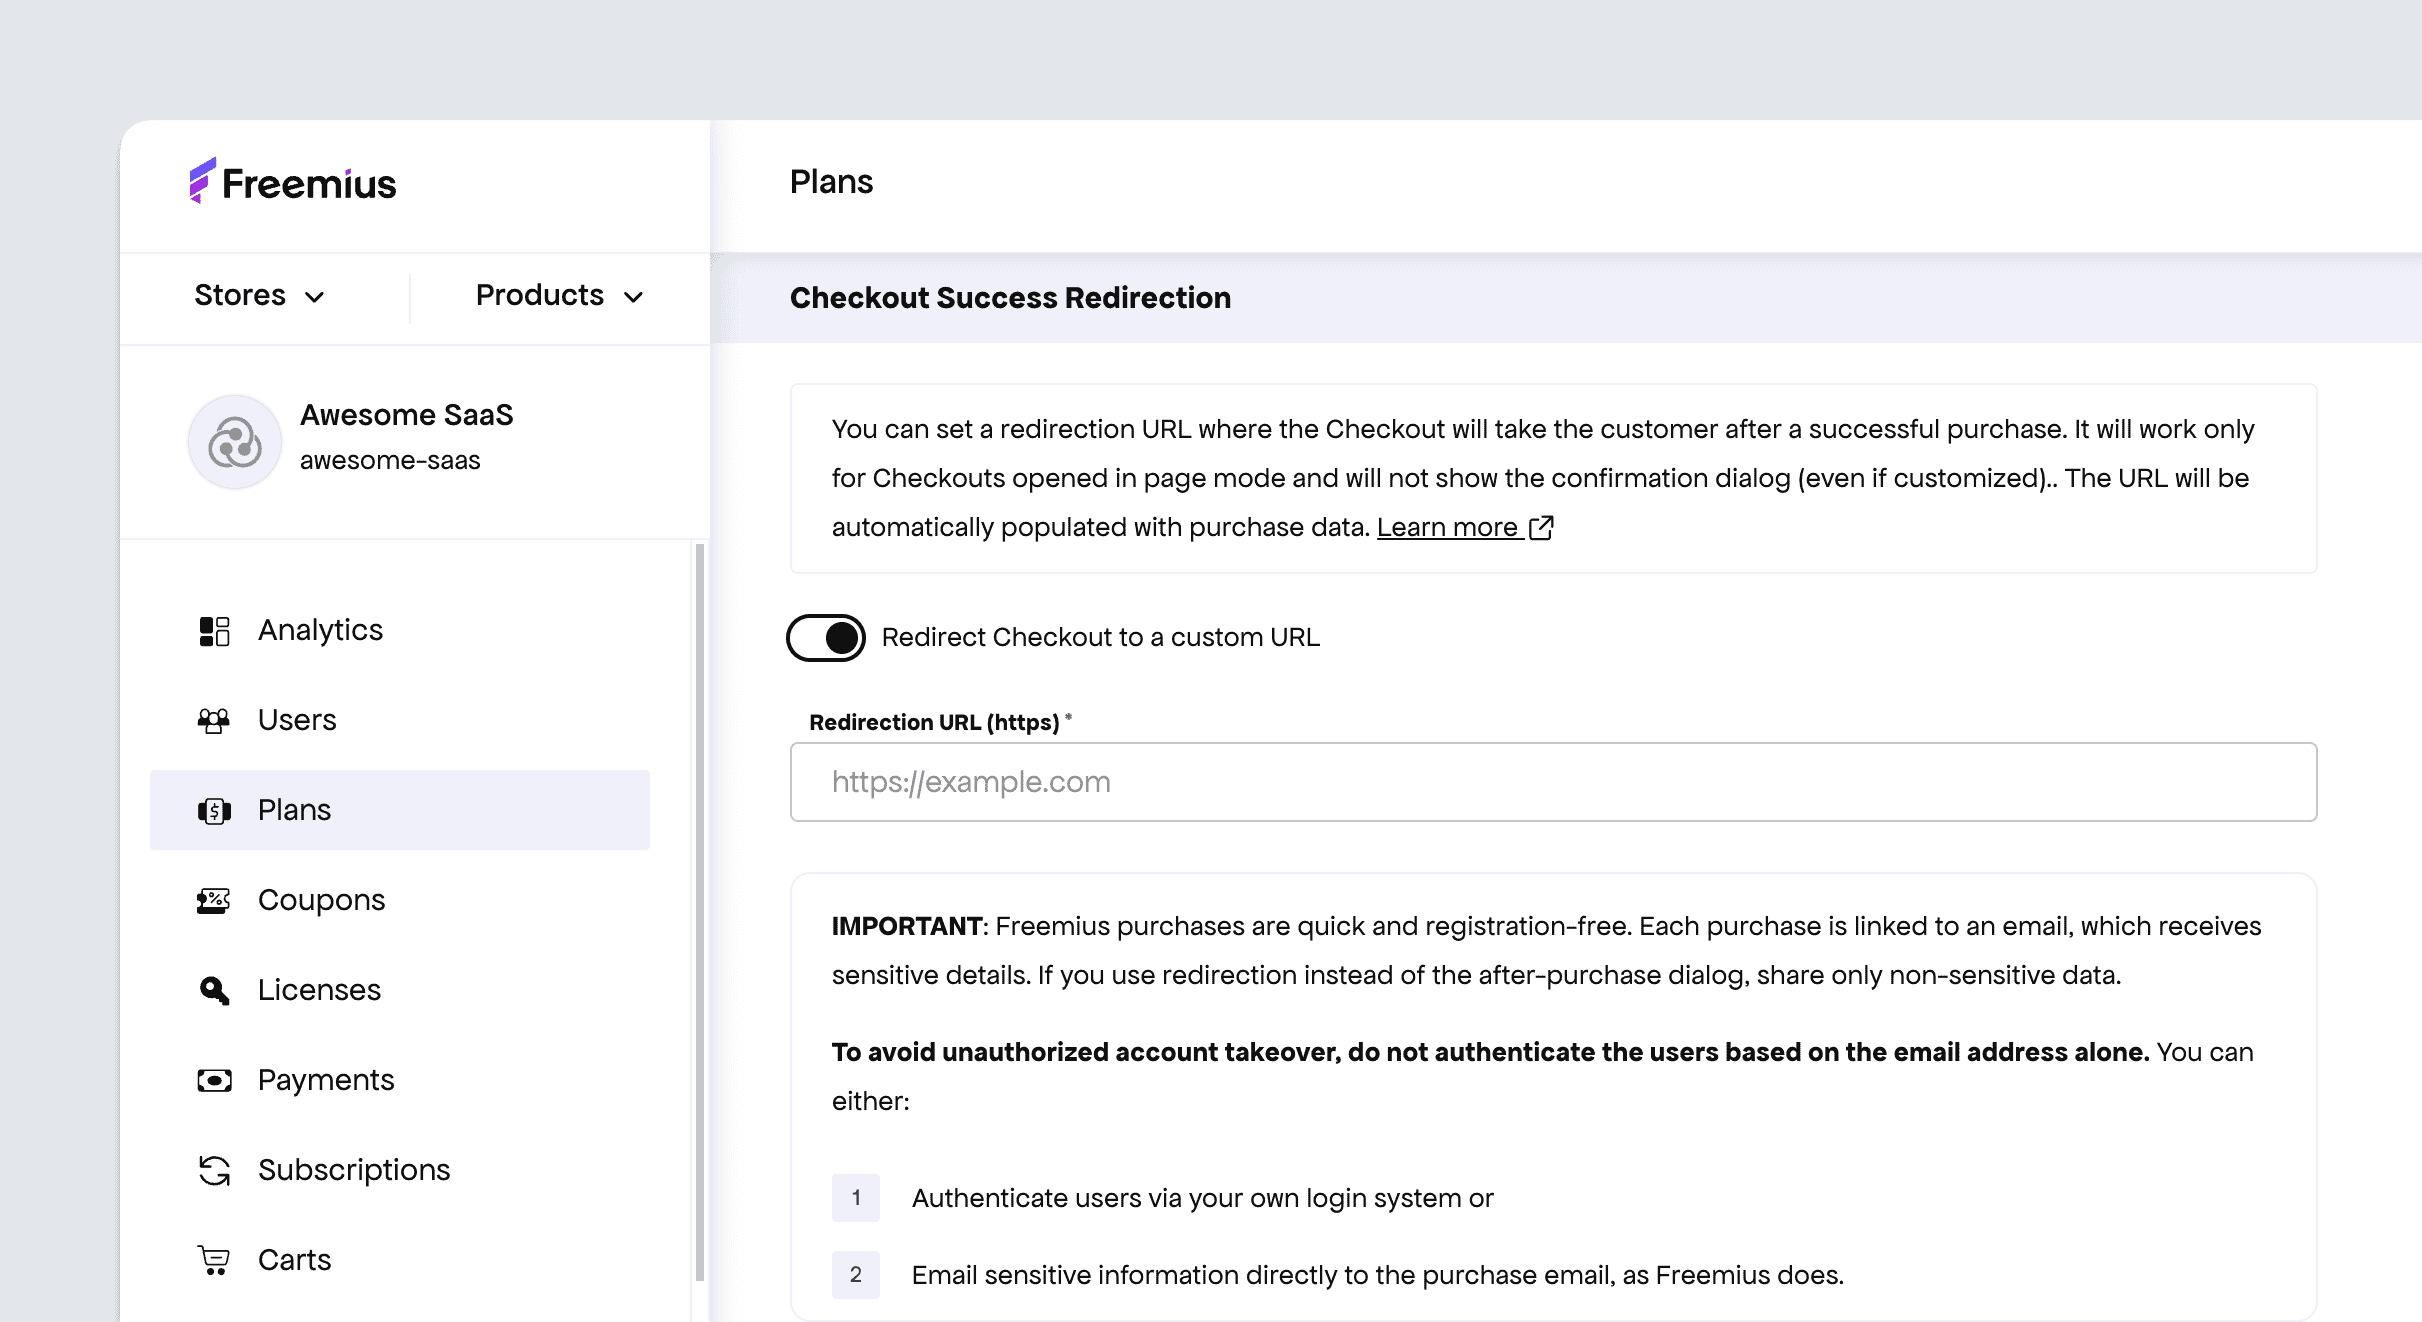
Checkout Success Redirection
Under the Plans page, via the Customization tab, you can set a redirection URL where the Checkout will take the customer after a successful purchase. It will work only for Checkouts opened in page mode and will not show the confirmation dialog (even if customized). The URL will be automatically populated with purchase data. Learn more.